Installation & Operation
Initial Set-up
After unpacking the unit, please avoid placing the unit in direct sun light, excessive heat,
excessive humidity or in contact with fluids of any type. Place the unit away from other
equipment at least 20 cm to avoid interference.
Place the unit to avoid:
- Direct sunlight
- Excessive heat
- Excessive humidity or contact with fluids
Connect Utility
Plug the UPS into an electrical outlet that does not share a circuit with a heavy electrical load.
Please allow the UPS to charge at least 6 hours prior to use.
Connect Equipment
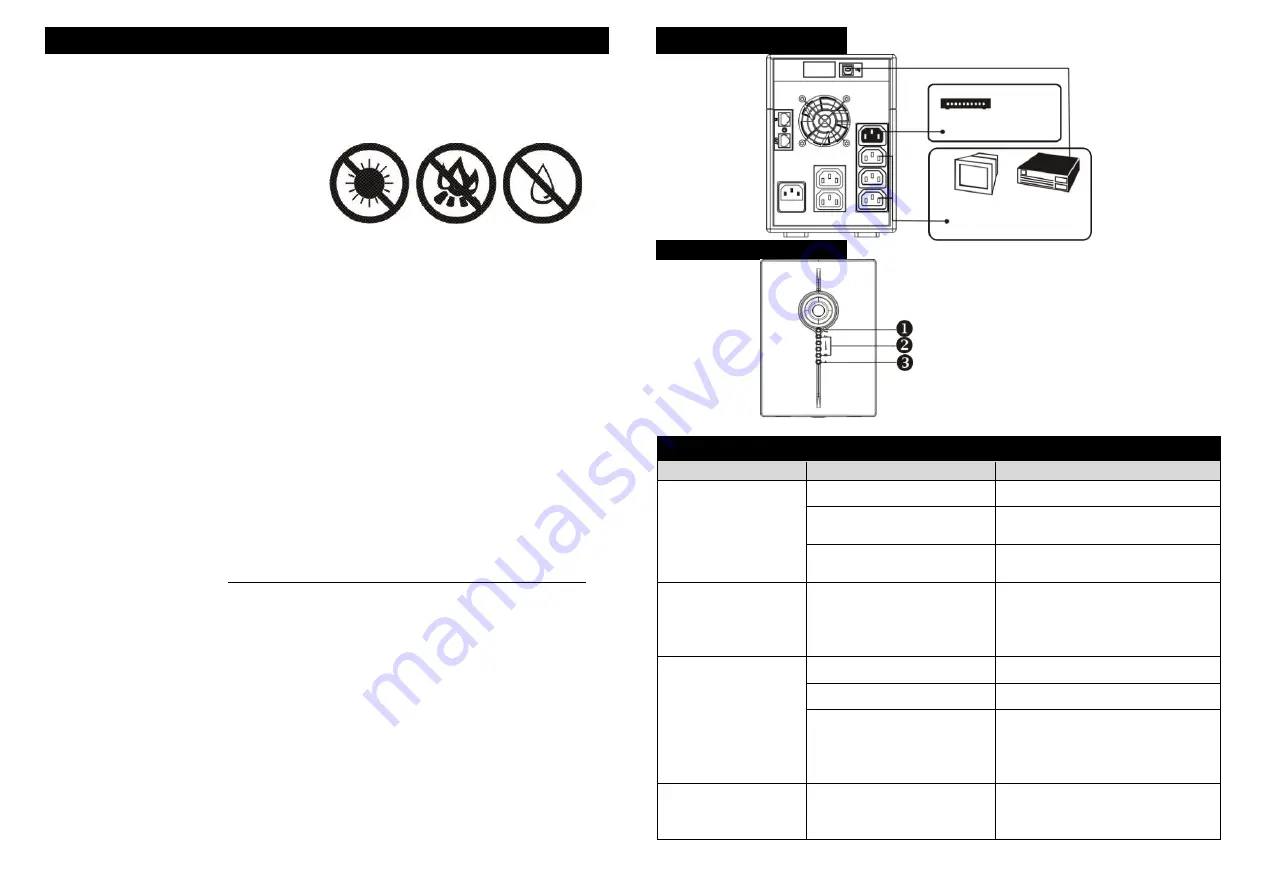
Connect critical equipment to “Battery Backup Sockets”. These battery backup sockets provide
battery back-up and surge protection. In case of power outage, battery power is automatically
provided to these outlets. Connect minor less critical device to “Surge Protected Socket”. Power
is not supplied to this socket when the utility fails.
NOTE: Please DO NOT connect scanner or printer into “Battery Backup Sockets”.
Connect Com. Port and Install Software
Connect the communication port cable end to the communication port located on the rear
panel of the UPS. Connect the other end of communication port cable to the port on the rear
panel of the computer.
Download the software from http://www.power-software-download.com/viewpower.html.
Follow on-screen instruction to install the monitoring software.
Connect Modem/Phone/Network for Surge Protection
Connect a single modem/phone line into surge-protected “IN” outlet on the back panel of the
UPS unit. Connect from “OUT” outlet to the computer with another phone line cable.
Power On/Off UPS
Press power switch on the front panel of the UPS to turn on UPS. Press switch again to turn
off the UPS.
Connection Chart
Status Indicators
Troubleshooting
Problem
Possible Cause
Solutions
No LED display on the
front panel.
Low battery.
Charge the UPS at least 6 hours.
Battery fault.
Replace the battery with the same
type of battery.
The UPS is not turned on.
Press the power switch again to turn
on the UPS.
Alarm continuously
sounds when the mains
is normal.
The UPS is overload.
Remove some loads first. Before
reconnecting equipment, please
verify that the load matches the UPS
capability specified in the specs.
When power fails,
back-up time is shorten.
The UPS is overload.
Remove some critical load.
Battery voltage is too low.
Charge the UPS at least 6 hours.
Battery defect. It might be due
to high temperature operation
environment, or improper
operation to battery.
Replace the battery with the same
type of battery.
The mains is normal
Bu the unit is on battery
mode.
Power cord is loose.
Reconnect the power cord properly.
Battery Backup Sockets
Surge Protected
Socket
UPS status LED
AC Mode: green lighting
Batt. Mode: green flashing
AC Mode: indicating load level
Batt. Mode: indicating battery capacity
Fault LED: red lighting


