

Bradley LavCare 500 Series Patient Care Module
Installation Instructions
Model LC500 L/F and L/W
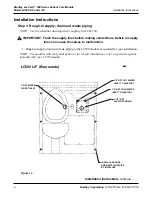
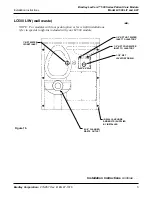
3
Bradley Corporation
215-857 Rev. B; EN 97-1016
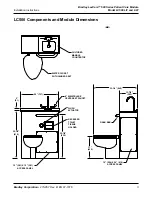
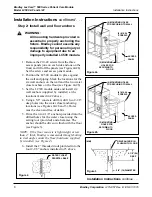
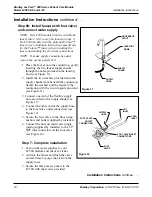
LC500 Components and Module Dimensions
4 WRISTBLADE
CENTERSET FAUCET
FLUSH
ACTUATOR
RECESSED
TOILET
TISSUE
HOLDER
15 (381) X 15 (381)
ACCESS PANEL
2
(51)
(MM)
36-1/8
(918)
29 (737)
32-7/8
(835)
CULTURED
MARBLE
COUNTERTOP
WATER CLOSET
WITH HINGED SEAT
GRAB BAR
10 (254) X 24 (610)
ACCESS PANEL
17
(432)
13-7/8
(352)
33-1/4 (845)


