MF2904/IR
Installation
4
9/25/08
Bradley
Corporation
• 215-752 Rev. U EN 08-023
B
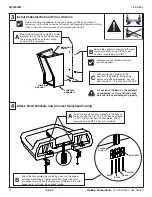
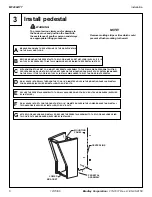
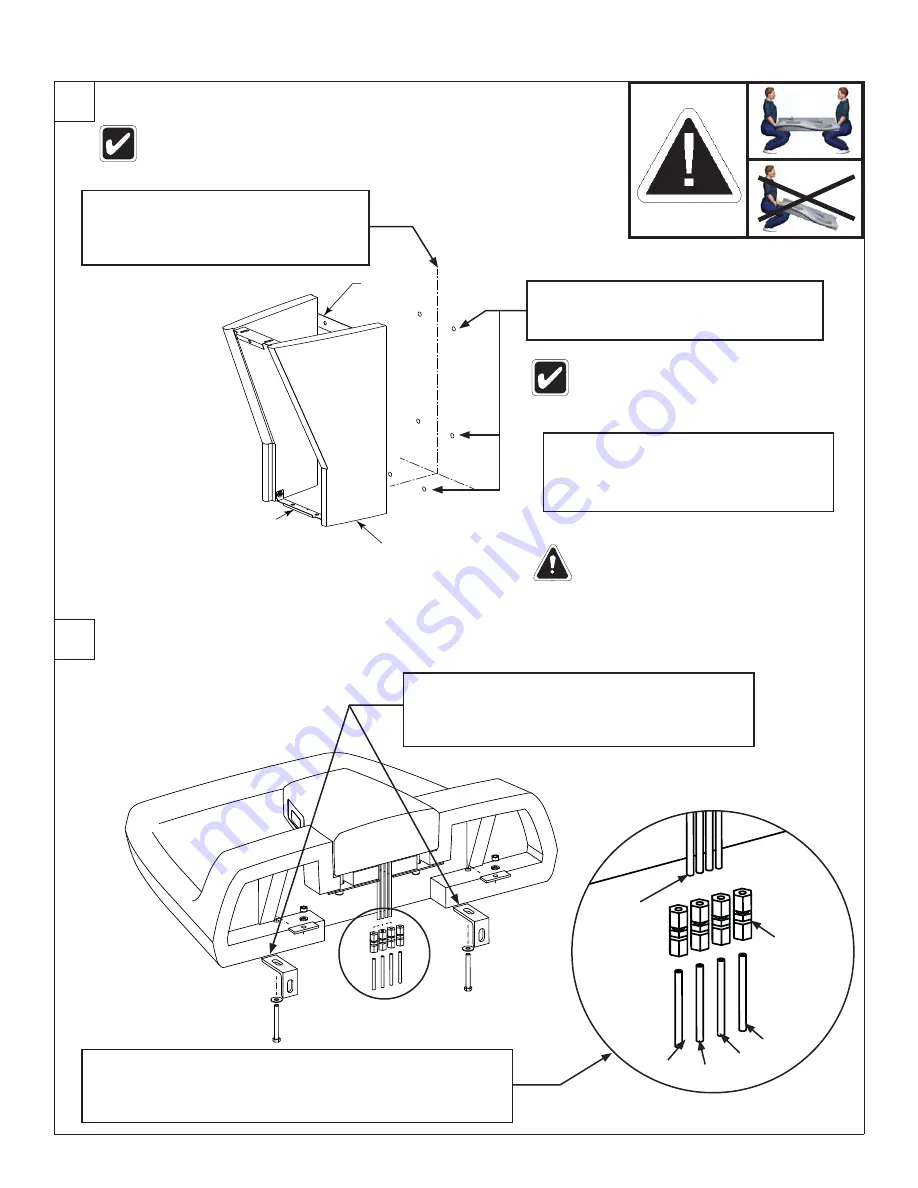
Secure the pedestal assembly to the wall
and fl oor anchors using 3/8" bolts and
washers (supplied by installer).
Washers are not utilized on back of
mounting panels.
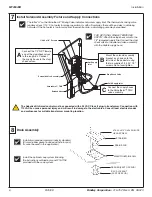
3
Install Pedestal, Wall and Floor Anchors
Before mounting the pedestal to the fl oor, make sure the fl oor is level. If
necessary, install shims under the left and/or right pedestal. Remove molding
strips or tiles that could prevent a fl ush mounting to the wall.
A
Measure and mark the centerline of the
washfountain on the wall and fl oor. Align
the locating notches on the mounting
panel with the centerline.
Do not leave the bowl on the pedestal
unsupported, as it may fall and cause
personal injury or damage to property.
C
With assistance, carefully lift the
bowl onto the pedestal frame using
appropriate lifting procedures. Ensure
bowl remains 3 – 4 inches from the wall.
MOUNTING
PANEL
LOWER
BRACKET
PEDESTAL
ASSEMBLY
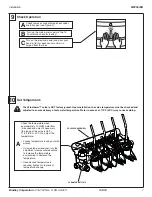
A
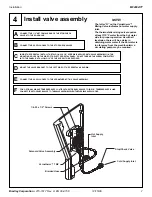
Install the two wall anchor brackets to the back of
the bowl using the 3/8"-16 x 3-1/4" hex head bolts,
13/32" I.D. plain washers, anchor plates, 3/8" I.D.
lockwashers and 3/8-16 hex nuts provided.
4
Attach Bowl Brackets and Connect Sprayhead Tubing
B
Attach the four colored plastic tubing unions to the copper
sprayhead inlet tubes. Tighten union nuts fi nger-tight plus
two wrench turns. When facing the rear of the bowl, the color
sequence is (L–R) red; black; green; yellow.
RED
BLACK
YELLOW
UNION NUTS
COPPER
TUBING
GREEN


