P.O. Box 309, Menomonee Falls, WI USA 53052-0309
PHONE 800.BRADLEY (800.272.3539) FAX 262.251.5817
bradleycorp.com
Installation
215-1428 Rev. C; ECM 11-05-004B
© 2011 Bradley Corporation
Page 1 of 3
5/27/11
S19-399
Waste Cart for On-Site
®
Eyewash
Chariot de renvoi pour la douche oculaire On-Site
®
Carro de desagüe para lavador de ojos On-Site
®
Installation
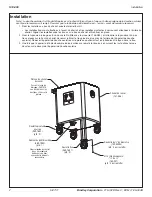
NOTE: The On-Site unit is positioned on the cart (facing either eyewash sign) before the tank is filled. Make sure the petcock
is “closed” before filling the tank.
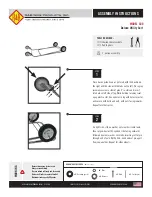
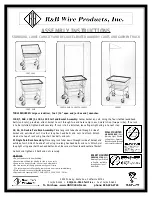
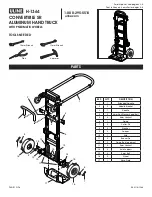
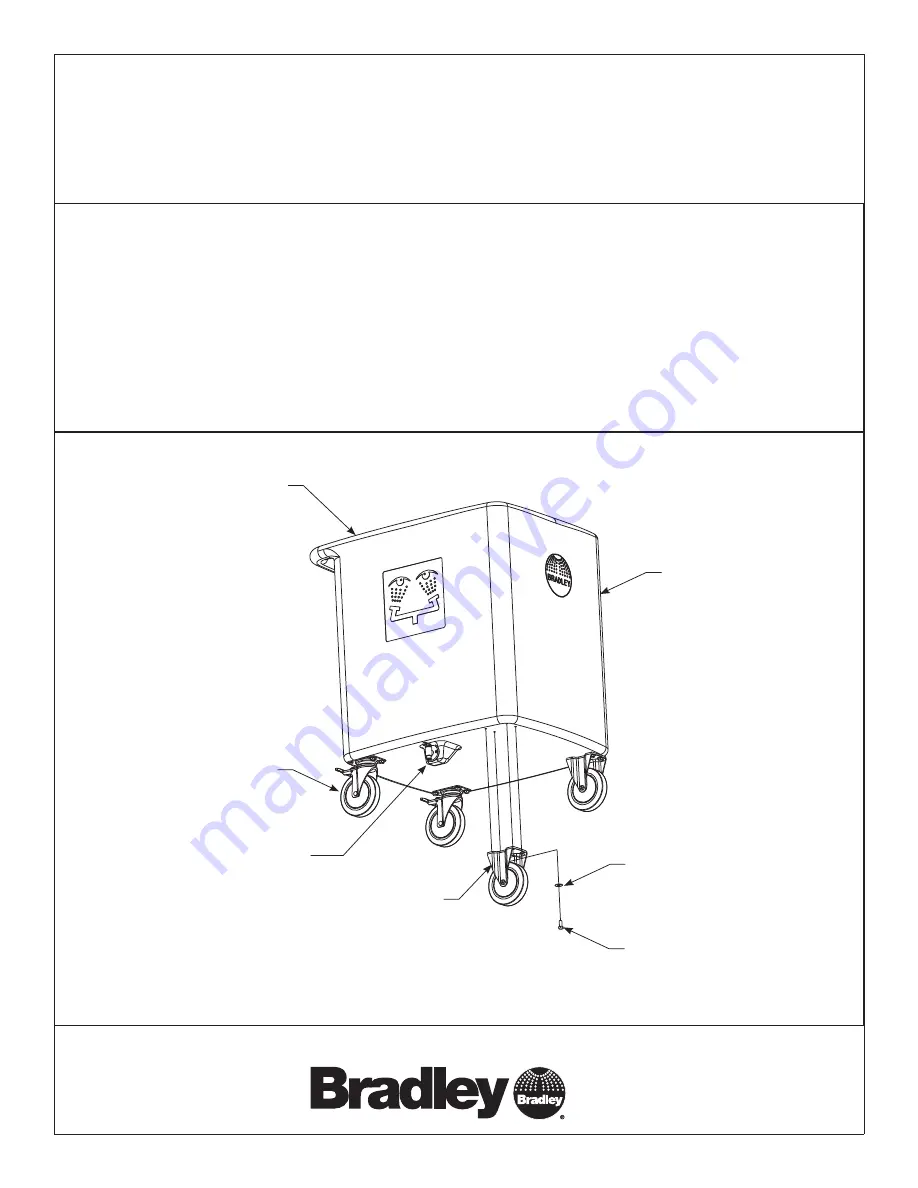
1. Attach the casters to the bottom of the cart with the hardware provided.
•
The rigid casters are attached to the front of the cart and the total lock swivel casters are attached to the back of the
cart. Line up the casters with the studs on the bottom of the cart and then secure in place.
2. Attach the drain tube to the bottom of the On-Site pedestal with the clamp (p/n 146-083) and feed the tube into one of
the holes in the top of the waste cart (use whichever hole is closest to the back of the eyewash unit). Lower the eyewash
unit onto the cart tray as you feed the tube into the hole.
3. After the On-Site eyewash unit is properly positioned, fill the eyewash tank following the instructions outlined on the front
of the eyewash unit.
Waste Cart
(131-086)
Waste Cart Tray
Route the drain tube
(p/n 269-1676, not
shown) into one of the
holes located in the tray
Total Lock
Swivel Caster
(269-1682)
(qty. 2)
Rigid Caster
(269-1681)
(qty. 2)
Petcock
(269-1980)
(qty. 1)
Drain the fluid from the
cart into an appropriate
waste receptacle or drain.
5
⁄
8
"-18 x ¾"
Hex Hd Cap Screw
(160-207)
(qty. 4 per caster)
5
⁄
8
" Washer
(142-002BJ)
(qty. 4 per caster)