background image

Terreon® Quadra-Fount® Washfountain with Touch Time® Control

Installation Instructions

MF2944/TT

3

Bradley Corporation • 215-1539 Rev. A; EN 03-063

12-18-2003

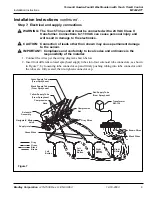
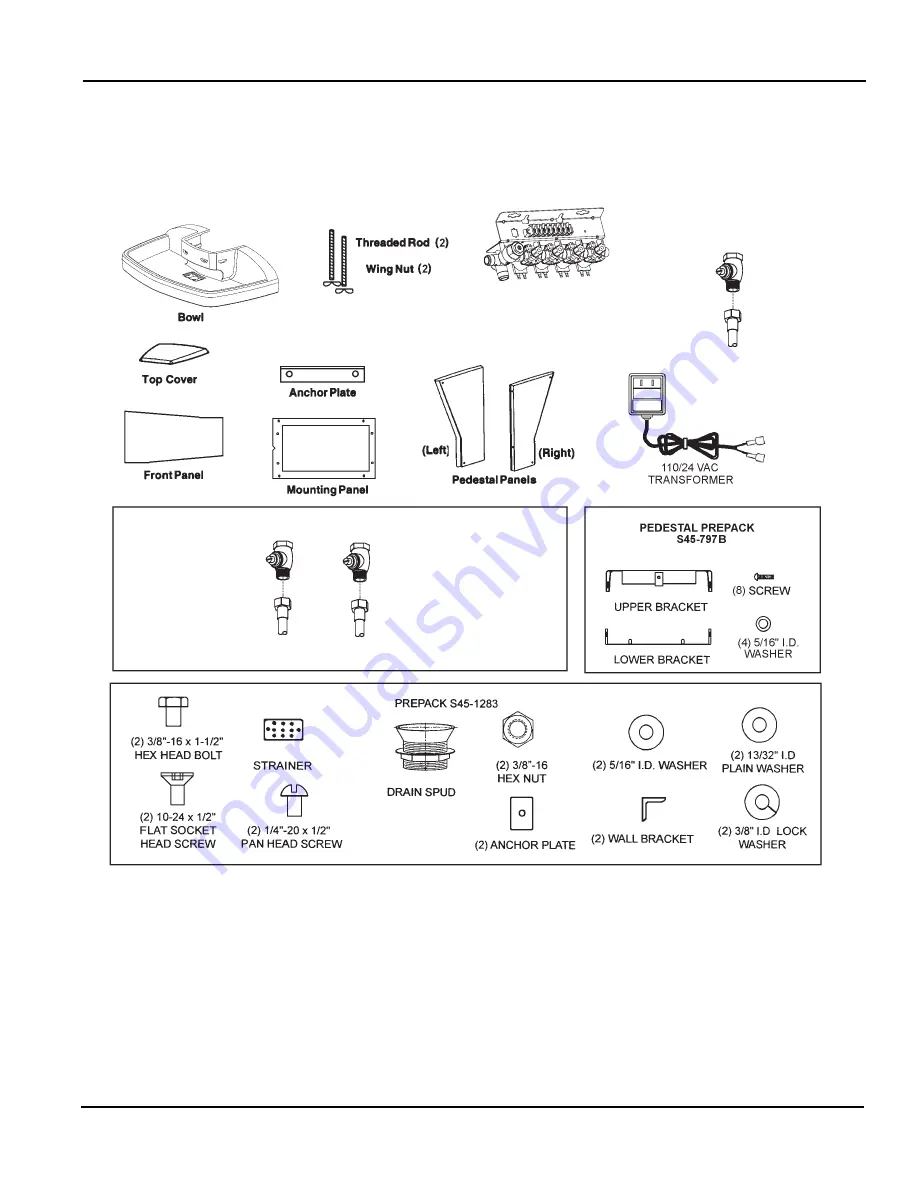
Solenoid Assembly with

Two Mounting Screws

TEMPERED LINE

S45-2081 (OPTIONAL) 

Stop/Check

Hose

VALVE PREPACK S45-2082 

Stop/Check

Hose

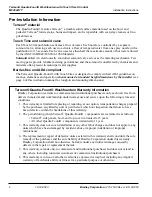
Parts Included with the Quadra-Fount®

Separate all parts from packaging materials and ensure you have all the parts required for assembly.
If any parts are missing, do not attempt to assemble the Quadra-Fount® until you obtain all parts.

Supplies required:

• (6) 3/8" diameter bolts with washers and (6) wall anchors appropriate for your installation
• (2) 3/8" diameter bolts with washers and (2) floor anchors appropriate for your installation
• 1/2" NPT Hot and cold water supply lines
• Drain trap and waste connection
• Pipe sealant and plumber’s putty
• 110 VAC power source for 110/24 VAC plug-in transformer supplied
• OPTIONAL: Bradley recommends installing an electrical cut-off switch to the unit. This

feature prevents accidental water delivery during regular maintenance and service.

Summary of Contents for Terreon Quadra-Fount Washfountain MF2944/TT

Page 1: ...on Page 1 of 16 12 18 2003 P O Box 309 Menomonee Falls WI 53052 0309 TEL 1 800 BRADLEY FAX 262 251 5817 http www bradleycorp com IMPORTANT Read through this installation manual to ensure proper installation Make sure that water supply is completely off before installation is begun When drilling into tile masonry or other hard materials to install wall and floor anchors be sure to wear safety goggl...

Page 2: ...n Warranty Information Bradley Corporation warrants to commercial and institutional purchasers only each unit free from defects in material and workmanship under normal use and service upon the following terms and conditions 1 This warranty is limited to replacing or repairing at our option transportation charges prepaid by the purchaser any Bradley unit or part thereof which our inspection shall ...

Page 3: ... any parts are missing do not attempt to assemble the Quadra Fount until you obtain all parts Supplies required 6 3 8 diameter bolts with washers and 6 wall anchors appropriate for your installation 2 3 8 diameter bolts with washers and 2 floor anchors appropriate for your installation 1 2 NPT Hot and cold water supply lines Drain trap and waste connection Pipe sealant and plumber s putty 110 VAC ...

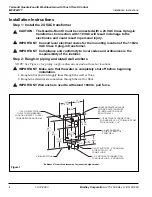
Page 4: ...ng rough in dimensions and wall anchor locations IMPORTANT Make sure that the water is completely shut off before beginning installation 1 Rough in hot and cold supply lines through the wall or floor 2 Rough in a drain waste connection through the wall or floor IMPORTANT Wall anchors need to withstand 1000 lb pull force 7 178 5 1 8 130 2 51 11 279 11 279 17 1 2 445 24 610 21 3 4 552 28 711 7 1 2 1...

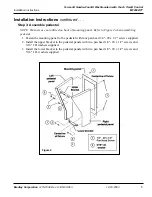
Page 5: ...s are not utilized on back of mounting panel Refer to Figure 2 when assembling pedestal 1 Fasten the mounting panel to the pedestal with four pan head 1 4 20 x 1 2 screws supplied 2 Install the upper bracket to the pedestal panels with two pan head 1 4 20 x 1 2 screws and 5 16 I D washers supplied 3 Install the lower bracket to the pedestal panels with two pan head 1 4 20 x 1 2 screws and 5 16 I D...

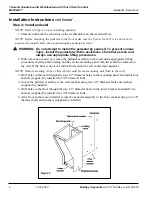
Page 6: ... you move the pedestal assembly to the wall using appropriate lifting procedures and align the locating notches on the mounting panel with the centerline marked on the wall If the floor is not level install shims under the left and or right pedestal NOTE Remove molding strips or tiles which could prevent mounting unit flush to the wall 3 Drill holes in the wall through the four 1 2 diameter holes ...

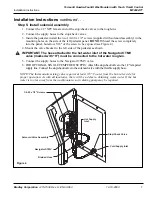
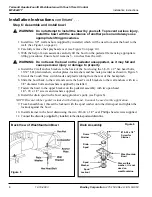
Page 7: ...e bracket to the left side of the pedestal as shown IMPORTANT The hose attached to the hot water inlet of the Navigator TMV valve marked with H must be connected to the hot water rough in 5 Connect the supply hoses to the Navigator TMV valve 6 FOR OPTIONAL SINGLE TEMPERED SUPPLY Attach the stop check valve to the 1 2 tempered supply line Connect the stop check valve to the solenoid valve with the ...

Page 8: ... x 2 hex head bolts 13 32 I D plain washers anchor plates lockwashers and hex nuts provided as shown in Figure 5 5 Uncoil the Touch Time switch leads and plastic tubing from the rear of the backsplash 6 Slide the bowl back to the wall and secure the bowl s wall brackets to the wall anchors with two 3 8 diameter bolts and washers supplied by installer 7 Fasten the bowl to the upper bracket on the p...

Page 9: ...es and ordinance is the responsibility of the installer 1 Connect the wires per the wiring diagram shown below 2 Insert four different colored sprayhead supply tubes into four solenoid tube connectors as shown in Figure 7 by loosening tube connector cap and firmly pushing tubing into tube connector until the tubes are fully seated then re tighten connector cap Supply Inlet Navigator Mixing Valve S...

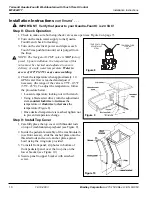
Page 10: ...ximately 1 0 GPM water flow is reached and adjust if necessary the range of the valve is 95 F 115 F 35 C 43 C To adjust the temperature follow the procedure below Loosen temperature locking nut with wrench Using a blade screwdriver turn the adjustment stem counterclockwise to increase the temperature or clockwise to decrease the temperature Figure 8 Once desired temperature is reached tighten nut ...

Page 11: ...n Solid Surface material Bradley recommends additional care and maintenance for the darker colored Terreon for complete instructions on this additional maintenance see Bradley document 1505 IMPORTANT DO NOT USE STRONG ACID OR ALKALINE CHEMICALS AND CLEANSERS TO CLEAN TERREON IF THESE CHEMICALS COME IN CONTACT WITH THE TERREON SURFACE WIPE THEM OFF IMMEDIATELY AND RINSE WITH SOAPY WATER AVOID CONTA...

Page 12: ...factures instructions Many of these products leave a protective coating the helps prevent future smears and fingerprints Grease and Oil To remove grease and oil use a quality commercial detergent or caustic cleaner Apply in accordance to the manufactures instructions and in the direction of the polish lines Precautions Avoid prolonged contact with chlorides bleaches salts bromides sanitizing agent...

Page 13: ...u may crack the plastic valve body Tighten until the armature plate makes contact with the plastic body 4 Reconnect the wiring per diagram on page 9 Problem An individual operating station fails to turn on Cause A failed coil for the valve or loose electrical connection to the terminal Solution Test the station to determine cause 1 Disconnect the wires from the coil of an adjacent valve Disconnect...

Page 14: ...S07 068A thru body 1 2 3 4 5 6 7 8 9 8 DESCRIPTION QTY PART NO REF 1 1 118 307 VALVE BODY 1 4 CLOSED 2 1 269 983 DIAPHRAGM 3 1 269 577 ARMATURE 4 1 269 578 SPRING 5 1 269 1729 ARMATURE HOUSING 6 1 269 1730 CLAMP ARMATURE HOUSING 7 1 269 579 COIL SOLENOID VALVE 8 3 160 447 SCREW 8 X 5 8 9 1 125 001CS O RING 2 013 10 10 1 125 160 FLOW RESTRICTOR 5 GPM 1 1 118 307A VALVE BODY 1 4 THRU Figure 11 ...

Page 15: ...ng the piston and valve body Remove the thermostat Lift the piston out with a needle nose pliers and remove the spring Any cleaner suitable for brass and stainless steel may be used if cleaning with suitable cleaner is not sufficient to remove debris a 400 grit sandpaper may be used to polish and hone the piston and valve body Snap spring into piston will detent and reassemble into the valve body ...

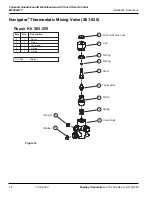
Page 16: ...39 Rev A EN 03 063 16 12 18 2003 6 5 4 3 2 1 10 10 7 Strainer Strainer Valve Body Spring Thermostat Piston Stem O Ring O Ring 2 1 Spring 3 1 Piston 4 1 Thermostat 6 1 O Ring 7 1 O Ring Item Qty Description 173 028 Strainer Repair Kit S65 259 9 8 Cap Nut 3 8 24 Hex Jam Figure 12 Navigator Thermostatic Mixing Valve S01 520 ...

Reviews: