1-8
¡
Setting up your system
Inserting and removing ribbon
This section describes how to insert and remove the system’s supply ribbon. These directions
assume that you are facing the front of the printer (where the display screen is located).
1) If this is the first time you have used the printer, unpack the clear plastic ribbon cartridge
case, and remove the wrapping.
2)
Press the red cover release button on the printer, and raise the printer cover up and
away to the left.
The release button is located on the lower right side of the printer, as shown on page 1-2.
3)
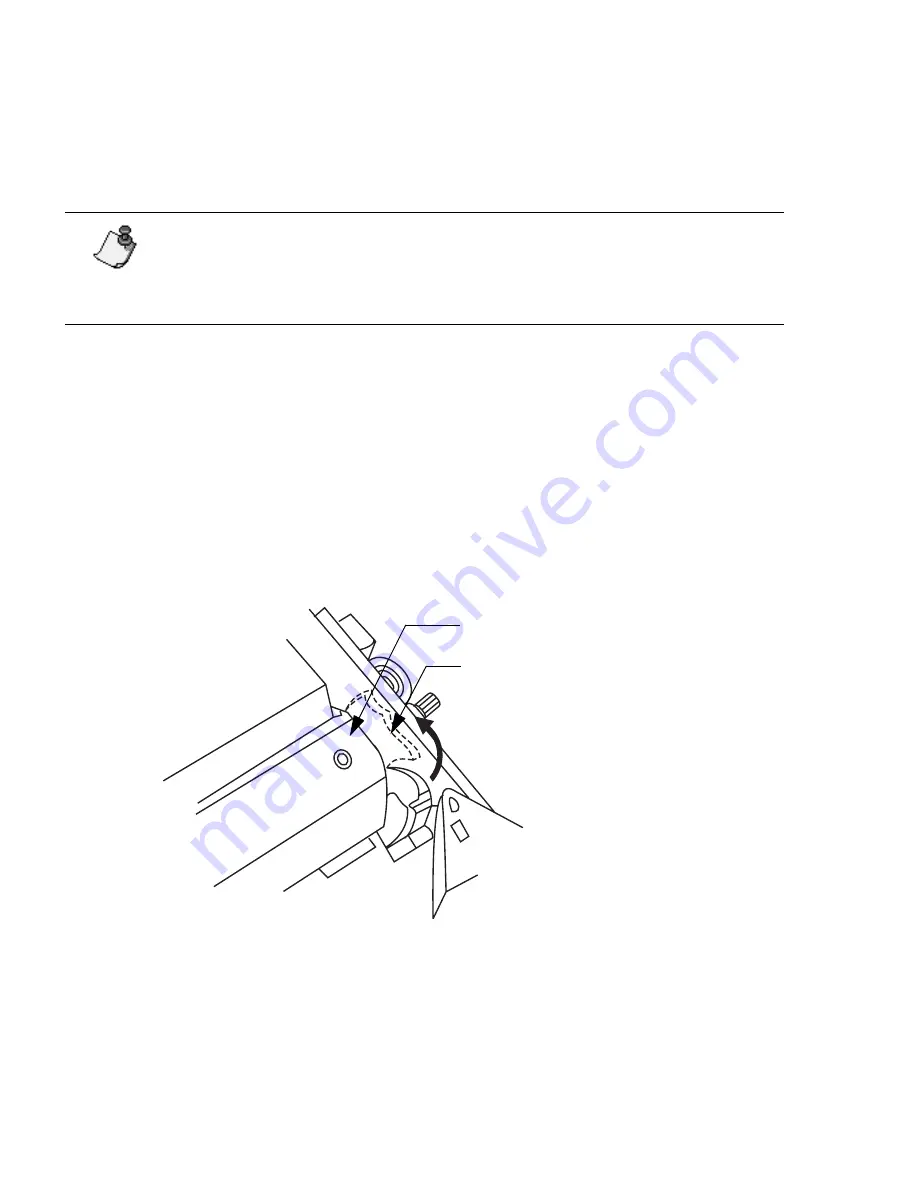
If a ribbon is already installed, remove the ribbon cartridge case from the printer.
•
Locate the clear ribbon cartridge case in the upper left side of the printer.
•
Flip the blue memory cell flag counter-clockwise out of the red memory cell holder.
•
Snap the hook on the memory cell flag to the ribbon cartridge case.
Note:
When you open the printer, you’ll see a set of illustrations attached to
the inside of the unit. These illustrations show you how to install the tape (on
the right side of the printer) and the ribbon (on the left side). Illustrations 1-4
refer to ribbon loading.
Memory cell flag
Ribbon cartridge case
Summary of Contents for POWERMark
Page 1: ...User s Guide Manuel d utilisation Manual de usauario...
Page 10: ...x Specifications...
Page 56: ...2 16 Using specialty applications...
Page 90: ...3 34 Working with bar codes...
Page 124: ...7 4 Maintaining the system...
Page 125: ...1 Signs Application 0...
Page 126: ...2 Signs Application Differences from standard operating system 1 2 2 2 2 3 4 5 6 1 7 8...
Page 148: ...1 Hazardous Waste Labels Application 0 1 2...
Page 168: ...1 Pipe Markers Application 0...
Page 169: ...2 Pipe Markers Application Differences from standard operating system 1 2 3 40 5 6 7 8 9...
Page 192: ......


