8
I
nstallation of your hood
b) Operation in recycling mode
-
In this case, non-return valves are not required .
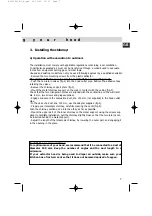
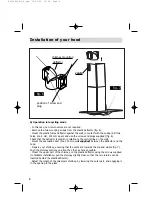
- Remove the two mounting screws from the plastic deflector (fig. 6).
- Mount the plastic fumes deflector against the wall, in contact with the ceiling (drill two
holes, dia. 8 mm, 200 mm apart, and use the screws and plugs supplied) (fig. 6).
Check that the deflector is central, in relation to the vertical line on the wall.
- Mount the evacuation duct (dia. 150 mm,
not supplied
) between the deflector and the
hood.
- Prepare your chimney, ensuring that the vents are towards the top and visible (fig. 7).
Push the chimney sections one into the other, as far as possible.
- Mount the upper part of the chimney on the plastic deflector, using the screws supplied
(to facilitate installation, pull the chimney slightly clear, so that the two returns can be
inserted behind the plastic deflector).
- Adjust the length of the telescopic chimney, by lowering the outer part, and engaging it
in the opening in the glass.
position of screw and
plug
deflector
chimney mounting
fig. 7
fig. 6
vents
99625941_ML_A.qxd 18/11/02 13:48 Page 8
Summary of Contents for AD289XT1
Page 13: ...13 99625941_ML_A qxd 18 11 02 13 48 Page 13 ...
Page 25: ...25 99625941_ML_A qxd 18 11 02 13 48 Page 25 ...
Page 37: ...37 99625941_ML_A qxd 18 11 02 13 48 Page 37 ...
Page 49: ...49 99625941_ML_A qxd 18 11 02 13 48 Page 49 ...
Page 61: ...61 99625941_ML_A qxd 18 11 02 13 49 Page 61 ...
Page 73: ...73 99625941_ML_A qxd 18 11 02 13 49 Page 73 ...
Page 85: ...85 99625941_ML_A qxd 18 11 02 13 49 Page 85 ...


