Instruction manual
Very important: Read this manual carefully before using your refrigerator.
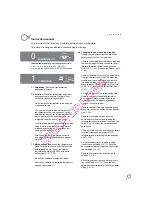
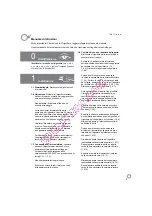
This manual is designed with texts corresponding to drawings.
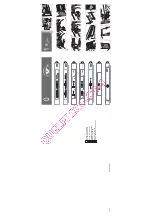
Identify the model of your refrigerator (« a »,
« b », « c », « d », « e », « f », « g »)
by
comparing the control panel with the illustrations.
0
Identification
1
Installation
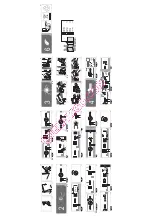
1.4 Changing the door opening direction.
Unplug the refrigerator from the mains and
empty the contents of the inner door.
Remove the screws from the lower hinge and
remove the hinge, holding the freezer door
in place to prevent it from falling onto the
fl oor (1,4,1, 1,4,2). Remove the freezer door
(1.4.3).
Use a screwdriver to remove the embellisher
from the central hinge (1.4.4). Remove the
screws from the central hinge and remove
the hinge, holding the refrigerator door in
place to prevent it from falling onto the fl oor
(1,4,5,1,4,6). Remove the refrigerator door
(1.4.7).
For models with door up to the ceiling only:
Remove the control panel with the aid of
a screwdriver. Make a small notch in the
opposite side of the upper hinge support.
Replace the control panel.
Remove the shaft from the upper hinge and
place it in the same position on the opposite
side (1.4.8).
Remove the locking devices from the
doors and turn them around, placing the
refrigerator lock on the freezer door and vice
versa (1.4.9). Replace the embellishers on
both doors.
Using a screwdriver, remove the embellishers
from the middle and lower part of the
refrigerator and place them on the opposite
side (1.4.10).
Fit the refrigerator door in place, slotting
it onto the upper hinge (1.4.11). Push the
door upwards without releasing it and fit the
central hinge (1.4.12).
Remove the lower hinge and change its
position (1.4.13).
Fit the freezer door in place, slotting it onto
the central hinge (1.4.14). Push the door
upwards without releasing it and fit the lower
hinge (1.4.15).
1.1 Unpacking.
Remove all the protective
packaging elements.
1.2 Location.
Stand the refrigerator away from
sources of heat and protect it from direct
sunlight to reduce its consumption.
Do not install the refrigerator in the open air
or exposed to rain.
The air must circulate around the rear of
the refrigerator. Leave a space of 25 mm
between the back of the refrigerator and the
wall. Do not block the space between the
refrigerator and the fl oor or the ceiling.
Level the refrigerator to prevent vibration and
noise. Bear in mind that if the refrigerator
is placed against the wall or a kitchen unit,
some noise may occur.
Also check the trays are placed correctly,
and place containers separately to prevent
vibration.
1.3 Mains connection.
Leave the refrigerator to
stand for at least 2 hours in vertical position
before plugging it in. Check the data on
the reference plate (220-240V with earth
connection) (1.3.1, 1.3.2).
Do not use adapters or extension leads.
Ensure the cable is not touching the motor or
trapped underneath it.
5
e n g l i s h
Summary of Contents for BFC2312NW
Page 27: ...0 1 25 D E F G H I J...
Page 28: ...ON OFF SUPER SUPER SUPER SUPER ON OFF 26 2...
Page 29: ...NO FROST 2 7 5 27 3 4...
Page 30: ...5 6 5 28...

