Chapter 6: Operation
Rear Inputs and Connections
6-4
100-214-252 Rev. A
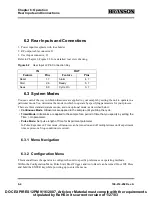
6.2 Rear Inputs and Connections
1. Power input receptacle with fuse holder
2. RF output cable connector, J1
3. User Input connector, J2
Refer to Chapter 2, Figure 2.3 for a detailed rear view drawing.
Figure 6.2
User Input J2 Pin Connection Key
6.3 System Modes
You can control the way in which ultrasonics are applied to your sample by setting the unit to operate in a
particular mode. You determine the mode in which to operate by specifying parameters for your process.
There are three standard system modes, and one optional mode, as described below:
•
Continuous Mode
: Ultrasonics are applied to the sample until you Stop the cycle.
•
Timed Mode:
Ultrasonics are applied to the sample for a period of time that you specify by setting the
Time > On parameter.
•
Pulse Mode:
Set pulse length of Time for Experiment parameter.
In Pulse/Experiment /Time mode, ultrasonics can be turned on and off multiple times until experiment
time expires or a Stop condition is received.
6.3.1 Menu Navigation
6.3.2 Configuration Menu
This menu alllows the operator to configure the unit to specific preferences or operating methods.
Within the Configuration Menu, Pulse Start, Panel Trigger, and Auto Reset can be turned On or Off. Press
and hold the ENTER key while powering up to enter the menu.
IN
OUT
Feature
Pins
Feature
Pins
Reset
1, 7
Alarm
4, 7
Start
2, 6
Ready
5, 7
Seek
8, 9
Cycle On
3, 7
DOC EXPIRES 12PM 9/16/2007. Article or Material must comply with the requirements
stipulated by RoHS in its current version of 1/27/03


