background image

www.branxfitness-helpdesk.co.uk

www.branxfitness-helpdesk.co.uk

8. The “Music” button

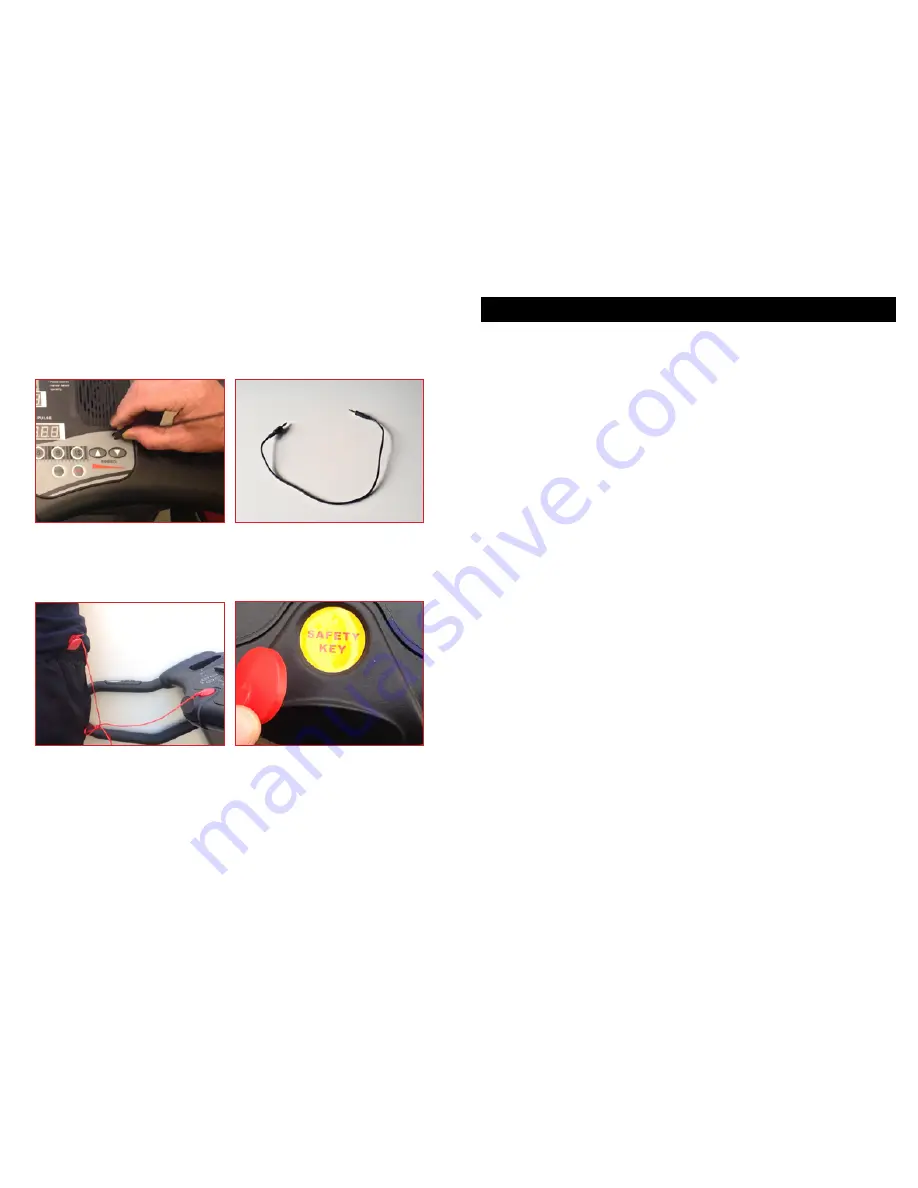
Simply plug in your music player using your MP3 connector cable (See pictures 

below) provided and press the “Music” button to activate the speakers. Please 

note that an adaptor (not supplied) may be required for some music player 

devices. Use your music player device to control your song choices and volume.

9. Safety Cut Off Chord 

It is not possible to operate your treadmill unless the red magnetic Safety Cut-

Off Chord (See picture below) is in position on the treadmill console. Whilst in 

“Operational Mode” removal of the red magnetic Safety Cut-Off Chord will stop 

the motor, which will slow/stop the running belt.

10. When you are finished exercising, remove the Safety Chord

Step onto the foot rails and press the start/stop button. Next, change the incline of 

the treadmill to the lowest setting. The incline must be at the lowest setting when 

the treadmill is folded to the storage position or the treadmill will be damaged. 

Remove the Safety key from the console and put it in a secure place.

Finally, move the on/off switch to the off position (See diagram on page 16) and 

unplug the power cord (See instructsion on page 14).

Page 18

Incline (it displays your auto incline range from 0-20%)

Distance (it displays your distance travelled from 0 upto 99km)

Time (it displays your time from 0 to 99minutes)

Speed (it displays your current speed of travel from 1 to 20km/h)

Calories (it displays the calories consumed from 0 to 999)

Pulse (it displays your pulse rate readout)

On/Off (Under “Ready Condition” press this key and the treadmill will run at a speed of 1km/h. If the 

speed is greater then 3.5km/h and this button is pressed the treadmill will slow down and then stop. 

During this stopping process other keys will not be made available to the user. If the speed is less then 

3.5km/h and this button is pressed the treadmill will stop immediately).

Incline up (it displays your current gradient of the running deck 0-20%)

Incline down (it displays your current gradient of the running deck 0-20%)

Set (under “Ready Condition” press this key once and it will clear all of the operations. In “Ready 

Condition” press and hold the “Set” button for 3 seconds to manually programme Time, Distance or 

Calorie targets. In addition pressing the “Clear” button under any other conditions (with the treadmill 

belt static) will return to “Ready Condition”. Use the “Speed” up/down buttons to change values in each 

window. Once you have set from one of these 3 available options simply press the “On/Off” button and 

the set figures will be counted down accordingly.

Clear (Press and hold this key and all recorded data will be cleared)

Incline short cut keys (Incline Shortcut Keys 3, 6, 9 and 12. Press any incline shortcut key whilst in 

“operational Mode” to move the incline directly to the selected gradient) 

Speed down (Press this and the speed will reduce in increments of 0.1km/h)

Speed up (Press this and the speed will increase in increments of 0.1km/h)

Music (Simply plug in your music player using your MP3 connector cable provided and press the 

“Music” button to activate the speakers. Please note that an adaptor (not supplied) may be required for 

some music player devices. Use your music player device to control your song choices and volume.

Mode (Whilst in “Ready Condition” press the “Mode” button to select from one of your treadmills 99 

different training programmes)

Speed short cut key (Speed Shortcut Keys 3, 6, 9 and 12. Press any speed shortcut key whilst in 

“operational Mode” to move the speed directly to the selected value in km/h.

Safety key (Whilst in “Operational Mode” removal of the red magnetic Safety Cut-Off Chord will stop the 

motor, which will slow/stop the running belt)

1

2

3

4

5

6

7

8

9

10

11

12

13

14

15

16

17

18

COMPUTER FUNCTION

Page 19

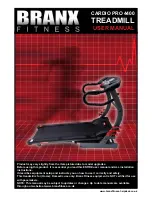
Summary of Contents for CARDIO PRO 4400

Page 1: ...ad this ENTIRE user manual and ALL installation instructions It describes equipment setup and instructs you on how to use it correctly and safely This treadmill is for Home Domestic use only Branx Fit...

Page 2: ...uage steel and coated with a smooth elegant finish for the best quality and a nice appearance I have an easy to use console display area with a whole array of exciting features like 99 built in progra...

Page 3: ...s in speed 1 2 3 4 5 6 7 8 9 10 11 12 13 14 15 16 The pulse sensor is not a medical device Various factors including the user s movement may affect the accuracy of heart rate readings The pulse sensor...

Page 4: ...l ever affect your warranty SELECTING A LOCATION Place your treadmill on a flat solid surface that allows air to circulate around it Place your treadmill so that it is close enough so that the power c...

Page 5: ...AFE PLACE PLEASE IT IS RECOMMENDED THAT THE PACKAGING IS RE USED IF THE TREADMILL IS EVER MOVED SIGNIFICANTLY FROM ITS PRIMARY LOCATION Now your treadmill should be safely out of its box and ready for...

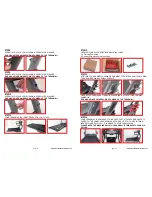
Page 6: ...OVE IS REQUIRED FOR BOTH SIDES OF THE TREADMILL STEP 1 YOUR TREADMILL ARRIVES FLAT PACKED AND 95 PRE ASSEMBLED STEP 2 FOLD UP THE CONSOLE CAREFULLY INTO PLACE UNTIL BOTH ARMS OF THE TREADMILL REACH TH...

Page 7: ...READY TO BE USED JUST ATTACH THE RED SAFETY CHORD TO THE CONSOLE AS SHOWN AND THEN CLIP IT TO YOUR CLOTHING INCASE YOU NEED TO PULL IT IN ORDER TO STOP THE MACHINE PLEASE NOTE THE MACHINE WILL STOP SU...

Page 8: ...with a qualified electrician or serviceman if you are in doubt as to whether the product is properly earthed Do not modify the plug provided with the product if it will not fit the outlet have a prope...

Page 9: ...belt will stop immediately During the first few minutes of using the treadmill inspect the alignment of the walking belt Align the belt if necessary see Adjusting Running Belt Alignment on page 25 4 G...

Page 10: ...made available to the user If the speed is less then 3 5km h and this button is pressed the treadmill will stop immediately Incline up it displays your current gradient of the running deck 0 20 Inclin...

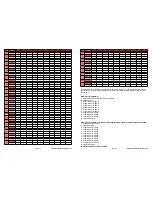
Page 11: ...3 4 3 4 5 5 3 3 2 P36 SPEED Km h 2 4 7 9 8 7 9 8 5 2 Incline 0 2 0 1 3 4 2 1 3 1 P37 SPEED Km h 2 3 4 5 7 8 6 4 3 2 Incline 0 3 6 4 3 1 4 5 2 1 Page 20 Page 21 Prog SPEED STAGE 1 STAGE 2 STAGE 3 STAG...

Page 12: ...2 3 4 5 7 8 6 4 3 2 Incline 0 3 6 4 3 1 4 5 2 1 P88 SPEED Km h 3 5 7 8 9 8 7 5 3 2 Incline 2 3 2 4 3 2 3 1 0 2 P89 SPEED Km h 2 4 6 8 7 8 6 4 4 3 Incline 1 0 2 5 3 4 6 4 3 1 Page 23 Prog SPEED STAGE 1...

Page 13: ...Programme 6 Programme 7 Programme 8 Programme 9 Programme 10 Programme 11 Programme 12 Programme 13 Programme 14 BLUE Speed RED Incline Page 24 Page 25 Programme 15 Programme 16 Programme 17 Programm...

Page 14: ...gramme 35 Programme 36 Programme 37 Programme 38 Programme 39 Programme 40 Programme 41 Programme 42 BLUE Speed RED Incline Page 26 Page 27 Programme 43 Programme 44 Programme 45 Programme 46 Programm...

Page 15: ...gramme 63 Programme 64 Programme 65 Programme 66 Programme 67 Programme 68 Programme 69 Programme 70 BLUE Speed RED Incline Page 28 Page 29 Programme 71 Programme 72 Programme 73 Programme 74 Programm...

Page 16: ...uk Page 30 Programme 85 Programme 86 Programme 87 Programme 88 Programme 89 Programme 90 Programme 91 Programme 92 Programme 93 Programme 94 Programme 95 Programme 96 Programme 97 Programme 98 BLUE S...

Page 17: ...use extreme caution whilst moving the treadmill Do not attempt to move the treadmill over an uneven surface 3 Place one foot on the base and carefully lower the treadmill until it is resting in the H...

Page 18: ...nspect the product regularly at least once a week is recommended Ensure that all fixings are tight before use Always replace damaged worn components with original parts from the manufacturer Lubricati...

Page 19: ...eyes occur and seek medical advice immediately Always store lubricant out of reach of babies and children Adjusting Running Belt Tension if the belt is slipping or becomes loose The tension of the run...

Page 20: ...he correct form for several basic stretches are shown below Move slowly as you stretch never bounce 1 Hamstring Stretch Sit with one leg extended Bring the sole of the opposite foot toward you and res...

Page 21: ...admill If your treadmill behaves in an unusual way and seems to have developed a fault turn it off at the electrical outlet and then back on again This should clear the treadmill of incidental error a...

Page 22: ...necessary arrange for service where your Product is located or advise you how to ship the Product for service Before shipping always obtain a Return Authorisation Number RA No from our Customer Servic...

Page 23: ...pdesk co uk Branx Fitness Ltd Pixmore Business Centre Pixmore Avenue Letchworth Hertfordshire SG6 1JG 0800 8620412 www branxfitness co uk Buy with confidence Your satisfaction is assured when shopping...

Reviews: