www.branxfitness.co.uk/productsupport
www.branxfitness.co.uk/productsupport
•
Heavy use (more than 5 hours a week) –every 2 months
Keeping the deck lubricated is the most important activity you can carry out to prolong the
life of your treadmill. If in doubt, apply a little lubricant.
You can check for proper lubrication levels at any time by doing the following:
1. Disconnect the treadmill from the power supply.
2.
Fold up the running deck, so the treadmill is in the storage position.
3.
Put your hand underneath the mat and feel along the running deck, as close to the centre
of the deck as you can:
• If your hand gets a light coating of lubricant then no further lubrication is required.
• If the surface feels dry and your hand feels clean, then apply more lubricant.
Your treadmill comes ready supplied with a bottle of lubrication oil to use, apply a liberal amount
to a lint free cloth and run the cloth along the length of the running deck (underneath the mat).
It’s important to try and get the lubricant as close to centre of the deck as possible. Check the
lubrication level as detailed above and re-apply with the cloth if necessary
If you need more lubricant, we recommend you use the Branx Fitness Treadmill Lubrication
Kit. Visit www.branxfitness.co.uk
How to Lubricate Your Running Deck
To see a video of this being done please visit:
http://www.branxfitness.co.uk/video-tutorials
1.
Ensure your treadmill is in the flat position.
2.
Turn off the treadmill power by positioning the power switch to the off position and then turn
off the plug at the mains wall socket and then remove the plug from the wall socket. This is
imperative for maintaining your safety at all times
3.
Using a clean cloth, lift the belt and clean all existing dust and debris.
4. Now that the deck has been cleaned and you have hovered up the dust from doing so its
time to apply the lubricant to the deck.
Page 28
5. Lift your running belt and apply 10/12ml under both sides of your treadmill matt. Or apply
a liberal amount to a lint free cloth and run the cloth along the length of the running deck
(underneath the mat NOT on the matt/belt itself). Focusing as close on the strike zoon as
possible, this is the area where your feet are mainly in contact with the treadmill belt and
running deck.
6. Now turn back on the treadmill power by plugging the plug back into the mains wall socket
and then positioning the power switch to the on position on the treadmill. Don’t forget to
attach the safety key.
7. Step on to the treadmill, using the foot plates first, attach your safety key to your clothing for
safety reasons and then start the treadmill and walk on the running belt for approximately a
2/3 minutes to spread the lubricant evenly.
8.
The lubrication procedure is now completed and you can stop the treadmill and turn it off.
Always keeping safety in mind as your number one priority.
CAUTION:
Please keep lubricant away from children and
babies at all times. Keep the lubricant away from clothes, wash hands after
use and avoid contact with eyes. Rinse thoroughly with clean water should
contact with eyes occur and seek medical advice immediately. Always store
lubricant out of reach of babies and children.
Adjusting Running Belt Tension (if the belt is slipping or becomes loose)
The tension of the running belt has been pre-set at
the factory; however, with use, the belt can stretch
slightly and become loose. If the belt is too loose
you will find it starts to slip during use. Check
Lubrication Before Adjusting the belt as symptoms
can be similar. To tighten the belt:
1.
Set the treadmill to run at 3km/h
2.
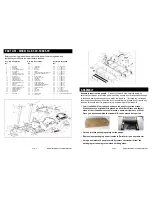
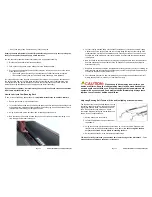
Locate the adjustment screws at the end of
the treadmill.
3. Using the allen key provided, adjust both screws by 1/2 turn clockwise. If the belt is too
tight, turn the screws anti-clockwise (See picture above).
Do not over tighten the belt -
only turn the screws 1/2 turn before re-checking the belt.
4.
Re-test the belt tension. If the belt still slips, repeat step 3
TIP: when correctly tensioned you should be able to lift the edge of the belt about 5 - 7 cm -
please only check this when the power is turned off.
Page 29


