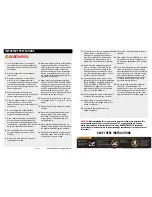
It is the responsibility of the owner to
ensure that all users of this treadmill are
adequately informed of all warnings and
precautions.
Use the treadmill only as described in
this manual.
Place the treadmill on a level surface,
with 2m (8 ft.) of clearance behind it.
Do not place the treadmill on any surface
that blocks air openings. To protect the
floor or carpet from damage, place a mat
under the treadmill.
When choosing a location for the
treadmill, make sure that the location and
position permit access to a plug.
Keep the treadmill indoors, away from
moisture and dust. Do not put the
treadmill in a garage or covered patio, or
near water.
Do not operate the treadmill where
aerosol products are used or where
oxygen is being administered.
Keep children away from the treadmill
at all times even whilst the treadmill is
being stored in its upright folded position
(see page 25) Please also keep all pets
away from the treadmill at all times.
The treadmill should not be used by
persons weighing more than 160 kg
(352lbs).
Never allow more than one person on
the treadmill at a time.
Wear appropriate exercise clothing when
using the treadmill. Do not wear loose
clothing that could become caught in the
treadmill. Athletic support clothes are
recommended for both men and women.
Always wear athletic shoes. Never use
the treadmill with bare feet, wearing only
stockings, or in sandals.
When connecting the power cord (See
HOW TO PLUG IN THE POWER CORD
on page 13), plug the power cord into an
earthed circuit. When replacing the fuse,
an ASTA approved BS1362 type should
be fitted to the fuse carrier. A 13 amp
fuse should be used. No other appliance
should be on the same circuit.
If you need an extension cord, use only
a 14-gauge cord of 1.5 m (5 ft.) or less in
length.
Keep the power cord away from heated
surfaces.
Never move the walking belt whilst the
power is turned off. Do not operate
the treadmill if the power cord or plug
is damaged, or if the treadmill is not
working properly.
Never start the treadmill whilst you are
standing on the walking belt. Always hold
the handrails whilst using the treadmill.
The treadmill is capable of high speeds.
Adjust the speed in small increments to
avoid sudden jumps in speed.
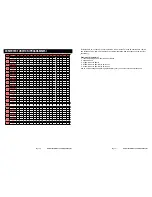
1.
2.
3.
4.
5.
6.
7.
8.
9.
10.
11.
12.
13.
14.
15.
16.
The pulse sensor is not a medical device.
Various factors, including the user’s
movement, may affect the accuracy of
heart rate readings. The pulse sensor
is intended only as an exercise aid in
determining heart rate trends in general.
Never leave the treadmill unattended
while it is running. Always remove the
key and move the on/off switch to the
off position when the treadmill is not in
use. (See the drawing on page 7 for the
location of the on/off switch).
Do not attempt to raise, lower, or move
the treadmill until it is properly assembled
(See ASSEMBLY on page 9, and HOW
TO FOLD, MOVE & RELEASE THE
TREADMILL on page 25). You must be
able to safely lift 30 kg in order to raise,
lower, or move the treadmill.
Do not change the incline of the treadmill
by placing objects under the treadmill.
When folding or moving the treadmill,
make sure that the storage latch is fully
closed or tightened.
Inspect and tighten all parts of the
treadmill regularly.
Never drop or insert any object into any
opening.
This treadmill is not certified for use with
pacemakers, we strongly suggest if you
are wearing a pacemaker not to use this
treadmill.
You must always stand on the footplates
which are adjacent to the running belt
whilst the treadmill is on and the running
belt is stationary. Only once the running
belt is moving the user can step onto it
and begin to walk/jog/run. This avoids
excessive load on the belt and motor
during the start up process.
Always turn the treadmills main power
switch OFF at all times when the
treadmill is not in use. For longer periods
which the treadmill is not being used for
it is recommended to remove the main
plug from the wall socket (See page 13)
17.
18.
19.
20.
21.
22.
23.
24.
25.
26.
www.branxfitness.co.uk/productsupport
www.branxfitness.co.uk/productsupport
WARNING:
IMPORTANT PRECAUTIONS
WARNING:
Before beginning this or any exercise program, consult your physician. This
is especially important for persons over the age of 35 or persons with pre-existing
health problems. Read all instructions before using. BRANX FITNESS LTD assumes no
responsibility for personal injury or property damage sustained by or through the use of
this product.
SAVE THESE INSTRUCTIONS
Page 4
Page 5

