background image


E S P A Ñ O L


2 5


ÍNDICE


1. Presentación ..................................................26

1.1 Mando a distancia ...................................26

1.2 Parte derecha del marco ..........................26

1.3 Parte izquierda del marco ........................26

2. Introducción y cambio de la batería .............. 26

3. Primeros pasos ..............................................27

4. Instrucciones de funcionamiento ....................27

4.1 Tarjeta y USB ..........................................27

4.2 Modo de imagen .....................................27

5. Archivo ...........................................................28

6. Calendario ......................................................29

7. Configuración.................................................29 

8. Instrucciones de soporte.................................30

9. Especificaciones técnicas ................................30

Instrucciones sobre eliminación de errores .........30

Características:

1. Formato de imagen soportado: JPEG
2. Tarjeta de memoria soportada: SD/ MMC/

SDHC/MS 

3. Conexión USB: Mini USB
4. Calendario integrado, hora y despertador
5. Menú táctil soportado para navegación y ajuste

sencillos

6. Presentación ajustable y más de 10 efectos dife-

rentes de transición

7. Claridad, contraste y saturación ajustables           
8. Idiomas de la indicación de estado óptica (OSD):

Inglés, alemán, francés, italiano, español, holan-
dés, portugués, sueco, griego

Lista de control embalaje:

Marco digital 7000SLT o 8000SLT, Manual de
usuario, Adaptador CA/CC, Mando a distancia,
Cable corto USB (para conexión a su dispositivo
USB)

Introducción:

Le estamos agradecidos por la compra del marco
digital. Está diseñado de forma que permite la con-
templación rápida y sencilla de fotos que usted ha
sacado con su cámara digital o teléfono móvil, o
que simplemente se encuentran en una tarjeta de
memoria.  Por favor, lea este manual de usuario
con atención, para aprender el manejo correcto del
marco de fotos digital. 

Advertencias

Medidas de precaución y mantenimiento

• Utilizar sólo en espacios interiores
• Para evitar peligro de incendio o descargas eléc-

tricas, no exponga el aparato a la humedad o con-
densación.

• Para evitar un sobrecalentamiento no bloquee los

orificios de ventilación en la parte posterior de la
moldura digital.

• Mantenga el marco digital alejado de la radiación

solar directa.

• Por favor, desconecte el aparato antes de introdu-

cir una tarjeta o un dispositivo USB. Si no lo
hace, puede dañar la tarjeta/ el dispositivo USB
así como el aparato.

• No desmonte el marco digital. Existe riesgo de

descarga eléctrica. En el interior no existen piezas
de cuyo mantenimiento pueda encargarse el
usuario. La garantía queda anulada al desmontar
el marco digital.

Limpieza de la pantalla LCD

• Manipule la pantalla con precaución. Como la

pantalla del marco digital se compone de  vidrio,
se puede romper o rayar fácilmente.

• Si se acumulan en la pantalla LCD huellas dactila-

res o polvo, le aconsejamos limpiarla con un
paño suave, no abrasivo, como por ejemplo un
paño de limpieza para lentes de cámara.

• Humedezca el paño de limpieza con el líquido lim-

piador y limpie la pantalla.


BN_DF-7_8000 SLT_ES.qxd  17.08.2010 14:35 Uhr  Seite 1

Summary of Contents for 7000SLT

Page 1: ... sich auf einer Speicherkarte befinden ermöglicht Bitte lesen Sie dieses Anwenderhandbuch sorgfältig durch um die richtige Handhabung des digitalen Bilderrahmens zu erlernen Warnhinweise Vorsichtsmaßnahmen und Wartung Nur in Innenräumen verwenden Um Brandgefahr oder elektrische Schocks zu ver meiden setzen Sie das Gerät nicht Feuchtigkeit oder Kondensierung aus Zur Vermeidung von Überhitzung block...

Page 2: ...taste Cursor nach rechts 9 SLIDE SHOW_ Drücken Sie um die Slideshow direkt zu starten 10 _ Funktionale Auswahltaste Cursor nach unten 11 EXIT _ Drücken um zur darüberliegenden Seite oder in das Hauptmenü zu gelangen 1 2 Drucktasten 1 Power Ein Aus 2 Menu Menü 3 Up Auf 4 Down Ab 5 Play Pause OK Abspielen Pause OK 6 Left Links 7 Right Rechts 8 Return Enter 1 3 Rechte Seite des Rahmens 1 SD SDHC MS M...

Page 3: ...dem Einschalten des Geräts erscheint der Startbildschirm Drücken Sie EXIT um in die Maske zur Kartenauswahl zu gelangen 4 1 Karte und USB Unterstützt werden SD SDHC MMC MS und USB 2 0 Nach dem Einstecken einer Karte oder eines USB Geräts wird automatisch eine Slideshow abge spielt Drücken Sie dann zweimal EXIT um in die Menüs Foto Datei Kalender und Einstellungen zu gelangen Drücken Sie auf OK um ...

Page 4: ... Modus 8000SLT 6 Bilder Modus 7000SLT um das Bild das Sie löschen möchten auszuwählen und drücken Sie SETUP um in die Löschmaske zu gelangen Drücken Sie dann OK um zu bestätigen 5 Datei Drücken Sie EXIT um im Hauptmenü SPEICHER KARTE auszuwählen Drücken Sie auf DATEI und dann auf OK um auf die Dateimaske zuzugreifen In diesem Modus können Sie durch alle Dateien auf der Speicherkarte blättern und D...

Page 5: ...von oben nach unten Baustein 7 6 Fotomodus Autoanpassung Optimal Vollbild 7 8 Anzeige Kontrast Verwenden Sie um zwischen 00 niedrig und 40 hoch auszuwählen Helligkeit Verwenden Sie um zwischen 00 niedrig und 40 hoch auszuwählen Sättigung Verwenden Sie um einen Punkt zwischen 00 niedrig und 40 hoch auszu wählen Farbe Verwenden Sie um zwischen 00 meiste Farbe und 40 wenigste Farbe auszu wählen 7 9 D...

Page 6: ... Sie bitte sowohl in dieser Anleitung als auch im Handbuch nach Wenn Sie mehr Unterstützung brauchen setzen Sie sich mit dem technischen Support in Verbindung Kein Strom Bitte überprüfen Sie ob der Stecker richtig einge steckt ist Fernbedienung ohne Funktion Bitte überprüfen Sie ob die Batterie Strom hat unter normalen Umständen kann die Batterie für ein halbes Jahr verwendet werden Tauschen Sie f...

Page 7: ...your digital camera mobile phone or from a memory storage card Please read this User Manual carefully to learn the correct way to use the Digital Photo Frame Cautions Precautions and maintenance For indoor use only To avoid risk of fire or electric shock do not expose the unit to moisture or condensation To avoid overheating do not block the ventilation holes on the back of the Digital Photo Frame...

Page 8: ...repress it to play 8 _ Functional selection button right cursor 9 SLIDE SHOW_ Press to start slideshow directly 10 _ Functional selection button bottom cursor 11 EXIT _ Press to return to upper page or enter the main menu 1 2 Touch Buttons 1 Power 2 Menu 3 Up 4 Down 5 Play Pause OK 6 Left 7 Right 8 Return 1 3 Right Side of Frame 1 SD SDHC MS MMC 1 4 Left Side of Frame 1 DC 5V 2 MINI USB 2 Installi...

Page 9: ...y 3 4 Power on the unit by pressing the Power but ton on the remote control or at the front of the unit 4 Operating Instruction After turning on the unit it will show the startup picture press EXIT to get to the card select inter face 4 1 Card and USB It supports SD SDHC MMC MS and USB 2 0 After inserting a card or USB device slideshow will play automatically then press EXIT twice to access to pho...

Page 10: ... to confirm In 9 picture mode 8000SLT 6 picture mode 7000SLT use to select the picture you want to delete then press SETUP to enter delete interface press OK to confirm 5 File Press EXIT to choose MEMORY CARD in the main menu Press File then press OK to access to file interface You can browse all the files in the memory card in this mode and delete files in built in memory or external device Delet...

Page 11: ...n out Jalousie Split Vertical in out Radiation Surround 7 6 Photo mode Auto fit Optiomal Full 7 8 Display Contrast Use to select between 00 lowest and 40 highest Brightness Use to select between 00 lowest and 40 highest Saturation Use to select a point between 00 lowest and 40 highest Tint Use to select between 00 most color to 40 least color 7 9 Set time date Press OK choose setup items with as f...

Page 12: ...Troubleshooting Guide If you are having problems with your player please consult both this guide and manual If you need fur ther assistance please contact Technical Support No power Please check whether the plug is inserted correctly Remote control no function Please check whether the battery has power the battery can be used for half a year in normal condi tions Replace with new battery if necess...

Page 13: ...r une carte mémoire Veuillez s il vous plaît lire le manuel d u tilisateur soigneusement afin d apprendre l utilisa tion correcte de ce cadre photo Avertissements Mesures de précaution et maintenance À n utiliser que dans les pièces intérieures Ne pas exposer l appareil à de l humidité ou à de la condensation afin de contrecarrer le risque d incendie ou les électrochocs Ne bloquez pas les ouvertur...

Page 14: ...nctionnelle curseur vers la droite 9 SLIDE SHOW_ À appuyer pour démarrer directe ment le diaporama 10 _ Touche de sélection fonctionnelle curseur vers le bas 11 EXIT _ À appuyer pour se rendre sur la page sus jacente ou retourner au menu principal 1 2 Touches 1 Power marche arrêt 2 Menu menu 3 Up vers le haut 4 Down vers le bas 5 Play Pause OK lecture pause OK 6 Left gauche 7 Right droite 8 Return...

Page 15: ...e d emploi L écran de démarrage apparaît après la mise en marche de l appareil Appuyez trois fois sur la tou che EXIT afin de vous rendre sur le masque de sel ection de la carte 4 1 Carte et USB Supporte les cartes SD SDHC MMC MS et USB 2 0 Un diaporama est automatiquement mis en marche après avoir enfiché une carte ou connecté un appareil USB Appuyez ensuite deux fois sur QUIT TER pour vous rendr...

Page 16: ...00SLT les touches pour sélectionner l image que vous souhaitez supprimer de la mé moire intégrée et appyuez ensuite sur SETUP pour vous rendre au masque de suppresion et sur OK pour confirmer 5 Fichier Appuyez sur QUITTER pour vous rendre au menu principal et sélectionner CARTE MÉMOIRE Appuyez sur FICHIER et ensuite sur OK pour vous rendre au masque fichier Dans ce mode vous pou vez feuilleter à t...

Page 17: ...tique optimal plein écran 7 7 Affichage Contraste Utilisez les touches pour procé der à une sélection entre 00 bas et 40 élevé Clarté Utilisez les touches pour procéder à une sélection entre 00 bas et 40 élevé Saturation Utilisez les touches pour sélec tionner un point entre 00 bas et 40 élevé Couleur Utilisez les touches pour procéder à une sélection entre 00 max de couleur et 40 min de couleur 7...

Page 18: ...ntré avec votre appareil de lecture nous vous prions de lire ce mode d em ploi et le manuel Veuillez contacter notre support technique si vous nécessitez une aide particulière Pas de courant Veuillez contrôler si la prise est bien enfichée Télécommande sans fonction Veuillez s il vous plaît contrôler le bon état de la pile celle ci peut normalement être utilisée pour six mois Échangez la en cas de...

Page 19: ...fotocamera digitale il vostro telefono cellulare o che si trovano su una scheda di memo ria Si prega di leggere attentamente il presente manuale per imparare ad utilizzare correttamente la cornice digitale Avvertenze Misure di prevenzione e manutenzione Utilizzare soltanto in ambienti interni Per evitare il rischio di incendio o di scosse elettriche non tenere l apparecchio in ambienti umidi o sog...

Page 20: ...ore a destra 9 SLIDESHOW _ Premere per avviare direttamente lo slide show delle immagini 10 _ Tasto freccia cursore verso il basso 11 EXIT _ Premere per uscire da una pagina o per tornare al menù principale 1 2 Tasti da premere 1 Power on off 2 Menu Menu 3 Up su 4 Down giù 5 Play Pause OK Riproduzione Pausa OK 6 Left a sinistra 7 Right a destra 8 Return Enter 1 3 Parte destra della cornice 1 SD SD...

Page 21: ...re sulla parte anteri ore dell apparecchio 4 Istruzioni d uso Dopo aver accesso l apparecchio apparirà la scher mata iniziale Premere EXIT per entrare nella schermata per la selezione della scheda 4 1 Scheda e USB Supporta SD SDHC MS MMC MS e USB 2 0 Dopo aver inserito una scheda o un dispositivo USB la modalità presentazione viene avviata in automatico Premere due volte EXIT per accedere ai menù ...

Page 22: ... tasti in modalità 9 immagi ni 8000SLT 6 immagini 7000SLT per selezionare la foto che si desidera eliminare e poi premere SETUP per entrare nella schermata elimina Preme re OK per confermare 5 File Premere EXIT per selezionare nel menu principale l opzione SCHEDA DI MEMORIA Premere su FILE e poi su OK per accedere alla schermata dei file In questa modalità è possibile sfogliare tutti i file sul la...

Page 23: ...ggiornamento effetto pan scorrimento dal basso verso l alto costruzione 7 6 Modalità immagine regolazione automatica otti male schermo intero 7 8 Visualizzazione Contrasto Utilizzare i tasti per selezionare tra 1 basso e 40 alto Luminosità Utilizzare i tasti per selezionare tra 1 basso e 40 alto Saturazione Utilizzare i tasti per seleziona re un punto tra 00 basso e 40 alto Colore Utilizzare i tas...

Page 24: ... d uso e il manuale utente Se avete bisogno di ulteriore assistenza si prega di contattare il team di supporto tecnico Assenza di corrente Si prega di verificare che la spina sia inserita cor rettamente _ Il telecomando non funziona Si prega di verificare che la batteria sia carica in circostanze normali la batteria può essere utilizzata per un anno e mezzo Sostituirla se necessario con una nuova ...

Page 25: ...do con su cámara digital o teléfono móvil o que simplemente se encuentran en una tarjeta de memoria Por favor lea este manual de usuario con atención para aprender el manejo correcto del marco de fotos digital Advertencias Medidas de precaución y mantenimiento Utilizar sólo en espacios interiores Para evitar peligro de incendio o descargas eléc tricas no exponga el aparato a la humedad o con densa...

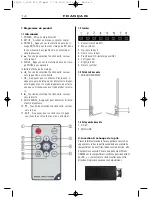
Page 26: ...cción funcional cursor a derecha 9 SLIDE SHOW_ Pulse para iniciar directamente la presentación 10 _ Tecla de selección funcional cursor a abajo 11 EXIT _ Pulsar para acceder a la página superior o al menú principal 1 2 Botones 1 Power activar desactivar 2 Menu menú 3 Up arriba 4 Down abajo 5 Play Pause OK reproducir pausar OK 6 Left izquierda 7 Right derecha 8 Return intro 1 3 Parte derecha del ma...

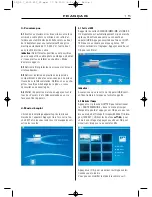
Page 27: ... delantera del aparato 4 Instrucciones de funcionamiento Después de encender el aparato aparece la pantalla de inicio Pulse EXIT para acceder a la pantella de seleccion de tarjeta 4 1 Tarjeta y USB Soporta SD SDHC MMC MS y USB 2 0 Una vez introducida la tarjeta o el dispositivo USB se repro duce automáticamente una presentación Pulse dos veces EXIT para acceder a los menús Foto Archivo Calendario ...

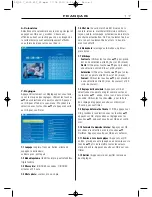
Page 28: ...8000SLT 6 ima genes 7000SLT utilice para seleccionar la imagen que desea borrar seleccione y pulse SETUP para acceder a la máscara de borrado Después pulse OK para confirmar 5 Archivo Pulse SALIR para seleccionar TARJETA DE MEMORIA en el menú principal Pulse ARCHIVO y después OK para acceder a la máscara de archi vo En este modo puede navegar a través de todos los archivos en la tarjeta de memoria...

Page 29: ...siguiente On Pan enrollado de abajo hacia arriba enrollado de arriba hacia abajo módulo 7 6 Modo de foto Autoadaptación óptimo imagen completa 7 8 Visualización Contraste Utilice para seleccionar entre 1 bajo y 40 alto Brillo Utilice para seleccionar entre 00 bajo y 40 alto Saturación Utilice para seleccionar un punto entre 00 bajo y 40 alto Color Utilice para seleccionar entre 00 más color y 40 m...

Page 30: ...rato reproductor consulte estas instrucciones así como el manual Si necesita más apoyo póngase en contacto con el servicio técnico No hay corriente Compruebe si se ha introducido correctamente el enchufe Mando a distancia no funciona Por favor compruebe si la batería tiene corriente en condiciones normales puede utilizarse la batería durante medio año Sustituya si es necesario por una nueva baterí...

Page 31: ... bevinden snel en eenvoudig te bekijken Leest u deze gebruiksaanwijzing alstublieft aan dachtig door om zo het juiste gebruik van de digi tale fotolijst onder de knie te krijgen Waarschuwingen Voorzorgsmaatregelen en onderhoud Gebruik alleen binnenshuis Om brandgevaar of stroomstoten te voorkomen mag het apparaat niet bloot worden gesteld aan vocht of condens Om oververhitting te voorkomen dient u...

Page 32: ...f te spelen 8 _ Functionele keuzetoets cursor naar rechts 9 SLIDE SHOW _ Drukken om de slideshow direct te starten 10 _ Functionele keuzetoets cursor naar bene den 11 EXIT _ Drukken om naar de pagina erboven of naar het hoofdmenu te gaan 1 2 Druktoetsen 1 Power aan uit 2 Menu menu 3 Up omhoog 4 Down omlaag 5 Play Pause OK afspelen pause OK 6 Left links 7 Right rechts 8 Return enter 1 3 Rechterkant...

Page 33: ...andsbediening of aan de voorkant van het apparaat te drukken 4 Gebruiksaanwijzing Na het inschakelen van het apparaat verschijnt het startscherm Druk op EXIT om naar het menu van de kaartkeuze te geraken 4 1 Kaart en USB Ondersteund worden SD SDHC MS MMC MS en USB 2 0 Na het plaatsen van een kaart of een USB apparaat wordt automatisch een slideshow getoond Druk vervolgens tweemaal op EXIT om in he...

Page 34: ...00SLT 6 foto s modus 7000SLT om de foto die u wilt verwijderen uit te kiezen en druk op SETUP om naar het verwijdermenu te geraken Druk vervol gens op OK om te bevestigen 5 Bestand Druk op EXIT om in het hoofdmenu GEHEUGEN KAART uit te kiezen Druk op BESTAND en ver volgens op OK om toegang tot het bestandmenu te krijgen In deze modus kunt u door alle bestanden op de geheugenkaart bladeren en besta...

Page 35: ... on pan rollen van beneden naar boven rol len van boven naar beneden bouwstenen 7 6 Fotomodus Automatische aanpassing optimaal full screen 7 8 Weergave Contrast Gebruik om tussen 00 laag en 40 hoog te kiezen Helderheid Gebruik om tussen 00 laag en 40 hoog te kiezen Verzadiging Gebruik om een punt tussen 00 laag en 40 hoog uit te kiezen Kleur Gebruik om tussen 00 meeste kleur en 40 minste kleur te ...

Page 36: ...wijzing als u problemen hebt met uw weergave apparaat Neem alstublieft contact op met onze technische support als u meer hulp nodig heeft Geen stroom Controleer alstublieft of de stekker juist is aanges loten Afstandsbediening werkt niet Controleer alstublieft of de batterij nog stroom heeft onder normale omstandigheden kan de bat terij een half jaar worden gebruikt Vervang indi en nodig door een ...

Page 37: ...ital ou o seu telemóvel ou que se encontrem armazenadas num cartão de memória Leia este manual de instruções com atenção a fim de aprender o correcto manusea mento da moldura de imagem digital Advertências Medidas de prevenção e manutenção Utilizar apenas em recintos interiores A fim de se evitar o perigo de incêndio ou de cho ques eléctricos não submeta o aparelho à humi dade ou a condensação A f...

Page 38: ... _ Botão de selecção funcional cursor para a direita 9 SLIDE SHOW_ Prima este botão para iniciar directamente a apresentação de diapositivos 10 _ Botão de selecção funcional cursor para baixo 11 EXIT _ Premir este botão para ir para a página sobreposicionada ou para o menu principal 1 2 Botões de comando 1 Power ligar desligar 2 Menu 3 Up p cima 4 Down p baixo 5 Play Pause OK reproduzir pausa OK 6...

Page 39: ...parte da frente do aparelho 4 Manual de instruções Após ter ligado o aparelho aparece o ecrã inicial Prima EXIT para ir parar a janela de seleccao dos cartoes de memoria 4 1 Cartões de memória e USB Suporta SD SDHC MS MMC MS e USB 2 0 Ao se inserir um cartão de memória ou um dispositivo de USB é reproduzida automaticamente uma apresen tação de diapositivos Depois prima EXIT duas vezes para ir para...

Page 40: ...do de 9 ima gens 8000SLT 6 imagens 7000SLT para selec cionar a imagem que deseja apagar e prima SETUP para ir ter à máscara da função de apagar Depois prima OK para confirmar 5 Ficheiro Prima SAIR para seleccionar CARTÃO DE MEMÓRIA no menu principal Prima FICHEIRO e depois OK para poder ter acesso à máscara dos ficheiros Neste modo pode paginar ao longo de todos os ficheiros contidos cartão de mem...

Page 41: ...alizar a partir da direita actualizar pró ximo no plano rolar de baixo para cima rolar de cima para baixo módulo 7 6 Modo de fotografia adaptação automática opti mizado imagem integral 7 8 Visualização Contraste Sirva se das setas para seleccio nar um valor compreendido entre 00 baixo e 40 alto Claridade Sirva se das setas para seleccio nar um valor compreendido entre 00 baixo e 40 alto Saturação ...

Page 42: ...blemas com o seu aparelho de leitura pode consultar tanto estas indicações como tam bém no manual de instruções Se necessitar de mais ajuda entre em contacto com a equipa de suporte técnico Nenhuma corrente Verifique se a ficha está bem enfiada Telecomando sem função Verifique se a pilha tem corrente em circunstân cias normais a pilha pode ser utilizada durante meio ano Se necessário troque a pilh...

Page 43: ...n digitalkamera eller din mobil telefon eller som befinner sig på ett minneskort Läs igenom denna manual noga för att lära dig att hantera den digitala fotoramen på rätt sätt Varningsinformation Försiktighetsåtgärder och underhåll Får endast användas inomhus För att undvika brandfara och elchocker Utsätt apparaten inte för fuktighet eller kondensation För att undvika överhettning Blockera ej venti...

Page 44: ...nu en gång 8 _ Funktionell valknapp markör till höger 9 SLIDE SHOW_ Tryck för att starta slideshowen direkt 10 _ Funktionell valknapp markör och ned 11 EXIT _ Tryck för att komma till överordnad sida eller till huvudmenyn 1 2 Knappar 1 Power Till från 2 Menu Meny 3 Up Upp 4 Down Ned 5 Play Pause OK Uppspelning Paus OK 6 Left Vänster 7 Right Höger 8 Return Enter 1 3 Ramens högra sida 1 SD SDHC MS M...

Page 45: ...kopplat på apparaten visas startbildskär men Tryck tre gånger på EXIT för att komma till den bild där du kan välja kort 4 1 Kort och USB Kortplats finns för SD SDHC MS MMC MS och USB 2 0 När man satt i ett kort eller en USB apparat spe las en slideshow upp automatiskt Tryck därefter två gånger på VERLASSEN LÄMNA för att komma till menyerna foto TXT fil kalender och inställningar Bekräfta sedan gen...

Page 46: ...ild 8000SLT 6 bild 7000SLT läget för att selektera den bild du vill radera och tryck därefter SETUP för att komma till menyn för att radera Tryck OK för att bekräfta 5 Fil Tryck VERLASSEN LÄMNA för att selektera SPEICHERKARTE MINNESKORT i huvudmenyn Tryck på DATEI FIL och sedan på OK för att kom ma till filens meny I detta läge kan du bläddra ige nom alla filer på minneskortet och radera filer i d...

Page 47: ... nerifrån och upp scrolla uppifrån och ned komponent 7 6 Fotoläge automatisk anpassning optimal helbild 7 8 Indikering Kontrast Använd för att selektera mellan 00 låg och 40 hög Ljus Använd för att selektera mellan 00 låg och 40 hög Mättnad Använd för att selektera en punkt mellan 00 låg och 40 hög Färg Använd för att selektera mellan 00 mest färg och 40 minst färg 7 9 Inställning av tid datum Try...

Page 48: ...n för åtgärdande av fel Om du har problem med din uppspelningsapparat titta både i denna handledning och i manualen Behöver du ytterligare hjälp kontakta vår tekniska support Ingen ström Kontrollera om kontakten sitter riktigt fast i uttaget Fjärrkontroll utan funktion Kontrollera om batteriet har ström under normala förhållanden kan batteriet användas i ett halvt år Byta vid behov ut batteriet mo...

Page 49: ...G R E E K 4 9 BN BA_DF7 8000_0810_GR qxd 17 08 2010 17 08 Uhr Seite 1 ...

Page 50: ...G R E E K 5 0 BN BA_DF7 8000_0810_GR qxd 17 08 2010 17 08 Uhr Seite 2 ...

Page 51: ...G R E E K 5 1 BN BA_DF7 8000_0810_GR qxd 17 08 2010 17 08 Uhr Seite 3 ...

Page 52: ...G R E E K 5 2 BN BA_DF7 8000_0810_GR qxd 17 08 2010 17 08 Uhr Seite 4 ...

Page 53: ...G R E E K 5 3 BN BA_DF7 8000_0810_GR qxd 17 08 2010 17 08 Uhr Seite 5 ...

Page 54: ...G R E E K 5 4 BN BA_DF7 8000_0810_GR qxd 17 08 2010 17 08 Uhr Seite 6 ...

Page 55: ...5 5 BN BA_DF7 8000_0810_GR qxd 17 08 2010 17 08 Uhr Seite 7 ...

Page 56: ...5 6 BN BA_DF7 8000_0810_GR qxd 17 08 2010 17 08 Uhr Seite 8 ...

Reviews: