10
2
How to guide the appliance
ï
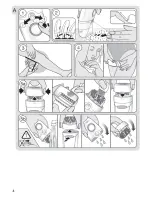
Always stretch your skin when
epilating.
ï
Always make sure that the epilation
area is in close contact with your skin.
ï
The pivoting head automatically adapts
to the contours of your skin.
ï
Guide the appliance in a slow, con-
tinuous movement without pressure
against the hair growth, in the direction
of the switch. As hair can grow in
different directions, it may also be
helpful to guide the appliance in
different directions to achieve optimal
results. The pulsating movements of
the massaging rollers stimulate and
relax the skin for a gentler epilation.
ï
If you are used to the sensation of
epilation and prefer a faster way of
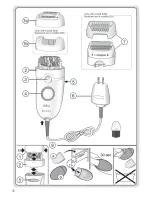
removing hair, attach the skin contact
cap (1b) replacing the massaging
rollers (1a).
3
Leg epilation
Epilate your legs from the lower leg in
an upward direction. When epilating
behind the knee, keep the leg
stretched out straight.
4
Underarm and bikini line epilation
Please be aware that especially at the
beginning, these areas are particularly
sensitive to pain. Therefore, we
recommend that you start with switch
setting I. With repeated usage the pain
sensation will diminish.
Before epilating, thoroughly clean the
respective area to remove residues
(like deodorant). Then carefully dab
dry with a towel. When epilating the
underarm, keep your arm raised up so
that the skin is stretched and guide the
appliance in different directions. As
skin may be more sensitive directly
after epilation, avoid using irritating
substances such as deodorants with
alcohol.
5
Cleaning the epilation head
Before cleaning, unplug the appliance.
Regular cleaning ensures better
performance.
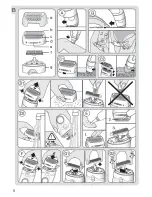
a Brush cleaning:
Remove the cap and brush it out.
Thoroughly clean the tweezers from
the rear side of the epilator head with
the brush dipped into alcohol. While
doing so, turn the tweezer element
manually. This cleaning method
ensures best hygienic conditions for
the epilation head.
b Cleaning under running water:
Remove the cap. Hold the appliance
with the epilation head under running
water.
Then press the release button (5) to
remove the epilation head (2).
Thoroughly shake both, the epilation
head and the appliance to make sure
that remaining water can drip out.
Leave both parts to dry. Before
reattaching, make sure that they are
completely dry.
B Using the shaver head
attachment
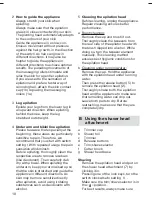
a Trimmer cap
b Shaver foil
c Trimmer
d Release buttons
e Trim/shave selector
f Cutter block
g Shaver head base
Shaving
ï
Remove the epilation head and put on
the shaver head attachment (7) by
clicking it in.
ï
Pressing one of the lock keys, turn the
switch clockwise to setting ´ IIª .
ï
Make sure the trim/shave selector is in
the
« »
position.
ï
For best results, always make sure


