16
Occupant restraints
1.
Bolted occupant restraints will have been installed in the vehicle in accordance with our
own and the vehicle converter’s instruction.
Note:
if fitting hardware, other than that
provided in this kit, is to be used, then the fixing bolts should be of an equivalent cross
section and an equivalent grade, namely B.S. Grade ’S’ (ISO 8.8).
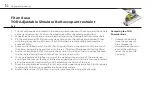
2. The componentry is assembled with the upper 3rd point and lower reel anchorage points
bolted to an approved anchorage position on the vehicle body. The inertia reel should
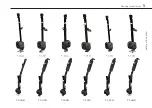
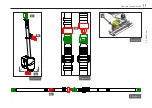
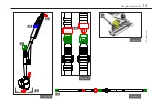
be mounted at an angle of 90/90° as viewed in 2 planes to the road level, (Fig 7A). The
reel and its bracketry is bolted through the vehicle and reinforced on the underside, if
required, with the 100mm diameter load spreader plate and nyloc nut. All bolts should
be tightened to a torque of 40Nm.
Note: All vehicle anchorage points may require
reinforcement as necessary to meet any required minimum strength recommendations
for the vehicle.
3. Once installed, check the free running ofthe webbing into, and out of, the inertia reel and
check the ’lock up’ facility of the reel by engaginga short tug at various intervals along
the extension and retraction of the webbing in and out of the reel.
4. Draw the shoulder belt buckle, (Fig. 7B), across the upper body and attach to the lap belt
tongue, (Fig. 3A & 4A), to complete the 3 point belt system.
5. Note: The lap belt (pelvic) restraint is designed to bear upon the bony structure of the
body and should be worn low across the front of the pelvis with any junctions between
the pelvic and shoulder restraints located near the wearer’s hips.
6. Adjust the tensioner, (Fig. 7C) so that it sits just above the occupant’s shoulder.
Removing the TOR
Shoulder Belt
1.
Unfasten the buckle
from the occupant’s
hips, remove the
shoulder belt restraint
and let the webbing
retract back into the
housing.
Fit and use
TOR Adjustable Shoulder Belt occupant restraint
Bolted

