background image

SERIES 762 BIDIRECTIONAL SLURRY KNIFE GATE VALVES

Installation, Operation, and Maintenance Manual

25 of 30

© 2021 BRAY INTERNATIONAL, INC. ALL RIGHTS RESERVED. BRAY.COM   The Information 

contained herein shall not be copied, transferred, conveyed, or displayed in any manner that would 

violate its proprietary nature without the express written permission of Bray International, Inc.

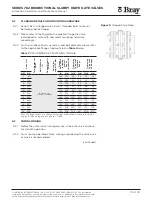
Figure 7:

 Gate Disassembly

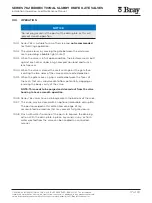
Figure 8:

 Gate Removal

14.3

GATE REPLACEMENT

14.3.1 1.  Relieve the line pressure and open the valve. Flush the line if 

necessary.

2.  Remove the cylinder port tubing and vent the air inside the 

cylinder if the valve with Pneumatic operated.

3.  Remove the seat as per seat replacement procedure.
4. Lock the gate in opened position using a suitable locking pin 

in the holes provided.

5.  If the valves are supplied with bellows, ensure stem is not 

rotated, as rotation will damage the bellows.

6. Disassemble the super structure by removing the fasteners 

with body.

7.  Lift the damaged/old gate & superstructure from the body 

assembly using suitable sling strapped below the base plate 
of superstructure. An overhead hoist may be required for 
larger size valves.

8. Lay the superstructure & old gate assembly in horizontal 

position & disconnect the stem/Piston rod from the gate by 
removing the clevis bolts & nuts.

9.  Remove the secondary seal, wiper and retainer and inspect 

the seal for suitability to reuse.

10.  Lubricate the new gate and install it in body carefully.
11. Insert the secondary seal back into the packing chamber.
12.  Re-attach the wiper and secondary seal retainer onto the 

valve body.

13.  Tighten the secondary seal retainer bolts.
14.  Inject the recommended lubricant at the grease nipple.
15.  Mount the actuator and super structure on the valve.
16.  Hand tighten the body bolting to the superstructure.
17. Tighten the actuator bolting. 
18.  Connect the gate and stem by clevis bolts and nuts.
19. Lower the stem by rotating the hand wheel clockwise (or   
     by applying air gradually for cylinder operated valves) while   
     holding the stem and fasten the stem to the gate with bolts  
     and nuts. 
20.Operate the valve for a few cycles and then tighten the body  
     to superstructure bolting as per the recommended torque as  
     per Table Install the seat as per above procedure. 
21. Adjust and ensure the gate positions from top of the body  
     according to 

Table 2 

on page 15.

14.3.2 Changing or repair of other valve parts by users is not 

recommended; please contact Bray for any further advice and 
assistance.

(continued)

Summary of Contents for 762 Series

Page 1: ...SERIES 762 BIDIRECTIONAL SLURRY KNIFE GATE VALVES BRAY SLURRYSHIELD Installation Operation and Maintenance Manual BRAY COM THE HIGH PERFORMANCE COMPANY...

Page 2: ...ermission of Bray International Inc 0 0 Definition of Terms 3 1 0 Introduction 4 2 0 Parts Identification 5 3 0 Valve Identification 6 4 0 Safety Information 7 5 0 Hazard Free Use 8 6 0 Qualified Pers...

Page 3: ...examples of information used throughout this manual 0 0 IDENTIFIES CHAPTER HEADING 0 00 Identifies and explains sequential procedure to be performed NOTE Provides important information related to a pr...

Page 4: ...the bidirectional shut off sealing is achieved by the elastomer sleeves inserted in the valve body from either side Series 762 valve is suitable for on off service only and is not recommended to be us...

Page 5: ...ocating Bush 8 Body Mounting Bolt Washer 9 Body Mounting Nut Washer 10 Grease Nipple 11 Body O Ring 12 Drain Plate Gasket optional Item Description 13 Drain Plate optional 14 Drain Plate Fasteners Was...

Page 6: ...nique to each device The following table is a representation of information that may be included Data Label Description Serial Number SERIAL NUMBER Unique serial number of valve Valve Size SIZE Valve...

Page 7: ...ve must only be installed commissioned operated and repaired by qualified personnel The device generates a large mechanical force during normal operation All installation commissioning operation and m...

Page 8: ...bserved by the user if this safe condition is to be maintained and hazard free operation of the device assured 5 2 Take all necessary precautions to prevent damage to the valve due to rough handling i...

Page 9: ...s familiar with the installation commissioning and operation of the device and who has appropriate qualifications such as 6 1 1 Is trained in the operation and maintenance of electrical equipment and...

Page 10: ...owing the local safety regulations 7 2 Unpacked Valves 7 2 1 Lifting and handling of valves should be carried out by using appropriate means and observing the carrying limits Handling must be carried...

Page 11: ...e months During short term storage the following is required 8 1 1 The preferred storage location is a clean dry protected warehouse Do not expose the valve to temperature extremes 8 1 2 End protector...

Page 12: ...may be stored in the vertical or horizontal position For air or hydraulic actuated valves the preferred orientation is with the valve and cylinder in the vertical position Access ports should be secur...

Page 13: ...r any foreign material that may have collected during shipping or storage 9 1 1 Seats require lubrication before installation please refer to section Lubrication page 20 9 1 2 These valves can be moun...

Page 14: ...TORQUE Valve Size Total Number of holes Bolt Stud size S Flange thickness F mm Raised face height R mm Flange hole depth including retainer flange thickness B Tightening Torque for Standard flange Tig...

Page 15: ...e the valve repeat by connecting the airline to the other port to slowly stroke the valve back to open position If movement with the rated air supply pressure is smooth the valve is ready to be put in...

Page 16: ...ly laid out piping is preferable and recommended 9 4 2 The valve superstructure is designed to provide rigid mounting and generally no additional supports are required for valves mounted in vertical o...

Page 17: ...omer seats butt against each other under a high compression load and form a leak free seal 10 0 4 When the valve is closed the seats seal against the gate face isolating the two sides of the valve and...

Page 18: ...actuators use the following port connections unless specially ordered otherwise Connections are listed below in Table 3 Table 3 PORT CONNECTIONS C80 C100 C150 C200 C250 C500 1 4 NPT 1 2 NPT 3 4 NPT 1...

Page 19: ...e normal valve operating thrust 12 3 In order to assure complete lockout compliance any actuated valve Pneumatic or Hydraulic or Electric must be placed in a Zero energy state by isolating all potenti...

Page 20: ...dy assembly and gate at a regular interval Check for any signs of corrosion components wear and or damage caused by process media 13 0 2 Look for corrosion galling or lack of lubrication in the valve...

Page 21: ...optional The drain plate holes should be connected to a customer supplied drain piping or left to drain or drain plates should be removed for satisfactory operation of the valve 13 2 3 A drain pan is...

Page 22: ...ion of Bray International Inc WARNING Do not operate the valves with the drain plate drain holes plugged drain holes should be connected suitably to flushing lines and flushed periodically using suita...

Page 23: ...removing or repairing a valve or operator Do not pressurize the line without an operator on the valve 14 1 REPLACEMENT OF PARTS AND MODIFICATIONS 14 1 1 Parts listed in Table 5 below may wear out and...

Page 24: ...gently pulling them out 8 Lay the valve down in a horizontal position on a flat surface 9 Check the bore diameter for unusual or excessive wear If found valve housing may require replacement 10 Lubric...

Page 25: ...valves 8 Lay the superstructure old gate assembly in horizontal position disconnect the stem Piston rod from the gate by removing the clevis bolts nuts 9 Remove the secondary seal wiper and retainer a...

Page 26: ...Lift the frame and actuator assembly off the housing to allow the secondary seal and gate removal 7 Loosen the secondary seal retainer plate bolts 8 Remove the gate While the gate is available inspect...

Page 27: ...n the actuator assembly Figure 10 Item 5 15 2 7 Place the actuator on the super structure and fasten loosely Figure 11 Item 3 15 2 8 Give air supply to actuator and extend the piston rod towards closi...

Page 28: ...n Replace seat Seat is worn out or torn Replace gate In fully open position valve leaks Seat is worn out Replace seat Improper stroke Check and adjust stroke per IOM Valve jerks during open and close...

Page 29: ...l products that are returned require a Return Merchandise Authorization RMA Contact a Bray representative to obtain authorization and shipping instructions 17 2 The following information must be provi...

Page 30: ...NY All statements technical information and recommendations in this bulletin are for general use only Consult Bray representatives or factory for the specific requirements and material selection for y...

Reviews: