5
Small Weather Shield
-
Installation, Operation & Maintenance Manual Continued
Continued:
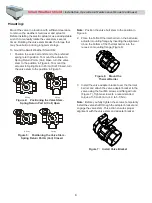
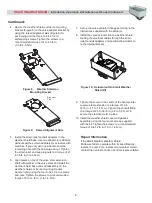
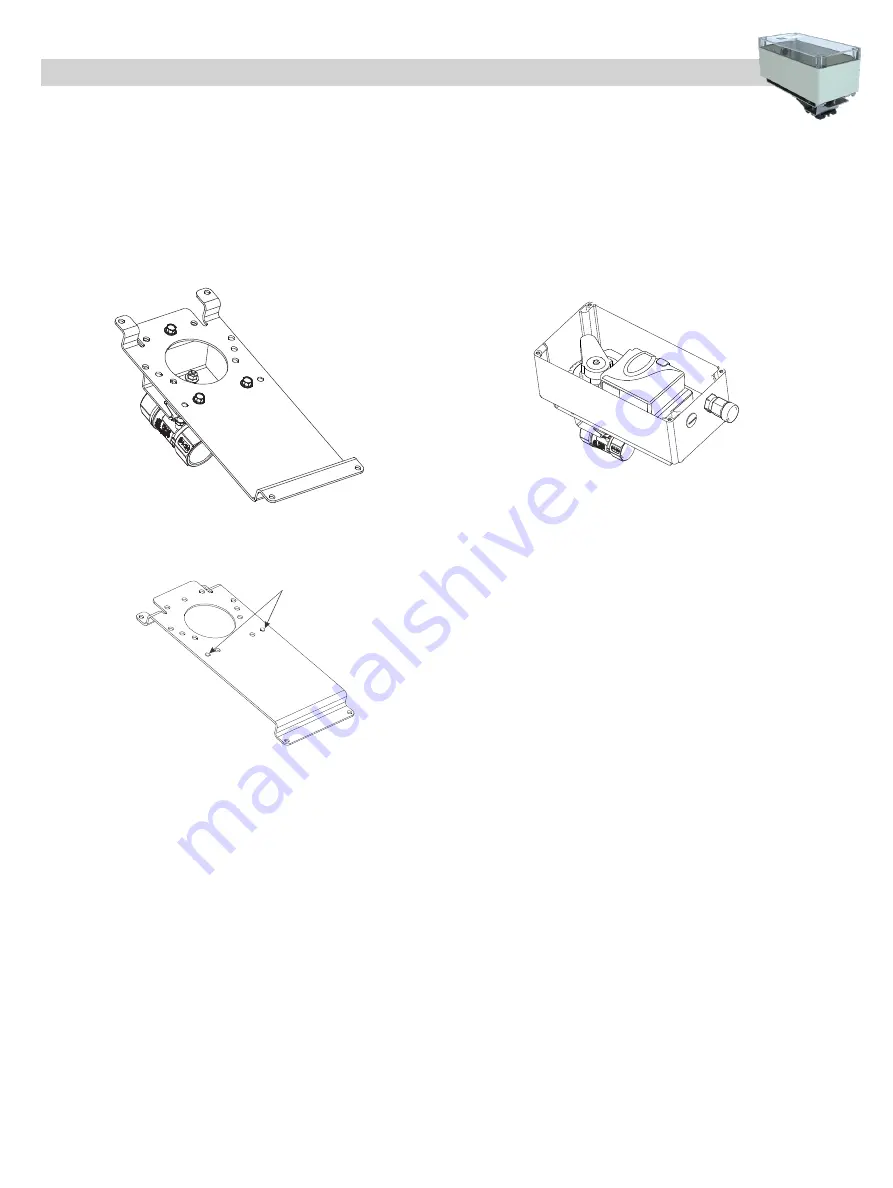
4. Secure the weather shield enclosure mounting
bracket (Figure 8) to the valve adapter bracket by
using the raised alignment aids (Figure 9) for
positioning and the three 12-24 x 1/2 in.
self-tapping screws. Tighten the screws to a
recommended torque of 31 to 40 lb·in.
(3.5 to 4.5 N·m).
5. Install the strain relief conduit adapters in the
weather shield base. Use one adapter for actuators
without switches or two adapters for actuators with
switches. If you only use one adapter, seal the
remaining hole with the cap plug and nut. Tighten
the strain relief and cap plug nuts to a torque of 27
to 35 lb·in (3 to 4 N·m).
6. Align marks on top of the valve stem extension
shaft with marks on the valve stem and install the
weather shield base and seal assembly on the
weather shield enclosure mounting bracket.
Secure tightly using the four 6-32 x 1/2 in. screws
and nuts. Tighten the screws to a recommended
torque of 9 to 12 lb·in. (1 to 1.4 N·m).
7. Set up the valve actuator linkage according to the
instructions supplied with the actuator.
8. Install the valve actuator into the weather shield
feeding the electrical cables through the strain
relief conduit adapters and position the actuator on
to the internal bracket.
9. Tighten the screw in the center of the fixed pointer
to valve stem extension to a torque of 10 to
12 lb·in. (1.1 to 1.4 N·m). Tighten the conduit fitting
to a torque of 25 to 30 lb·in. (2.8 to 3.4 N·m) to
secure the electrical cord in place.
10. Install the weather shield cover and gasket
assembly using the four cover screws supplied
with the kit. Tighten the screws to a recommended
torque of 9 to 12 lb·in (1.0 to 1.4 N·m).
Repair Information
If the Small Weather Weather Shield
Enclosure fails to operate within its specifications,
replace the unit. For a replacement weather shield,
contact the nearest Johnson Controls representative.
Figure 8: Weather Shield on
Mounting Bracket
Figure 9: Raised Alignment Aids
Alignment
Aids
?g
:a
lig
nm
en
t
Figure 10: Actuator within Small Weather
Shield Kit


