background image

Exceptional Heat, Outstanding Value

®

BRECKWELL

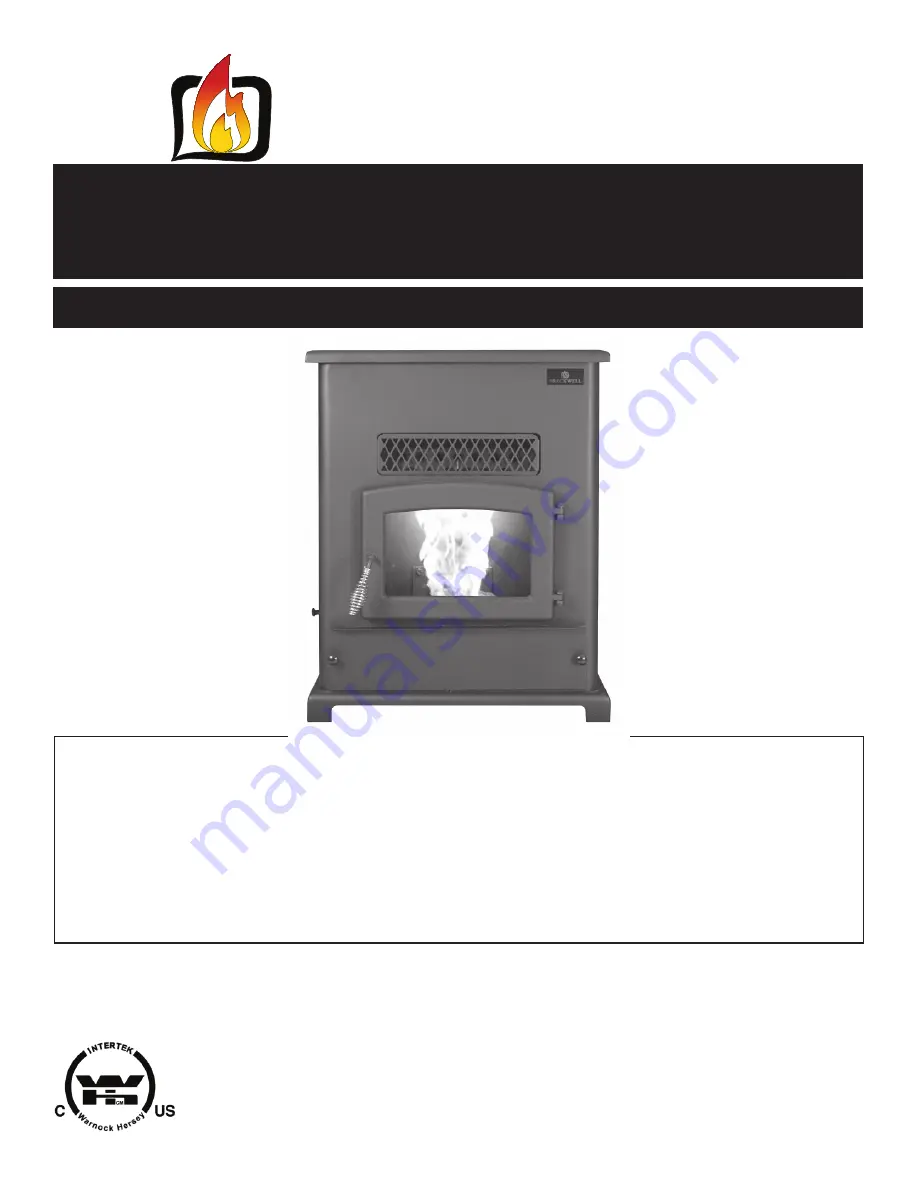
THE BIG E

THE BIG E

Economical to Buy

Effi

  cient to Operate

Easy to Use

OWNER’S MANUAL

OWNER’S MANUAL


•  Warning: If your appliance is not properly installed a house 

fi

 re may result. For your safety, 

follow the installation directions. Contact local building or 

fi

 re of

fi

 cials about restrictions and 

installation inspection requirements in your area.

•  PLEASE read this entire manual before installation and use of this pellet fuel-burning room 

heater. Failure to follow these instructions could result in property damage, bodily injury, or 
even death.

•  Save these instructions.

PROFESSIONAL INSTALLATION IS HIGHLY RECOMMENDED

Manufactured by

Breckwell Hearth Products

Eugene, Oregon

www.breckwell.com

0

6/2012

© 

BRECKWELL HEARTH PRODUCTS

This unit is not intended to be used as a primary source of heat. 

Summary of Contents for The Big E

Page 1: ... about restrictions and installation inspection requirements in your area PLEASE read this entire manual before installation and use of this pellet fuel burning room heater Failure to follow these instructions could result in property damage bodily injury or even death Save these instructions PROFESSIONAL INSTALLATION IS HIGHLY RECOMMENDED Manufactured by Breckwell Hearth Products Eugene Oregon ww...

Page 2: ...ing to current national and local building codes as a freestanding room heater It is also approved as a mobile home heater which is designed for connection to an outside combustion air source The stove will not operate using natural draft or without a power source for the blower systems and fuel feed system and must not be burned with any type of coal see PROPER FUEL This stove is designed to prov...

Page 3: ...ever try to repair or replace any part of the stove unless instructions are given in this manual All other work should be done by a trained technician Do not throw this manual away This manual has impor tant operating and maintenance instructions that you will need at a later time Always follow the instructions in this manual Do not place clothing or other flammable items on or near the stove The ...

Page 4: ...matic Fire Starter 12 Damper Control 12 Opening Door 12 Room Air Fan 12 Re Starting a Warm Stove 13 If Stove Runs Out OF Pellets 13 Refueling 13 Breckwell Maintenance Tool 13 Shutdown Procedure 13 Safety Features 13 Optional Thermostat 14 Please Read This Operating Safety Precautions 15 MAINTENANCE 16 Ash Removal 16 Ash Disposal 16 Vacuum Use 16 Cleaning 17 Blowers 17 Chimney Cleaning 18 Recommend...

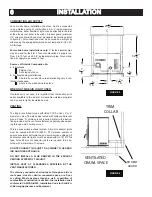
Page 5: ...30 wide by 32 deep The stove must be placed on a continuous grouted joints non combustible material such as ceramic tile cement board brick 3 8 millboard or equivalent or other approved or listed material suited for floor protec tion THE MATERIAL S USED MUST HAVE OR COM BINE TO HAVE A MINIMUM INSULATIVE RAT ING OF R1 NOTE ceramic tile or any tile requires a con tinuous sheet beneath to prevent the...

Page 6: ...er can be used in tightly insulated homes VENTING The Big E is certified for use with listed TYPE L Vent 3 or 4 diameter in size The stove was tested with Simpson Duravent brand CLass A chimney is not required Refer to the instruc tions provided by the vent manufacturer especially when pass ing through a wall ceiling or roof This is a pressurized exhaust system All vent connector joints must be se...

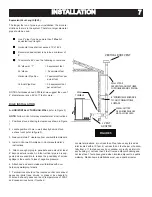
Page 7: ... 000 feet we suggest the use of 4 diameter vent at an EVL of 7 feet or more BIG E INSTALLATION A HORIZONTALLY THROUGH WALL refer to Figure 5 NOTE Follow L Vent chimney manufacturer s instructions 1 Positions stove adhering to clearances shown in Figure 1 2 Locate position of hole in wall directly behind stove exhaust vent refer to figure 3 3 Always maintain 3 clearance from combustible materials 4...

Page 8: ...ure 7 As an alternative 3 or 4 L Vent can be run inside existing chimney to termination Figure 8 This is the preferred method Follow guidelines for equivalent vent length D VERTICALLY INTO EXISTING MASONRY FIREPLACE NOTE Follow L Vent chimney manufacturer s instructions 1 Have the masonry chimney inspected by a qualified chimney sweep or installer to determine its structural condition 2 You will n...

Page 9: ...tall the trim collar An adjustable pipe length and adapter may be needed to finish the connection to the stove ELECTRICAL INSTALLATION This stove is provided with a 6 foot grounded electrical cord extending from the rear of the stove We recommend connecting to a good quality surge protector that is plugged into a standard three prong 120V 60Hz elec trical outlet DO NOT connect the unit to a GFCI s...

Page 10: ...stened to the floor of the mobile home through the two holes in the rear of the stove using 2 1 4 lag bolts that are long enough to go through both a hearth pad if used and the floor of the home See figure11 Refer to VENTING for proper exhaust configurations CAUTION THE STRUCTURAL INTEGRITY OF THE MANUFACTURED HOME FLOOR WALL AND CEILING ROOF MUST BE MAINTAINED When installing in a mobile home ens...

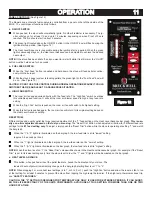
Page 11: ...air fan will return to its original setting based on the Heat Level Advance setting RESET TRIM Different sizes and quality pellet fuel may require adjustment of the 1 feed setting on the Heat Level Advance bar graph This is usu ally a one time adjustment based on the fuel you are using The Reset Trim button when adjusted will allow for 3 different feed rate settings for the 1 feed setting only To ...

Page 12: ... In order to prime the auger press and hold the fuel feed button after starting the unit Keep fuel feed button depressed until pellets begin to fall into the burnpot then release the fuel feed button and allow the unit to operate normally During the start up period 1 DO NOT open the viewing door 2 DO NOT open the damper more than 1 4 3 DO NOT add pellets to the burnpot by hand 4 DO NOT use the Fue...

Page 13: ...an help NOTE To help prevent bridging of pellets common wax paper can be rubbed on the sidewalls and bottom of the hopper b Scrape ashes from burnpot SHUTDOWN PROCEDURE Turning your Breckwell stove off us a matter of pressing the On Off control panel switch The red light will go out The blowers will con tinue to operate until internal firebox temperatures have fallen to a preset level SAFETY FEATU...

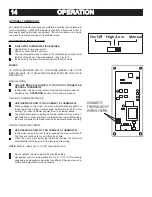
Page 14: ...ATION section of this owner s manual HIGH LOW THERMOSTAT MODE USE THIS MODE ONLY IF YOU CONNECT A THERMOSTAT When engaged in this mode the stove will automatically switch be tween two settings When warm enough it will switch to the 1 or low setting The room air blower will also slow to its lowest speed The Heat Level Advance setting on the bar graph will stay where it was initially set When the ho...

Page 15: ...ire hazard in your home IF ANY EXTERNAL PART OF THE UNIT BEGINS TO GLOW YOU ARE OVERFIREING Immediately press the POWER switch on the control h KEEP ALL LOOSE OR MOVEABLE HOUSEHOLD COMBUSTIBLES SUCH AS FURNITURE DRAPES TOYS ETC AT LEAST THREE FEET FROM THE OPERATING STOVE i Maintain proper ventilation It is important that adequate oxygen be supplied to the fire for the combustion process Mod ern h...

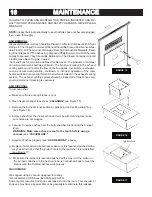
Page 16: ...t in the exhaust venting system The exhaust venting system should be inspected at least once every year to determine if cleaning is necessary ASH DISPOSAL To remove ashes a Make sure fire is out and firebox is cool b Clean heat exchanger tubes see CLEANING and Figure 15 c Remove the burnpots inner section by grasping it and pulling straight up see Figure 16 d Empty ashes from the inner section and...

Page 17: ...N OF PELLETS BURNED UNTIL YOU ARE FA MILIAR WITH HOW ASHES AND CREOSOTE ACCUMULATE WITH YOUR OPERATING PRACTICES Use the small wire brush to also clean the inside of the chamber walls above the access doors Establish a routine for the fuel wood burner and firing technique Check daily for creosote build up until experience shows how of ten you need to clean to be safe Be aware that the hotter the f...

Page 18: ... connection and at the chimney top Cooler surfaces tend to build creosote deposits quicker so it is important to check the chimney from the top as well as from the bottom The creosote should be removed with a brush specifically designed for the type of chimney in use A qualified chimney sweep can perform this service It is also recommended that before each heating season the entire system be profe...

Page 19: ...e sure the ash door is properly latched and the gasket is sealing good If the stove has just a small hole for the ashes to fall through under the burnpot make sure the slider plate is in place to seal off the firebox floor 4 Vent pipe is incorrectly installed Check to make sure vent pipe installation meets criteria in owner s manual 5 The airflow switch wire connections are bad Check the connector...

Page 20: ...haft out of the stove After you have removed the shaft inspect it for bent flights burrs or broken welds Remove any foreign material that might have caused the jam Also check the auger tube for signs of damage such as burrs rough spots or grooves cut into the metal that could have caused a jam 8 The auger motor has failed Remove the auger motor from the auger shaft and try to run the unit If the m...

Page 21: ...ontrol board is not sending power to the igniter Check the voltage going to the igniter during startup It should be a full current If the voltage is lower than full cur rent check the wiring If the wiring checks out good the board is bad SMOKE SMELL COMING BACK INTO THE HOME Possible Causes Possible Remedies 1 There is a leak in the vent pipe system Inspect all vent pipe connections Make sure they...

Page 22: ...auger motor by removing the auger pin Remove the auger shaft inspec tion plate in the hopper so that you see the auger shaft Gently lift the auger shaft straight up so that the end of the auger shaft comes up out of the bottom auger bushing Next remove the two nuts that hold the top auger biscuit in Then rotate the bottom end of the auger shaft up towards you until you can lift the shaft out of th...

Page 23: ...t board malfunction Time the fuel feed light at each setting after the stove has completed the startup cycle Make sure the times match the auger timing chart If the auger motor runs constantly the board is bad 8 Combustion blower is not spinning fast enough Test the RPM on the blower after the blades have been cleaned The RPM should be approximately 3000RPM 9 Bad Pellets Applies to GLASS SOOTS UP ...

Page 24: ... Breckwell pellet stoves If there are signs of other types of fuel being used stop using them immediately 4 Power surge or brown out situation A power surge spike or voltage drop could cause the high limit switch to trip Check to see if a surge protector is being used on the stove If not recommend one to the consumer 5 High limit switch is malfunctioning If the other items checked out ok replace t...

Page 25: ...ELECTRICAL DIAGRAM ELECTRICAL DIAGRAM 25 25 FIGURE 21 ...

Page 26: ...or Gasket C G 050 Door Glass PB Version C D 11000 Door Glass PCA PCNA Version C D 031 Door Glass PWC PWA Version C D 038 Exhaust Adapter 3 C M 050 Exhaust Adapter 4 A 4 VA Gasket Door C G 055 Gasket Combustion Blower Housing to Stove C G 101 Gasket Combustion Blower Motor to Housing C G 105 Hot Rod Igniter C E IGN Thermodisc Proof of Fire C E 090 22C Thermodisc High Temp C E 090 21 Damper Knob C M...

Page 27: ...27 27 ...
Page 28: ...ER WHICH IS ON THE NAMEPLATE ATTACHED TO THE HEATER WHEN ORDERING REPAIR PARTS ALWAYS GIVE THE FOLLOWING INFORMA TION AS SHOWN IN THIS LIST Exceptional Heat Outstanding Value BRECKWELL 227 Industrial Park Road P O Box 151 South Pittsburg TN 37380 800 750 2723 www BRECKWELL com How to Order Repair Parts 1 THE PART NUMBER 2 THE PART DESCRIPTION 3 THE MODEL NUMBER _______________________ 4 THE SERIAL...

Reviews: