Volledige bedieningshandleiding 2
© Bredenoord 2017
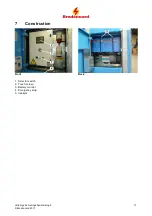
4
2
Safety measures and symbols
Every other use of the ESaver than that described in this user manual, can lead to a dangerous work ing
situation, both for the ESaver and user(s). Bredenoord Aggregaten BV refuses to accept responsibility for any
claim of damage or human harm which has occurred because of not following the instructions in this manual or
by lack of care during use, installation, service, maintenance or repair of the ESaver. It is necessary, before
usage, to read this user manual with care. Always follow the safety instructions! For information regarding
installation, maintenance or repair not included in this manual, please contact Bredenoord Aggregaten BV.
2.1
Safety markings in the text
The safety markings in the text have the following meaning:
BEWARE!
If a comment has additional information, it’s drawing your attention to possible problems or dangers.
WARNING!
Indicates that you can (seriously) injure yourself if you do not carry out the procedures with care.
DANGER!
Indicates that your life is directly threatened if you do not carry out the procedures with care.
2.2
Safety instructions
·
Only start the machine when all safety measures have been observed.
·
The ESaver is only permitted to be operated, serviced, maintained and connected by qualified and
adequately trained personnel that is authorized by the customer.
·
No maintenance, connection, commissioning, usage or other operation before consulting the manual.
·
Switch the ESaver safe before carrying out maintenance, repairs or other jobs.
·
Operate the generator only when all protective parts have been correctly installed (again).
·
Watch out for parts that are under voltage in the electric switchboard cabinets.
·
Only use the ESaver when the emergency stop is visible and accessible.
·
Keep the doors of the room and/or ESaver closed during operation because of cooling, noise and entry.
·
Keep open fires and other combustible elements away from the generator. Also don´t install the ESaver
nearby flammable gasses.
·
Keep a powder fire extinguisher in the direct proximity of the ESaver.
·
Be careful with batteries, very high currents will run when short-circuited.
·
Apply appropriate (personal) safety measures when servicing the ESaver.
·
Do not use the ESaver if your concentration is diminished for example by tiredness or alcohol
consumption.
·
The ESaver is exclusively intended for use as (emergency) power supply. All other usage is seen as
unintended use by the manufacturer and is therefore forbidden.
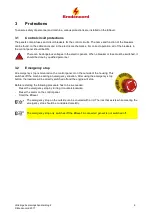
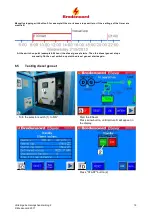
2.3
Safety symbols on the ESaver
In the ESaver are protective measures mounted for electrical parts. When this is not possible due to practical
reasons, warning stickers have been placed. To warn for dangerous situations the following safety symbols can
be used on the ESaver:
Danger! You are close to a life-threatening voltage!