28
GB
Prior to Initial Use / Initial Operation / Operation
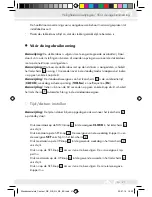
10. Press the SET-Button
4
to confirm your entry. The hundredths place after the comma
will blink.
11. Press the UP-Button
5
until you reach the desired value.
Example: 15,99
12. Press the SET-Button
4
, to confirm your entry.
Note:
As soon as the overload value you entered is exceeded by one of the electrical
devices connected, the
OVER LOAD WARNING
indicator will blink. The button’s
functions are deactivated.
i
Unplug the electrical device from the power strip and if necessary re-set the over-
load warning value.
Q
Initial Operation
q
Putting the Power Strip into Service
i
Plug the power strip’s mains plug into a correctly installed electrical outlet.
i
The LC-display
2
shows the time (
CLOCK
), day of the week, current voltage
(
VOLTac
) as well as the current line frequency (
Hz
). This display combination is
the standard display.
i
Now you can plug the desired electrical devices into the sockets
1
.
Q
Operation
CAUTION! POTENTIALLY FATAL DANGER OF ELECTRICAL SHOCK!
Only perform measurements at voltages of over 25 V~ in compliance with the relevant
safety regulations for the attached electrical devices.
CAUTION! DANGER OF INJURY!
Never exceed the maximum prescribed
input voltage.
Note:
The power factor shows how high the ratio between the real output and apparent
output of an electrical device. The power factor can lie between 0 and 100. In the
ideal case, the power factor will be equal to100.
Note:
You can still access the following functions when the power strip is no longer
Steckdosenleiste_Content_DE_GB_NL_SE_ES.indd 28
23.07.14 13:23
Summary of Contents for EM 235
Page 4: ...4 DE 2 3 4 5 6 1 1 Steckdosenleiste_Content_DE_GB_NL_SE_ES indd 4 23 07 14 13 23 ...
Page 20: ...20 GB 2 3 4 5 6 1 1 Steckdosenleiste_Content_DE_GB_NL_SE_ES indd 20 23 07 14 13 23 ...
Page 34: ...34 Steckdosenleiste_Content_DE_GB_NL_SE_ES indd 34 23 07 14 13 23 ...
Page 36: ...36 NL 2 3 4 5 6 1 1 Steckdosenleiste_Content_DE_GB_NL_SE_ES indd 36 23 07 14 13 23 ...
Page 52: ...52 SE 2 3 4 5 6 1 1 Steckdosenleiste_Content_DE_GB_NL_SE_ES indd 52 23 07 14 13 23 ...
Page 68: ...68 ES 2 3 4 5 6 1 1 Steckdosenleiste_Content_DE_GB_NL_SE_ES indd 68 23 07 14 13 23 ...


