background image

10

About this Instruction Manual

Please read the safety instructions and 
the operating instructions carefully befo-
re use.

Keep these instructions for renewed use at a 
later date. When the device is sold or given 
to someone else, the instruction manual must 
be provided to the new owner/user of the pro-
duct. 

General Warning

 DANGER!

Children should only use the device under 
adult supervision. Keep packaging material, 
like plastic bags and rubber bands, out of the 
reach of children, as these materials pose a 
choking hazard.

Do not expose the device to high tempera-
tures. Excessive heat or improper handling 
could trigger a short-circuit, a fire or an ex-
plosion.

 FIRE RISK!

Do not place the device, particularly the len-
ses, in direct sunlight. The concentration of 
light could cause a fire.

 RISK of ELECTRIC SHOCK!

This device contains electronic components 
that operate via a power source. Children 
should only use the device under adult super-
vision. Only use the device as described in 
the manual; otherwise, you run the risk of an 
electric shock.

 NOTE!

Do not disassemble the device. In the event 
of a defect, please contact your dealer. The 
dealer will contact the Service Centre and can 
send the device in to be repaired, if neces-
sary. 

 Privacy PROTECTION!

The night vision device is intended only for 
private use. Please heed the privacy of other 
people. Do not use them to look into apart-
ments, for example.

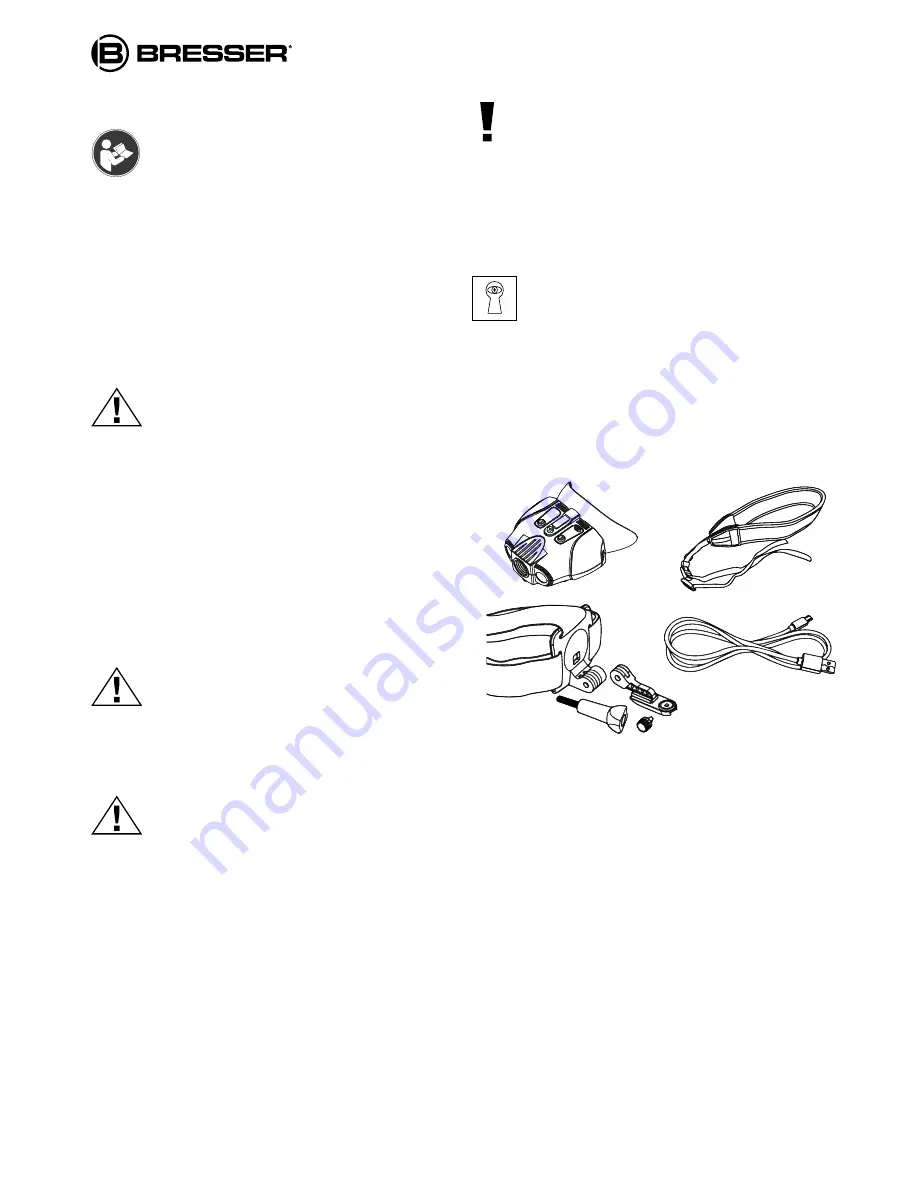
Scope of delivery 

c

b

d

f

g

f


h

e

c

b

d

f

g

f


h

e

Night vision device, Neck strap, Head mount, 
USB cable (for charging), Instruction manual

Summary of Contents for 1877490

Page 1: ...Digital Night Vision Binoculars 1x mit Kopfhalterung with head mount Art No 1877495 DE BEDIENUNGSANLEITUNG 2 EN INSTRUCTION MANUAL 10...

Page 2: ...nes de uso completas sobre este producto en un idioma determinado Entonces visite nuestra p gina web utilizando el siguiente enlace c digo QR para ver las versiones disponibles PT Deseja um manual det...

Page 3: ...Setzen Sie das Ger t speziell die Linsen keiner direkten Sonneneinstrahlung aus Durch die Lichtb ndelung k nnten Br nde verursacht werden GEFAHR EINES STROMSCHLAGS Dieses Ger t beinhaltet Elektronikt...

Page 4: ...7 Helligkeitsstufen 0 1 2 3 4 5 6 7 0 bei Verwendung in der Nacht d ZOOM Dr cken Sie ZOOM zum Vergr ern Der maximale Zoom ist 2X Bei Erreichen von 2X dr cken sie ZOOM ein weiteres Mal um wieder auf 1...

Page 5: ...rfeinstellungsrad h Aufladen des Ger ts 1 USB Deckel ffnen 2 Schlie en Sie das USB Kabel zum Aufladen an Die Ladezeit betr gt ca 3 Stunden 3 Sie k nnen das Ger t auch mit einer mobilen Powerbank betre...

Page 6: ...seite vor 3 Bei Nachtbeobachtung aktivieren Sie die Infrarotbeleuchtung durch dr cken der IR Taste Erh hen Sie die Helligkeit indem Sie die Taste wiederholt dr cken Es gibt 7 Helligkeitsstufen 0 1 2 3...

Page 7: ...g besteht aus 4 Einzelteilen Schieben Sie A in die Montagevorrichtung auf der Oberseite des Nachtsichtger ts Sichern Sie A mit der Schraube B fest an Verbinden Sie A mit der Kopfhalterung D Sichern Si...

Page 8: ...r Staub und Feuchtigkeit EG Konformit tserkl rung Eine Konformit tserkl rung in bereinstimmung mit den anwendbaren Richtlinien und entsprechenden Normen ist von der Bresser GmbH erstellt worden Diese...

Page 9: ...DE 9...

Page 10: ...FIRE RISK Do not place the device particularly the len ses in direct sunlight The concentration of light could cause a fire RISK of ELECTRIC SHOCK This device contains electronic components that opera...

Page 11: ...R for 7 levels of brightness 0 1 2 3 4 5 6 7 0 when using the binoculars at night d ZOOM Press ZOOM to zoom in at multiple levels The maximum zoom is 2X Once reaching 2X keep pressing ZOOM to go back...

Page 12: ...12 h Focus Wheel h Charging the device 1 Open the USB cover 2 Connect the USB cable for charging The charging time is about 3 hours 3 You can also operate the device with a mobile power bank g f h...

Page 13: ...heel at the front bottom 3 For night use turn on the IR by pressing the IR button Increase the brightness by pressing the button repeatedly It has 7 levels of brightness 0 1 2 3 4 5 6 7 0 4 Long press...

Page 14: ...mbly The head mount consists of 4 parts Slide A into the mounting fixture on the top of the night vision device Secure A with the screw B firmly Connect A to the head mount D Secure both elements usin...

Page 15: ...e cleaning cloth Protect the device from dust and moisture EC DECLARATION OF CONFORMITY Bresser GmbH has issued a Declaration of Conformity in accordance with applica ble guidelines and corresponding...

Page 16: ...tailed instructions for this product in a particular language Then visit our website via the link below QR code for available versions Alternatively you can also send an email to manuals bresser de or...

Page 17: ...trarse en nuestra p gina web Las condiciones de garant a completas as como informaciones relativas a la ampliaci n de la garant a y los servicios pueden encontrarse en www bresser de warranty_terms De...

Page 18: ...18...

Page 19: ...19...

Page 20: ...ngen vorbehalten Errors and technical changes reserved Manual_1877495_Digital NV Bino 1x_de en_BRESSER_v042018a Bresser GmbH Gutenbergstr 2 DE 46414 Rhede Germany www bresser de service bresser de Bes...

Reviews: