Imprint | 11
IM_4670350_de_en_BRESSER_v1016
17 / 21
11 Mounting the OTA on the tripod
NOTICE
Save the OTA when installing it.
Save the OTA always with one hand when installing it! It can cause serious damage if the device is
falling down.
1. Press the locking lever for the tripod head plate and move to FREE position and take the plate out
of the holder at the same time.
2. Pull out the eyelet of the threaded bolt at the bottom side of the tripod head plate.
3. Screw the threaded bolt of the tripod head plate into the mounting connection of the OTA to attach
the plate to the OTA. Make sure that the fixing pin is reaching into the corresponding drill.
4. Press the and hold the locking lever in position FREE and put the OTA with the attached tripod
head plate into the holder. Make sure that the objective lens is pointing to the opposite side of the
handle.
5. Press the locking lever to position LOCK.
12 Installing accessories
1
2
3
4
5
7
8
9
6
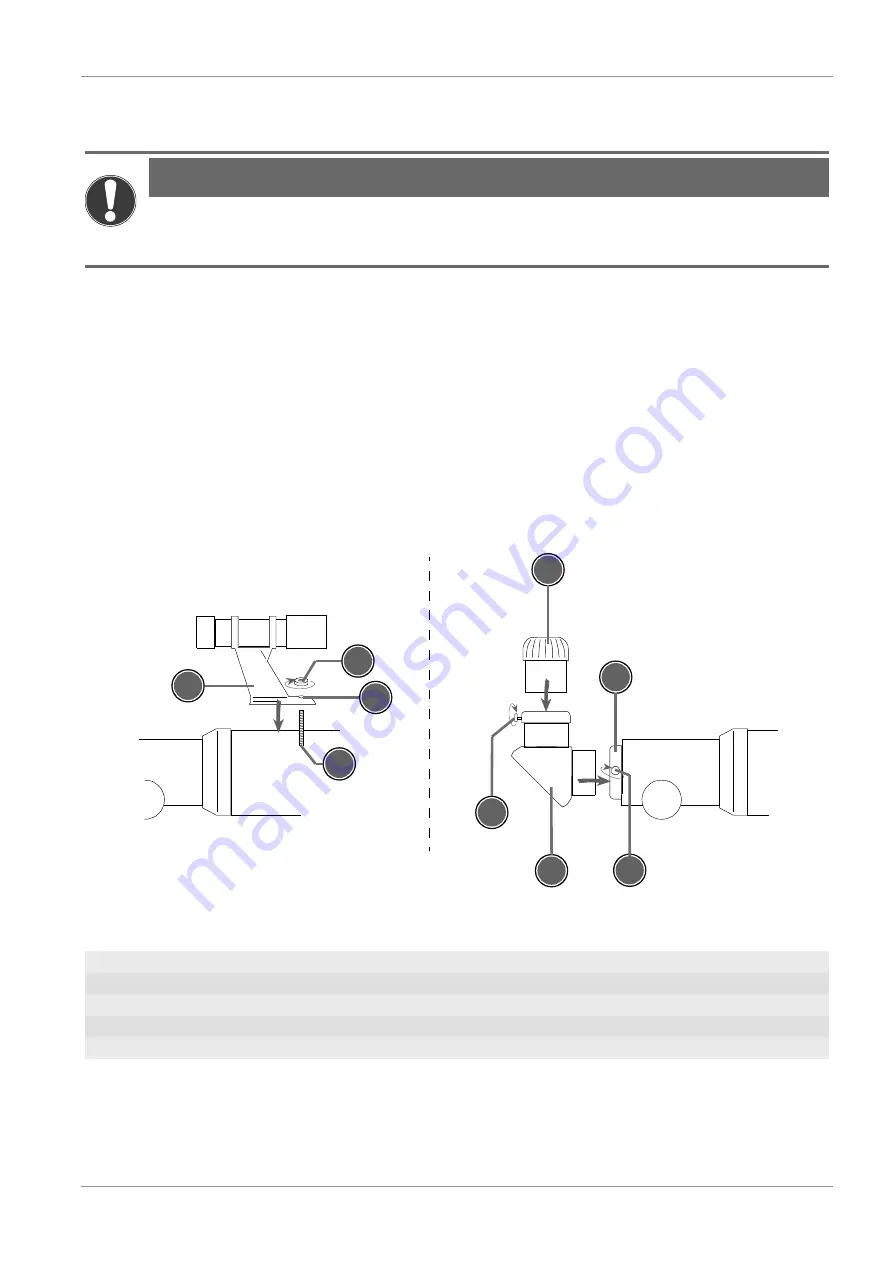
Illustration 2:
Achromat - attaching accessories
1 Bracket (Viewfinder)
2 Fixing screw (Viewfinder bracket)
3 Drill (Foot bracket)
4 Threaded bolt (OTA)
5 Eyepiece
6 Fixing screw (Amici prism)
7 Amici prism
8 Eyepiece holder
9 Fixing screw (Eyepiece holder)
1. Loosen fixing screw.
2. Insert the desired accessory into the eyepiece holder.
3. Tighten the fixing screw by hand that the accessory ist fixed in a secure way.


