


8 / 16
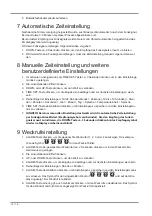
7 Automatic time setting
After the power is restored, the unit automatically searches for the radio signal. It takes about 3-8
minutes to complete this process.
If the radio signal is received correctly, the date and time are set automatically and the reception sym-
bol is displayed.
If no radio signal is received, proceed as follows:
1. Press the DOWN button for approx. 2 seconds to initiate the reception of the radio signal again.
2. If no radio signal is still received, the time setting must be made manually.
8 Manual time setting and other user defined
settings
1. In normal display mode, press the TIME SET button for about 3 seconds to enter the settings
mode.
2. Digits to be set are flashing.
3. Press UP or DOWN button to change the value.
4. Press the CLOCK-SET button to confirm the entry and move to the next setting.
5. Sequence of settings: 12/24 hour mode > Time zone (-12 to +12 hours) > Hours > Minutes >
Seconds > Year > Month > Day > Language > Temperature unit > Language
6. Finally press the CLOCK-SET button to save the settings and exit the settings mode.
7.
NOTICE! If the unit is set manually, the automatic time setting is deactivated by radio signal
(reception symbol disappears). To initiate the reception of the radio signal again, press the
DOWN key for approx. 3 seconds until the reception symbol reappears in the display and
flashes.
9 Alarm setting
1. Press the ALARM button to display the desired alarm type 1, 2, 3 or 4. The corresponding wake-
up call icon
flashes.
2. Press the ALARM button for approx. 2 seconds for the desired alarm type to enter the alarm time
setting mode.
3. Digits to be set are flashing.
4. Press UP or DOWN button to change the value.
5. Press the CLOCK-SET button to confirm the entry and move to the next setting.
6. Sequence of settings: Hours > minutes
7. Finally, press the CLOCK-SET button to save the settings and exit the setting mode. The icon
for the set wake-up call is shown on the display. The wake-up call is activ-
ated.
8. Press the ALARM button again, or repeatedly if necessary, to deactivate the wake-up call. The
wake-up call icon is no longer displayed. The alarm call is deactivated.
10 Disposal
Dispose of the packaging materials properly, according to their type, such as paper or card-
board. Contact your local waste-disposal service or environmental authority for information
on the proper disposal.
Summary of Contents for 7001801
Page 3: ...English 4 Deutsch 10...


