background image

A section of almost any material can be 

placed on a slide and observed with a 

microscope. All you need is the proper 

equipment and a little patience, and you’ll 

be making slides in no time.

Everything you need for the following 

experiments can be found in this kit or 

around your home (make sure to ask a 

parent first before you borrow any of his or 

her items, such as the measuring cup).

Locate the follow items:

• Petroleum jelly

• Wide mouth jar and lid

• A measuring cup

• Paper towels

• A potato, uncooked corn kernels, an 

apple, and

other foods

• 3 or 4 paper cups, or any small contain

-

ers which can be discarded after use.

Next, set up your work area: the kitchen 

table (make sure to ask a parent for his 

or her permission), the desk in your room 

or any place where you can work undis-

turbed.

Label 3 of your cups: clean, flush, and 

waste. Fill the flush cup with clean wa

-

ter. Next, you will obtain a specimen and 

make your first slide.

Want to See Crystals?

Use the measuring cup to measure one or 

two ounces of hot (but not boiling) water 

and pour it into the clean cup. Slowly add 

as much table salt to the water as will dis-

solve. Stir the solution with the stirring rod 

(C, Fig. 1) while adding the salt. Use the 

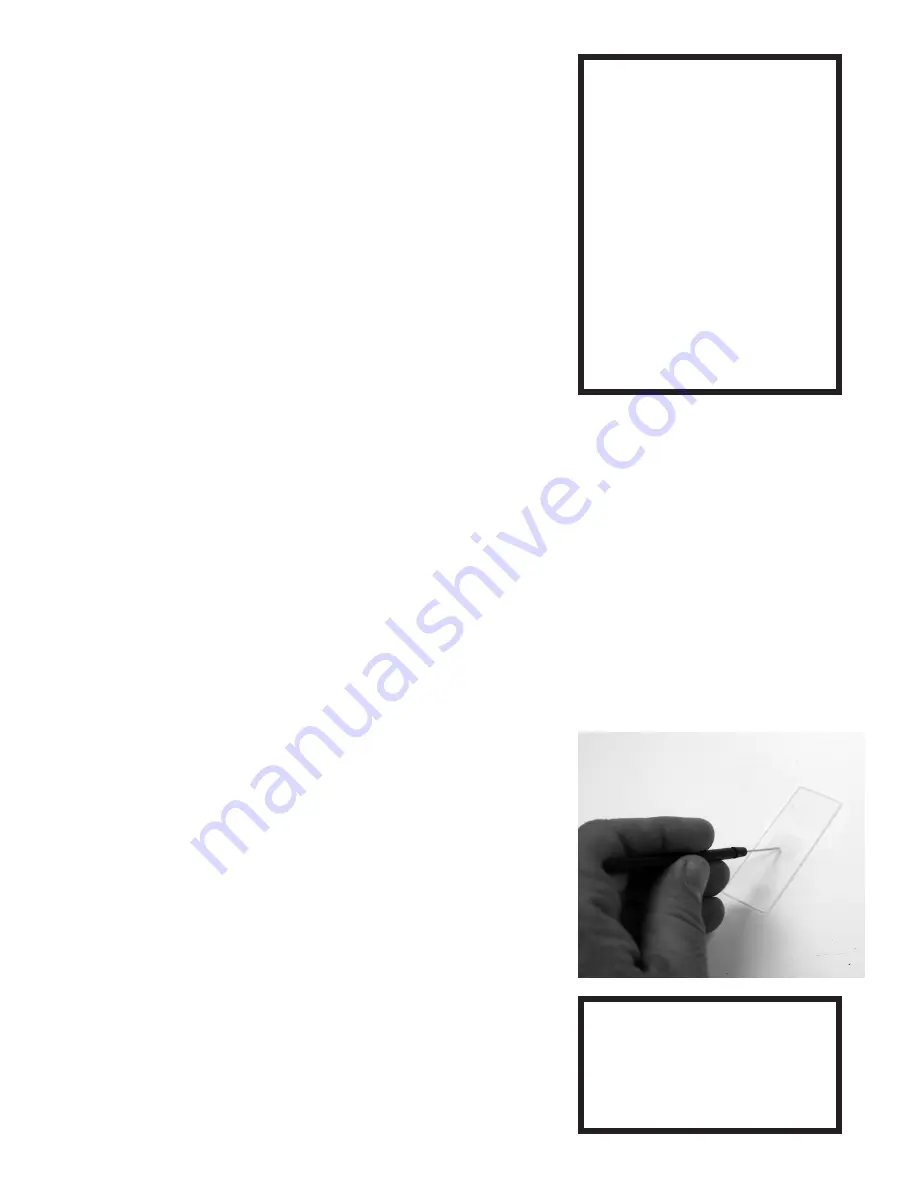
needle (B, Fig. 1) to carefully place one or 

two drops of the salt solution onto a clean 

slide (Fig. 5).

CAUTION: The needle has a very sharp 

point. Always use caution while handling 

it. Allow the slide to dry. The slide will dry 

covered with a white substance. Place the 

slide onto the microscope stage. Rotate 

the light source of the microscope until it 

turns on. Before reading any further, look 

through the microscope eyepiece and 

write down what you observe.

TIP:

  Don’t  always  assume 

that increasing magnification

will  produce  the  best  image 

for viewing.

Each  time  you  increase  in 

magnification,  the  amount 

of  light  decreases,  and  the 

section of the image you are 

able to view also decreases. 

This  is  desirable  for  some 

specimens, but not for others. 

Experiment  observing  with 

all  three  objectives  for  all 

specimens  until  you  get  a 

feel for magnification

Fig. 5: Use the needle to 

place a drop of water on a 

lean slide.

Need Help? Toll Free 866-252-3811

Summary of Contents for 900x

Page 1: ...900x Microscope Need Help Toll Free 866 252 3811 ...

Page 2: ... Contains instruments and other materials with sharp points and edges SAFETY INFORMATION General First Aid Information a In case of eye contact Wash out eye with plenty of water holding eye open if necessary Seek immediate medical advice b If swallowed Wash out mouth with water drink some fresh water Do not induce vomiting Seek immediate medical advice c In case of inhalation Remove person to fres...

Page 3: ...tage the brighter and sharper the images will appear in the microscope eyepiece Accessories A Scalpel B Needle C Stirring Rod D Graduated Cylinder E Collecting Vials F Tweezers G Slide Covers and Labels H Replacement Light Bulb I Prepared Blank Slides J Micro slicer K Petri Dish L Fenazo Blue Dye M Eosin Red Dye N Sea Salt O Brine Shrimp Eggs P Shrimp Hatchery Q Cover Slips under box of slides Nee...

Page 4: ... eyepiece 10X you will magnify the object by 900 times note that the power indicator reads 900 This means that the object appears 900 times larger than it appears to the naked eye Gently turn the power indicator on the objective turret U Fig 1 You will feel and hear the objectives lens click into place Practice turning the focus knob R Fig 1 in both directions and notice how far you can turn it wi...

Page 5: ...turn the focus knob so that the objective lens does not make contact with a slide or the stage This may cause damage to the slide and also to the objec tive lens Now that you ve studied the fea tures of your microscope its time to take it out for a test drive and try out a simple observing exercise 1 Rotate the focus knob R Fig 1 and raise the body tube S Fig 1 as far as it will go Turn the tu ret...

Page 6: ... of the prepared slide Next take a blank slide and place a few grains of salt or sugar on it Rotate the filter and see how the filtered light enhances the image of the salt or sugar Tip Use the color filter especially when looking at clear or dim specimens The Brine Shrimp Hatchery Brine shrimp are tiny crustacean that are ideal for study with a microscope Crustacean are sea creatures with hard sh...

Page 7: ...hatchery P Fig 1 3 Place some fresh brine solution in an other compartment Add a small amount of yeast to this new solution Then us ing an eyedropper transfer some of the larvae into this compartment as well The yeast will serve as food and produce oxygen for the larvae as they develop into maturity Without food and oxygen the shrimp cannot develop and will die Mature brine shrimp are known as Art...

Page 8: ...measure one or two ounces of hot but not boiling water and pour it into the clean cup Slowly add as much table salt to the water as will dis solve Stir the solution with the stirring rod C Fig 1 while adding the salt Use the needle B Fig 1 to carefully place one or two drops of the salt solution onto a clean slide Fig 5 CAUTION The needle has a very sharp point Always use caution while handling it...

Page 9: ...t it dry overnight for the crystals to form Preparing a Mount Dip your scalpel A Fig 1 in some clean water and make a smear across a clean slide Use your tweezers F Fig 1 to place a portion of an insect a wing a leg or an antenna on the slide Attach a cover slip Q Fig 1 over the specimen and place the slide on the microscope stage Obtain a piece of hair from your head and place it on a wet slide T...

Page 10: ...described previously Do not place any water or a cover slip on the specimen Set the slide aside to dry if necessary When the slide is dry use the needle to place one drop of Eosin Dye or Fenazo Blue Dye M L Fig 1 on the slide Both the Eosin and Fenazo Blue Dye will stain your specimen Tilt the slide from side to side to spread the stain over the specimen Remove the excess fluid to the waste cup Pu...

Page 11: ...are very difficult to make without special equipment and proce dures However there is one common household item which can be sectioned without special equip ment the common onion made up of layers of tissue Peel off the very thinnest layer you can One that is nearly transparent will make an ideal section Slice into a piece about 1 4 x 1 4 inch 7 x 7 mm Put two drops of Eosin Red Dye or Fenazo Blue...

Page 12: ...little bit of water with a corner of a paper towel Remember you can make a specimen slide out of almost any material When you are on a play ground at school in a park or just sitting around at home train yourself to look at all the material around you Keep an eye out for what might make a good specimen and discover the hidden micro scopic world that surrounds us all Note Your set contains both gla...

Page 13: ...roscope away Do not use anything except lens cleaning tissue to clean the lenses Never touch a slide with the objective lenses of the turret Remove the batteries before storing the micro scope for a month or longer Remember you can make a specimen slide out of almost any material When you are on a playground at school in a park orjustsittingaroundat home train yourself to look at all the material ...

Reviews: