8 / 28
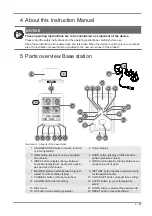
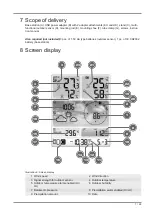
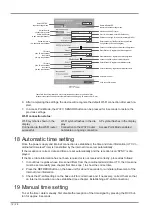
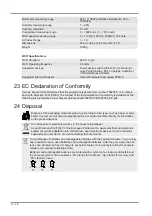
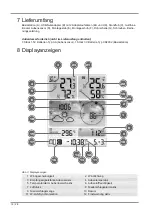
11 WIFI synchronization
12 Ice alert enabled
13 Wake-up alarm enabled
14 Current time
15 Temperature felt
16 Moon phase
17 Weekday
18 Graphical weather trend display
19 Indoor humidity
20 Comfort indicator (climate)
21 Indoor temperature alarm enabled
22 Indoor temperature
23 Trend arrow (rising, constant or falling)
9 Before starting operation
NOTICE
Avoid connectivity disruptions!
To avoid connectivity disruptions between the devices, consider the following points before starting
operation.
1. Place base station (receiver) and remote sensor (sender) together as close as possible.
2. Set up power supply for the base station and wait until the indoor temperature is displayed.
3. Set up power supply for the remote sensor.
4. Position the base station and the remote sensor within the effective transmission range.
5. Ensure that the base station and remote sensor are assigned to the same channel.
When changing batteries always change batteries in the main unit as well as all remote units and re-
place them in the correct order, so the remote connection can be re-established. If either of the
devices is mains-powered, the power supply must be disconnected for a short moment also for this
device when exchanging the batteries. If batteries are exchanged in only one of the devices (i.e. the
remote sensor) the signal can’t be received or can’t be received correctly.
Note, that the effective range is vastly affected by building materials and position of the main and re-
mote units. Due to external influences (various RC devices and other sources of interference), the
maximum distance can be greatly reduced. In such cases we suggest to position the main unit and the
remote sensor at other places. Sometimes all it takes is a relocation of one of these components of a
few inches!
10 First Steps
Follow the bullet points in order, to ensure a successful setup.
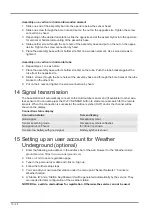
• Setting up power supply (base station and wireless sensor)
• Mount the remote sensor
• The base station is now in AP mode (LED flashes green) and ready for initial setup.
• Create a Weather Underground account and add the station to your account ("My Profile" / "Add
Weather station"). Here you will receive a station ID and a password, which will be needed in the next
step.
• Setting up the base station (Estabish Wi-Fi / Router connection)
• Viewing weather data via web, mobile or tablet
11 Setting up power supply
Base unit
1. Push the appropriate plug adapter attachment onto the spigot on the mounting plate of the USB
power adapter until it snaps into place.
2. Plug the MicroUSB plug into the USB connection socket on the base unit.

