background image

INITIAL SETUP

EN

BIOS

Important note

Please note that you cannot access the BIOS without an external keyboard. Therefore, connect a 
USB keyboard before commissioning the SCORPION 6”. You can use the included USB-OTG cable 
from the accessories to use a USB hub, mouse and keyboard. Alternatively, you can also use a USB 
hub with an integrated LAN port, which is used for imaging and more.


Please note that in this case the device cannot be charged at the same time.

 We recommend the use 

of a docking station to ensure a constant power supply during the initial setup.

Setup function key

For Windows 10 OS

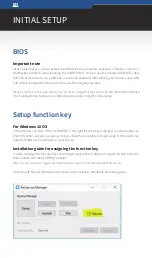
In the Windows version of the “SCORPION 6”, the right function key (scan key) is permanently set. 
The left function key has no purpose, but you have the possibility to freely assign it. Either with the 
barcode reader or an application of your choice.

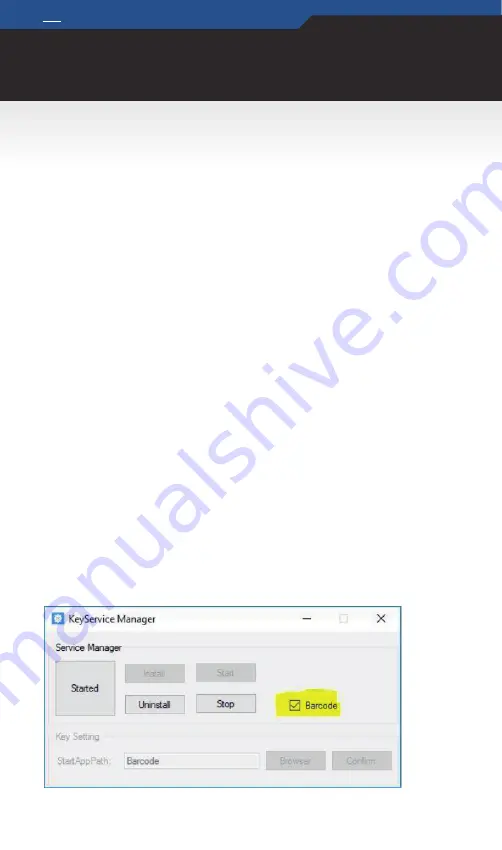
Installation guide for assigning the function key

In order to assign the function keys according to your wishes, software is required which has to be 
downloaded from the SCORPION website:

https://www.scorpion-rugged.de/downloads/scorpion-6-funktionstastensoftware.zip

Unzip the ZIP file and follow the instructions in the included installation and setup guide.

Summary of Contents for SCORPION 6

Page 1: ...indows 10 IoT For more information about the product and a detailed description please visit https www scorpion rugged de en products scorpion 6 BRESSNER Technology GmbH Industriestrasse 51 82194 Groe...

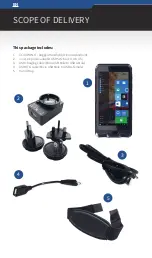
Page 2: ...ackage includes 1 SCORPION 6 Rugged Handheld Windows Android 2 3 in 1 AC power adapter USB 5V 2 5A EU UK US 3 USB charging cable Micro USB Male to USB A Male 4 USB OTG cable Micro USB Male to USB A Fe...

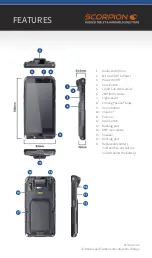
Page 3: ...nt camera 7 Light sensor 8 Corning Gorilla Glass 9 Home button 10 Volume 11 Volume 12 Scan button 13 Docking port 14 8MP rear camera 15 Speaker 16 Docking port 17 Replaceable battery SIM and SD card s...

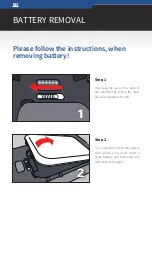
Page 4: ...emoving battery 2 Step 1 First open the lock on the back of the handheld by sliding the latch above the battery to the left Step 2 Then carefully remove the battery with a lever or by hand Insert a sp...

Page 5: ...the left side After removing the battery insert the micro SIM card into its designated slot see illustration until it locks in Please make sure that the gold contacts of the SIM card are on the bottom...

Page 6: ...n to ensure a constant power supply during the initial setup Setup function key For Windows 10 OS In the Windows version of the SCORPION 6 the right function key scan key is permanently set The left f...

Page 7: ...the scanner These programming codes can be scanned directly from the User s Guide To do this follow the instructions in each chapter At the end of the manual you will also find a Programming Chart wit...

Page 8: ...lling out the form and returning it You can find the form on our website at https www bressner de en rma Contact our RMA department on weekdays from 8AM 5PM by phone 49 8142 47284 24 Where do I find m...

Page 9: ...ties with new versions Security updates and patches are performed via Windows update or manual installation Software update from LTSB LTSC to standard Win10 version not possible only by new licensing...

Page 10: ...nt and voltage rating to prevent damage to the device If you use an universal charger consider the polarity of the charger as well as the current and the voltage rating Do not unplug the charger from...

Reviews: