background image

Important Information

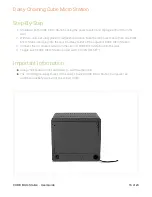
Be sure to wrap each adapter as efficiently as possible to make the most out of the space
provided for the adapters.
Cables that are not plugged into devices can rest in the front lower pocket of the tray to stay
out of the way of the door.
When toggled ON and connected, the power switch will light up to indicate the CUBE Micro
Station is powered.

NOTE

 - The middle divider is not intended for use with a device as it would rest on the

separation between the two Device Modules. This product is only designed for use with ten
(10) devices.

CUBE Micro Station - User Guide

11 of 23

Summary of Contents for CUBE TVS10AC

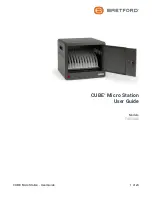
Page 1: ...CUBE Micro Station User Guide Models TVS10AC CUBE Micro Station User Guide 1 of 23...

Page 2: ...of your product including tools and setup instructions required to begin using new product as quickly as possible Using Your Product A collection of articles photos and videos showing how to use your...

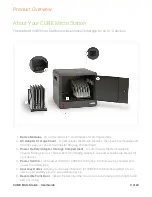
Page 3: ...dapter Storage Compartment Located below the Removable AC Adapter Storage Cover This is where AC charging adapters and power cables are stored for your devices 4 Power Switch Turns power on off for CU...

Page 4: ...es should not exceed the size of a 14 laptop Mounting hardware is not included Vertical stacks shall not exceed two 2 CUBE Micro Stations Daisy chain feature not available when mounted to the wall Dev...

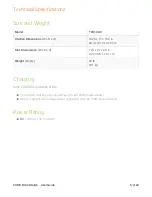
Page 5: ...mensions W x D x H 1 25 x 14 x 9 9 in 3 2 x 35 6 x 25 1 cm Weight Empty 40 lb 18 1 kg Charging Each CUBE Micro Station offers Ten 10 AC outlets each supporting up to an 100W power adapter One 1 extern...

Page 6: ...5 Unit Device Modules Two 2 Door Lock Keys One 1 Stacking Brace Plate Wall Mounting Kit One 1 Wall Mount Adapter pre installed on CUBE Micro Station One 1 Wall Mount Plate Two 2 Mount Locking Screws W...

Page 7: ...Cord Kit QTY 10 Allows you to support non standard AC power adapters For instance large wall wart type adapters that could cover one or more of the adjacent AC power outlets in the Adapter Storage Com...

Page 8: ...rtant Mounting hardware not included WARNING For safety and ease of installation use a qualified professional to properly install the correct mounting hardware for your specific wall surface Failure t...

Page 9: ...o Station out of the cardboard box 3 Set the CUBE Micro Station on a flat surface 4 Using the keys provided unlock and open the front door 5 Locate and remove both Device Modules from inside the CUBE...

Page 10: ...e of the ten 10 AC outlets 6 Carefully route each power cable through the tray and out through a corresponding hole on the lower front portion of the unit 7 Replace the AC Adapter Storage Cover making...

Page 11: ...ront lower pocket of the tray to stay out of the way of the door When toggled ON and connected the power switch will light up to indicate the CUBE Micro Station is powered NOTE The middle divider is n...

Page 12: ...ng the back interior wall of the station 8 Using the Mount Locking Screws provided fasten the CUBE Micro Station to the mounting plate to prevent the station from being lifted off the mounting plate 9...

Page 13: ...cabinet from being removed from the wall Bretford will not be liable for the improper use or installation of its products CUBE Micro Station User Guide 13 of 23...

Page 14: ...BE Micro Station onto the other CUBE Micro Station 5 Once stacked use the Stacking Brace Plate to secure each CUBE Micro Station together with the four 4 Torx T 25 screws you set aside when removing t...

Page 15: ...CUBE Micro Station User Guide 15 of 23...

Page 16: ...ug into the rear Courtesy Outlet of the adjacent CUBE Micro Station 3 Connect the AC power cable from the second CUBE Micro Station into the wall 4 Toggle each CUBE Micro Station power switch to ON RE...

Page 17: ...it locate and remove the three 3 screws that secure the door in place 3 Flip the door 180 degrees 4 Carefully line up the three 3 holes in the hinge with the three 3 pre drilled holes on the opposite...

Page 18: ...E LAW A BRETFORD IS NOT LIABLE FOR ANY DIRECT INDIRECT INCIDENTAL OR CONSEQUENTIAL DAMAGES ARISING OUT OF THE USE OR SERVICE OF THE PRODUCT B THE WARRANTY AND REMEDIES DESCRIBED ABOVE ARE EXCLUSIVE AN...

Page 19: ...mber and date of manufacture of the unit you are making the claim on Model number serial number and date of manufacture can all be found on the Bretford label inside the product Bretford s Customer Su...

Page 20: ...unit Do not plug the unit in if the switch or power cord has been damaged Unplug unit from the wall before moving to a different location Only transport device to a different location if door is secur...

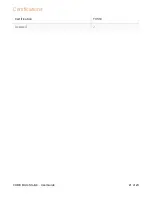
Page 21: ...Certifications Certification TVS10 UL Listed CUBE Micro Station User Guide 21 of 23...

Page 22: ...0 PM CST Telephone 1 800 521 9614 Email customerservice bretford com Bretford CUBE CUBE Micro and the B design are trademarks or registered marks of Bretford Manufacturing Inc Patents pending All righ...

Page 23: ...11000 Seymour Avenue Franklin Park Illinois 60131 USA Toll Free Phone 866 866 4758 Phone 847 678 2545 Toll Free Fax 800 343 1779 Fax 847 678 0852 CUBE Micro Station User Guide 23 of 23...

Reviews: