background image

Document # 99300 RevA 

14 

Printed in USA © 2008

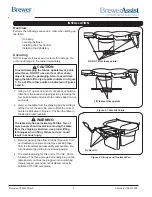
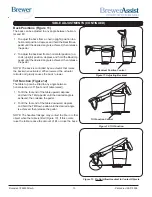
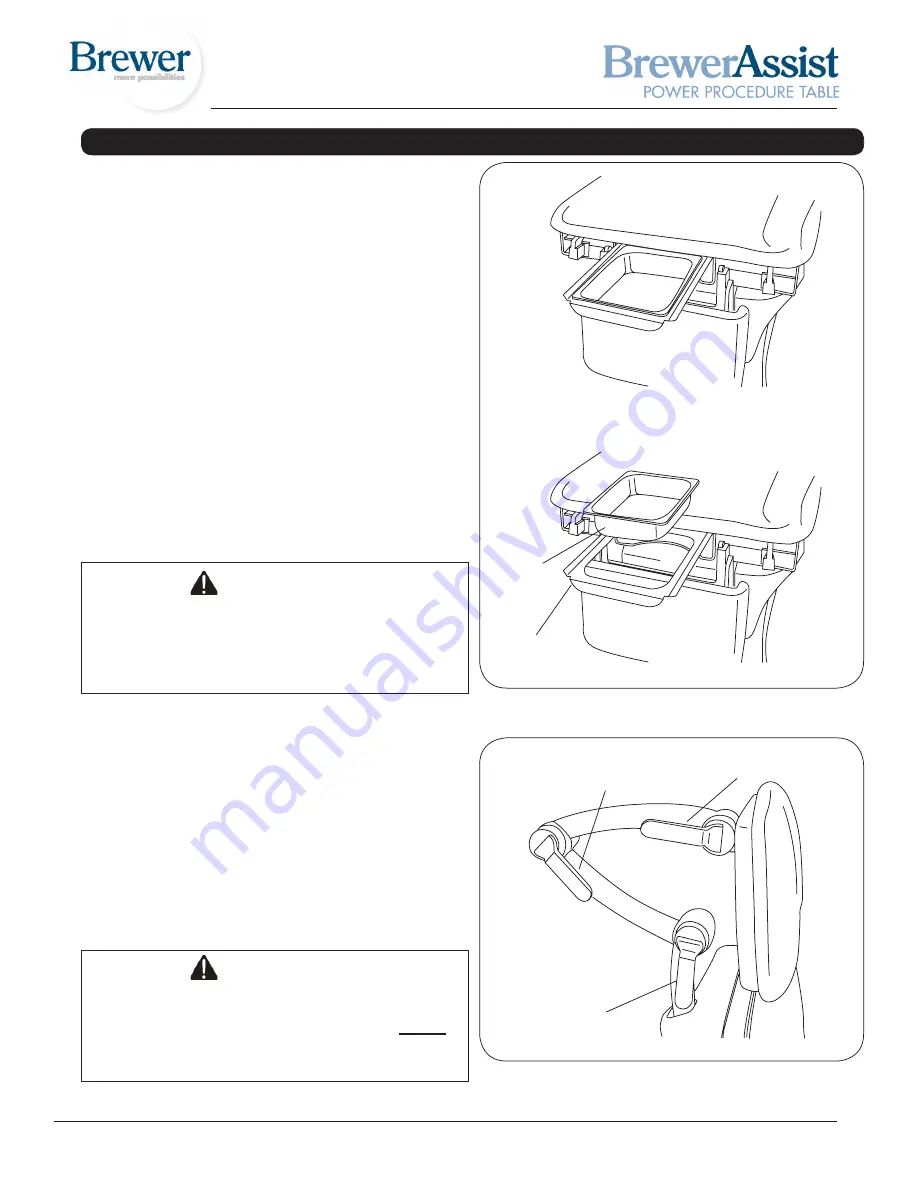
Figure 21. Treatment Pan

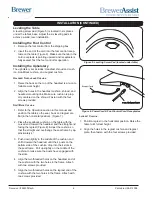
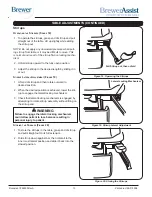
Figure 22. Headrest Handles

Treatment Pan (Figure 21)

NOTE: A safety switch prevents operation of the foot 

function when the treatment pan tray is extended. This 

prevents the legrest from contacting the treatment pan 

tray. If the legrest is inoperable, check to ensure that the 

treatment pan tray is in its fully stowed position (inward). 

A light clicking sound will be heard just before the treat-

ment pan reaches its fully stowed position.

 1.  To expose the treatment pan for use, grasp the tray 

handle and pull until tray is fully extended (Figure 21).

 2.  The pan can be easily removed for cleaning with 

the tray fully extended. Fully seat pan into tray when 

clean.

 3.  Push the tray handle as far in as it will go to fully stow 

the treatment pan after use. A light clicking sound will 

be heard just before the pan reaches its fully stowed 

position.

Headrest Positions (Figure 22)

WARNING

Make sure headrest is securely locked into position 

before use. Failure to have the three handles cor-

rectly locked could result in headrest falling during 

a procedure which could result in serious personal 

injury.

 1.  To move the headrest, rotate the three handles to 

their open position. Move the headrest to its desired 

location.  Rotate the 3 handles to their locked position 

as shown in Figure 22.

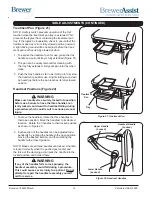
 2.  Each section of the headrest can be adjusted inde-

pendently by rotating the handle to the open position, 

moving the desired section, and then rotating the 

handle to the closed position.

NOTE: Make sure all three handles are locked. A handle 

is locked correctly when it is pushed past center and 

the force of the clamping action pulls the handle into the 

locked position and holds it there.

WARNING

If any of the handles fails to lock properly, the 

headrest assembly could fall during a procedure. 

This could cause severe injury to a patient. Do not 

attempt to repair the headrest assembly yourself; 

call for service.

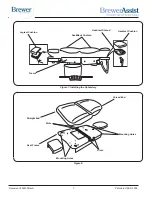
TABLE ADJUSTMENTS (CONTINUED)

Headrest Handle 

(Locked)

Upper Handle 

(Locked)

Lower Handle 

(Locked)

Tray

Treatment  

Pan

Summary of Contents for ASSIST 7000

Page 1: ...The Brewer Company ASSIST Powered Medical Examination Table Model 7000 Important Information 2 Safety Information 3 Component Identification 3 Specifications 4 Electrical Requirements 4 Installation...

Page 2: ...adjustable headrest stirrups and treatment pan create a safe and convenient patient positioning table for most examinations and proce dures performed in the doctor s office The table is easily adjuste...

Page 3: ...n The primary concern of The Brewer Company is that the equipment is operated and maintained with the safety of the patient and healthcare staff in mind To ensure safe and reliable operation Read and...

Page 4: ...pe of protection against electrical shock B applied parts Type of protection against ingress of water Ordinary Can accept paper rolls of 18 in x 3 0 in 21 in x 3 0 in Certifications UL6060 1 UL2601 1...

Page 5: ...from the shipping skid by sliding it off the front of the skid Be sure to lift at the correct points as indicated in Figure 3 Position the table in the desired room location WARNING The table weighs a...

Page 6: ...ion the table so the seat back and legrest are flat in the horizontal position Figure 7 2 Place the seat back cushion on the table with the curved end toward the headrest and the straight end facing t...

Page 7: ...A 7 Printed in USA 2008 Figure 7 Installing the Upholstery Headrest Cushion Frame Legrest Cushion Headrest Shroud Seat Back Cushion Figure 8 Straight End Curved End Seat Frame Mounting Holes Slots Mou...

Page 8: ...tion call for service Do not attempt to repair table yourself WARNING Before initiating power keep personnel and equip ment clear of the table movement to avoid person al injury or equipment damage OP...

Page 9: ...upward TABLE DOWN Lowers the entire table downward TABLE ADJUSTMENTS Figure 10 Table Height Positioning Table Height Control Table Height Figure 10 The table top can be adjusted to any height between...

Page 10: ...table reduce the amount of tilt or raise the back Figure 12 Tilt Function Figure 11 Adjusting Backrest Backrest Position Control Figure 13 Do Not Allow Headrest to Contact Objects Back Positions Figur...

Page 11: ...e treatment pan tray If the legrest is inoperable check to ensure that the treat ment pan tray is in its fully stowed position inward A light clicking sound will be heard just before the treatment pan...

Page 12: ...otation stops 3 Slide the legrest downward and rotate the cushion downward to engage the stop Two height positions are provided TABLE ADJUSTMENTS CONTINUED Paper Roll Figure 17 To change a paper roll...

Page 13: ...en rotate outward to desired position 2 When the desired position is achieved lower the stir rup to engage the lateral locking mechanism 3 Check that lateral locking mechanism is engaged by attempting...

Page 14: ...22 WARNING Make sure headrest is securely locked into position before use Failure to have the three handles cor rectly locked could result in headrest falling during a procedure which could result in...

Page 15: ...d dealer inspect your table every 6 months Fuse Replacement WARNING Disconnect power by removing plug from the 115V outlet before changing fuses 1 Remove Seat Back upholstery shown in Figure 7 2 Locat...

Page 16: ...TY AND OR FITNESS FOR A PARTICULAR PURPOSE NO AGENT EMPLOYEE OR REPRESENTATIVE OF THE BREWER COMPANY HAS ANY AUTHORITY TO MAKE ANY AFFIRMATION REPRESENTA TION OR WARRANTY NOT SET FORTH IN THESE TERMS...

Reviews: