Adjusting The Timer:
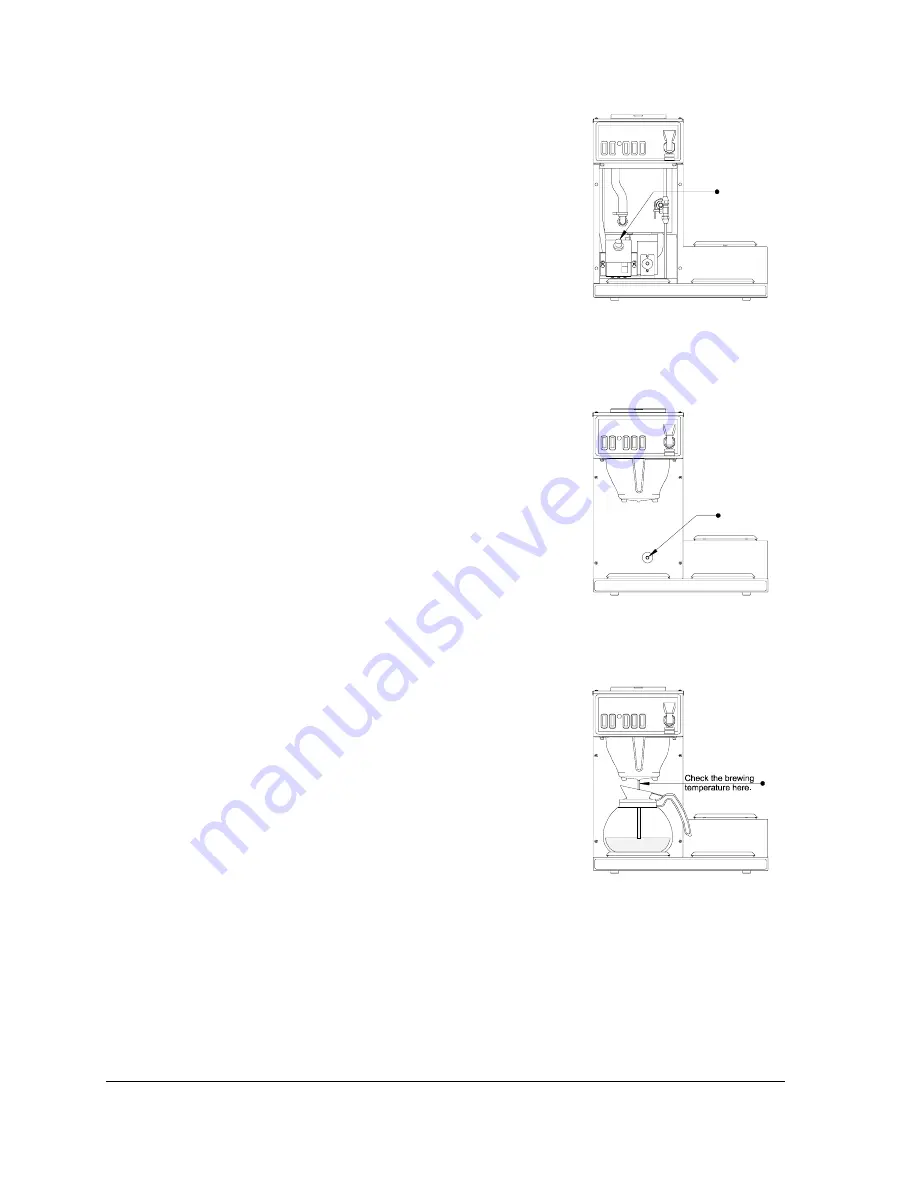
(See fig. 29)
Fig. 29.
Timer adjustment.
1.
Remove the front access panel.
(Fig. 26, item 2)
.
2.
Turn the timer adjustment knob clockwise to increase the
time (water volume) and counterclockwise to decrease the
time (water volume). Turn the adjustment knob 1/2
reference mark maximum per adjustment. The brew
volume should be approximately 60 oz.
3.
Replace the front access panel, connect the power supply
cord and turn on the "Power" switch.
4. Test
thoroughly.
Note:
If the water volume is still not to the desired level,
repeat the timer adjustment steps again until the desired
volume has been reached.
Fig. 30.
Thermostat adjustment.
Adjusting The Thermostat:
(See fig. 30)
1. Remove the access plug from the front access panel.
(Fig. 26, item 3)
.
2.
Turn the thermostat adjustment shaft clockwise to increase
the temperature and counterclockwise to decrease the
temperature. Turn the adjustment screw 1/8 turn maximum
per adjustment.
3.
Replace the access plug, connect the power supply cord and
turn on the "Power" switch.
4.
Allow the coffee brewer to reach brewing temperature
before checking the water temperature. Check the water
temperature directly under the brew cone with water only
(Fig. 31)
. Temperature range should be approximately
192° to 196°F.
Fig. 31.
Checking the brewing
temperature.
Note:
If the water temperature is still not within the proper
range, repeat the adjustment steps again until the proper
temperature has been reached.
Caution:
Brewing temperatures above the maximum
recommended range may cause the hi-limit to set. Under
no circumstances should the maximum temperature exceed
196°
These adjustments should be performed during installation only.
Operators should refer to the operating instruction only.
Page 14
COMK211


