Not for
Reproduction
5.
Apply a small amount of clean SAE 30 engine oil to
foam filter. Gently squeeze foam filter until engine oil
is evenly distributed. Squeeze foam filter in a clean cloth
to remove excess oil.
6.
Remove O-ring (E) and baffle screen (F) from bath bowl
(G).
7.
Remove bath bowl from air cleaner base (H). Empty
used oil into an approved container.
8.
Remove seal washer (I) from air cleaner base. Inspect
seal washer for damage or general deterioration.
Replace if necessary.
9.
Wash bath bowl and air cleaner cover in warm, soapy
water. Wipe dry with a clean cloth.
10. Install seal washer and bath bowl onto air cleaner base.
11. Add clean SAE 30 engine oil to bath bowl until level is
even with horizontal line (J). Do not overfill.
12. Install baffle screen and O-ring onto bath bowl.
13. Install foam filter into air cleaner cover.
14. Install air cleaner cover.
15. Install flat washer and knob, but do not over-tighten.
16. Dispose of used oil at a proper waste disposal or
recycling center.
Foam Low Mount Air Filter
1.
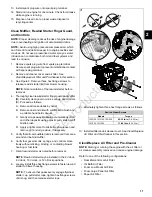
See Figure 6. Remove two hex flange screws (A) to
release air cleaner cover (B).
NOTE: Exercise care to keep dust and dirt out of
carburetor. Inadequate precautions can result in engine
damage.
2.
Remove retainer (C) and foam filter (D) from air cleaner
cover.
6
3.
Gently wash foam filter in warm, soapy water.
Thoroughly rinse with clean water. Squeeze foam filter
in a clean cloth until dry.
NOTE: Use of pressurized air or solvents will damage
foam filter.
4.
Carefully inspect foam filter. Replace if it cannot be
adequately cleaned or if any damage is observed.
5.
Saturate foam filter with clean engine oil. Gently
squeeze foam filter in a clean cloth to remove excess
oil.
6.
Install foam filter and retainer into air cleaner cover.
7.
Install air cleaner cover and start two hex flange screws.
Tighten screws to 9-12 lb-in (1-1.4 N-m).
Foam Large Panel Air Filter
1.
See Figure 7. Disengage two retaining clips (A) to
release air cleaner cover (B) and foam filter (C).
NOTE: Exercise care to keep dust and dirt out of
carburetor. Inadequate precautions can result in engine
damage.
2.
Gently wash foam filter in warm, soapy water.
Thoroughly rinse with clean water. Squeeze foam filter
in a clean cloth until dry.
NOTE: Use of pressurized air or solvents will damage
foam filter.
3.
Carefully inspect foam filter. Replace if it cannot be
adequately cleaned or if any damage is observed.
4.
Saturate foam filter with clean engine oil. Gently
squeeze foam filter in a clean cloth to remove excess
oil.
7
13
2
Summary of Contents for 130G00
Page 1: ...N o t f o r R e p r o d u c t i o n ...
Page 2: ...N o t f o r R e p r o d u c t i o n ...
Page 6: ...N o t f o r R e p r o d u c t i o n ...
Page 8: ...N o t f o r R e p r o d u c t i o n ...
Page 26: ...N o t f o r R e p r o d u c t i o n 20 2 ...
Page 32: ...N o t f o r R e p r o d u c t i o n 26 3 ...
Page 44: ...N o t f o r R e p r o d u c t i o n TOP END DISASSEMBLY 41 38 5 ...
Page 50: ...N o t f o r R e p r o d u c t i o n 44 5 ...
Page 90: ...N o t f o r R e p r o d u c t i o n 123 84 8 ...
Page 100: ...N o t f o r R e p r o d u c t i o n 94 8 ...
Page 108: ...N o t f o r R e p r o d u c t i o n This page is intentionally left blank 102 9 ...
Page 109: ...N o t f o r R e p r o d u c t i o n This page is intentionally left blank 103 9 ...
Page 110: ...N o t f o r R e p r o d u c t i o n This page is intentionally left blank 104 9 ...
Page 111: ...N o t f o r R e p r o d u c t i o n This page is intentionally left blank 105 9 ...


