background image

7000W Generator

16

Generator Maintenance

Generator maintenance consists of keeping the unit clean
and dry. Operate and store the unit in a clean dry
environment where it will not be exposed to excessive
dust, dirt, moisture or any corrosive vapors. Cooling air
slots in the generator must not become clogged with snow,
leaves or any other foreign material.

NOTE: DO NOT use a garden hose to clean generator.
Water can enter engine fuel system and cause problems. In
addition, if water enters generator through cooling air slots,
some of the water will be retained in voids and cracks of
the rotor and stator winding insulation.Water and dirt
buildup on the generator internal windings will eventually
decrease the insulation resistance of these windings.

Battery Maintenance

Other than float charging, as described in “How to Use the
Battery Charger”, no maintenance is required for the
battery. Keep the battery and terminals clean and dry.

IMPORTANT: Battery charging should be performed in a
dry location, such as inside a garage.

Generator Cleaning

• Use a damp cloth to wipe exterior surfaces clean.

• Use a soft bristle brush to loosen caked on dirt or oil.

• Use a vacuum cleaner to pick up loose dirt and debris.

• Use low pressure air (not to exceed 25 psi) to blow

away dirt. Inspect cooling air slots and opening on
generator.These openings must be kept clean and
unobstructed.

STORAGE

The generator should be started at least once every seven
days and allowed to run at least 30 minutes. If this cannot
be done and you must store the unit for more than
30 days, use the following guidelines to prepare it for
storage.

Generator Storage

• Clean the generator as outlined in “Generator Cleaning”.

• Check that cooling air slots and openings on generator

are open and unobstructed.

Engine Storage

See engine owner’s manual for instructions.

Other Storage Tips

• To prevent gum from forming in fuel system or on

essential carburetor parts, add fuel stabilizer into fuel
tank and fill with fresh fuel. Run the unit for several
minutes to circulate the additive through the carburetor.
The unit and fuel can then be stored for up to
24 months. Fuel stabilizer can be purchased locally.

• DO NOT store fuel from one season to another unless

it has been treated as described above.

• Replace fuel container if it starts to rust. Rust and/or dirt

in fuel can cause problems if it's used with this unit.

• Store unit in a clean and dry area.

• DO NOT place a storage cover over a hot generator.

• Let equipment cool for a sufficient time before placing the

cover on the equipment.

Storage covers can be flammable.

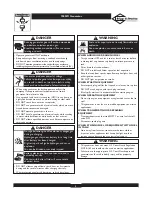
WARNING

• DO NOT expose generator to excessive moisture, dust, dirt,

or corrosive vapors.

• DO NOT insert any objects through cooling slots.

Improper treatment of generator can damage it and
shorten its life.

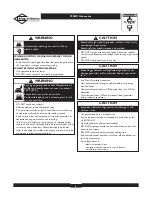
CAUTION

WHEN ADJUSTING OR MAKING REPAIRS TO YOUR
GENERATOR
• Disconnect the spark plug wire from the spark plug and place

the wire where it cannot contact spark plug.

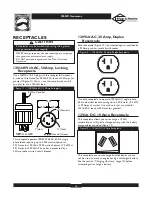
WHEN TESTING FOR ENGINE SPARK
• Use approved spark plug tester.

• DO NOT check for spark with spark plug removed.

Unintentional sparking can result in fire or
electric shock.

WARNING

Summary of Contents for Elite 01894

Page 1: ...n avez pas besoin d aller loin pour trouver de l aide Preguntas La ayuda es justa un momento lejos Call Generator Helpline 1 800 743 4115 M F 8 5 CT Appelez Ligne d assistance de G n rateur 1 800 743...

Page 2: ...rranted for standards set by the Environmental Protection Agency For warranty information refer to the engine owner s manual SAFETY RULES This is the safety alert symbol It is used to alert you to pot...

Page 3: ...tains acid and is extremely caustic Contact with battery fluid will cause severe chemical burns DANGER Operate generator ONLY outdoors Keep exhaust gas from entering a confined area through windows do...

Page 4: ...l output is lost equipment sparks smokes or emits flames unit vibrates excessively Improper treatment of generator can damage it and shorten its life CAUTION WHEN ADJUSTING OR MAKING REPAIRS TOYOUR GE...

Page 5: ...engine Choke Lever Used when starting a cold engine Circuit Breakers AC The 120Volt AC 20A duplex receptacles are provided with push to reset circuit breakers to protect the generator against electri...

Page 6: ...carton 3 Cut down corners of carton from top to bottom and lay that side of carton down flat 4 Remove all packing material carton fillers etc 5 Remove generator from shipping carton Attach Handle You...

Page 7: ...erator from being started Open cap on battery float charger Remove and discard plastic cover over the start switch Figure 3 Replace cap on battery float charger Replace 1 5 with 2 25 fuel fill level g...

Page 8: ...e generator where exhaust gas could accumulate and enter inside or be drawn into a potentially occupied building Ensure exhaust gas is kept away from any windows doors ventilation intakes or other ope...

Page 9: ...e is good or replace with a known good fuse Reinstall fuse in the fuse holder 2 Slide the red rubber boot off the generator s battery terminal and push it onto the red wire thus uncovering the POSITIV...

Page 10: ...p engine with electrical devices plugged in and turned on 2 Let engine run at no load for 30 seconds to stabilize the internal temperatures of engine and generator 3 Turn start switch to Stop position...

Page 11: ...and wall outlet when generator is being started and while in operation 3 Keep charger plugged in when generator is not in use to prolong battery life The charger has a built in float equalizer and wil...

Page 12: ...ent icing problem 10 Start and run engine outdoors 11 Keep exhaust gas from entering a confined area through windows doors ventilation intakes or other openings 12 DO NOT enclose generator any more th...

Page 13: ...p to 2 400 watts 2 4 kW at 20 Amps of current Use cord sets that are rated for 125 Volt AC loads at 20 Amps or greater 12 Volt DC 10 Amp Receptacle This receptacle allows you to recharge a 12 Volt aut...

Page 14: ...put to stabilize engine runs smoothly and attached device operates properly 4 Plug in and turn on the next load 5 Again permit the generator to stabilize 6 Repeat steps 4 and 5 for each additional loa...

Page 15: ...tray under the oil drain plug Figure 15 2 Place the oil drain tray foot tab in the slot on the base of the generator as shown 3 Follow the instructions given in the engine owner s manual for draining...

Page 16: ...n at least 30 minutes If this cannot be done and you must store the unit for more than 30 days use the following guidelines to prepare it for storage Generator Storage Clean the generator as outlined...

Page 17: ...ad 2 Generator is overloaded 3 Shorted generator circuit 1 Disconnect shorted electrical load 2 See Don t Overload Generator 3 Contact Authorized service facility Generator will not start or starts an...

Page 18: ...7000W Generator 18 NOTES...

Page 19: ...sed for commercial purposes are not warranted NO WARRANTY REGISTRATION IS NECESSARY TO OBTAIN WARRANTY ON BRIGGS STRATTON PRODUCTS SAVE YOUR PROOF OF PURCHASE RECEIPT IF YOU DO NOT PROVIDE PROOF OF TH...

Page 20: ...de l environnement Pour des informations sur la garantie se reporter au manuel du moteur R GLES DE S CURIT Ceci est la s ret le symbole vif Il est utilis pour vous alerter aux dangers de blessure pers...

Page 21: ...mobile ou les applications marines LORSQUE VOUS TRANSPORTEZ OU R PAREZ L QUIPEMENT Le r servoir d essence doit tre VIDE ou le robinet d arr t de carburant doit tre la position ferm e OFF pendant le tr...

Page 22: ...stante l quipement produit des tincelles de la fum e ou des flammes l unit vibre excessivement Un traitement inappropri du g n rateur risque de l endommager et de raccourcir sa dur e d utilisation ATT...

Page 23: ...tant de salet et de poussi res entrant dans le moteur Interrupteur de starter Utilis lorsque vous faites un d marrage froid du moteur Pot d chappement avec arr teur d tincelles Le pot d chappement dim...

Page 24: ...3 Abattre des coins une fin de bo te et plie d haut en bas ce c t de bo te en bas plat 4 Enlever tout mat riel qui emballe fillers de bo te etc 5 Enlever le g n rateur de la bo te qui exp die Fixer la...

Page 25: ...r que la batterie Enlevez et jetez le couvercle de plastique sur l interrupteur de d marrage Figure 19 Remplacer la chargeur de flotteur pour que la batterie Reportez vous au manuel d utilisation du m...

Page 26: ...pement pourraient s accumuler et p n trer ou tre aspir s dans un difice qui pourrait tre occup Assurez vous que les gaz d chappement ne puissent entrer par une fen tre une porte une prise d a ration o...

Page 27: ...et enlevez le fusible mont sur conducteur de 10 amp res de la g n ratrice Figure 22 Assurez vous que le fusible est en bon tat ou remplacez le avec un fusible en bon tat R installez le fusible dans le...

Page 28: ...ais mettre en route ou arr ter le moteur alors que les appareils lectriques sont branch s et en marche 2 Laissez le moteur tourner vide pendant 30 secondes pour stabiliser les temp ratures internes du...

Page 29: ...de courant lorsque vous d marrez le g n rateur et lorsqu il est en marche 3 Laissez le chargeur branch lorsque le g n rateur n est pas utilis vous prolongerez ainsi la dur e de vie de la batterie Le c...

Page 30: ...nctionner le moteur l ext rieur 11 Assurez vous que les gaz d chappement ne puissent entrer dans un espace restreint par une fen tre une porte une prise d a ration ou une autre ouverture 12 N envelopp...

Page 31: ...arges lectriques de 120 volts c a monophas es 60 Hz n cessitant jusqu 2 400 watts 2 4 KW 20 amp res Prise de 10 Amp res 12 Volts c c Cette prise Figure 29 vous permet de recharger une batterie de remi...

Page 32: ...se stabiliser le moteur tourne r guli rement et les dispositifs branch s fonctionnent correctement 4 Branchez et mettez la charge suivante en marche 5 De nouveau laissez le g n rateur se stabiliser 6...

Page 33: ...e Figure 31 2 Placez la patte du bac de vidange d huile dans la fente la base de la g n ratrice tel qu illustr 3 Pour vidanger l huile suivez les instructions du manuel d utilisation du moteur 4 Une f...

Page 34: ...tions ci apr s comme guide pour pr parer votre appareil au remisage Remisage du G n rateur Nettoyez le g n rateur comme indiqu la section Nettoyage de g n rateur V rifiez si les fentes d air de refroi...

Page 35: ...35 7000W G n ratrice REMARQUES...

Page 36: ...1 D brancher la charge en court circuit 2 Voir Ne Pas Surcharger G n rateur 3 Contacter n gociant de service Autoris Le moteur ne veut pas d marrer ou d marre et marche mal 1 Le fusible mont sur cond...

Page 37: ...S STRATTON IL N EST PAS N CESSAIRE DE L ENREGISTRER CONSERVEZ LE RE U COMME PREUVE D ACHAT SI LORS D UNE R CLAMATION DE GARANTIE VOUS NE POUVEZ PROUVER LA DATE INITIALE DE L ACHAT NOUS UTILISERONS LA...

Page 38: ...otecci n Ambiental Para mayor informaci n acerca de la garant a consulte con el manual del propietario del motor INSTRUCCIONES DE SEGURIDAD ste es el s mbolo de alerta de seguridad Sirve para advertir...

Page 39: ...os materiales ADVERTENCIA CUANDO A ADA COMBUSTIBLE O VAC E EL DEP SITO Apague el generador posici n OFF y d jelo enfriar al menos por 2 minutos antes de remover la tapa de la combustible Afloje la ta...

Page 40: ...generador si Se pierde la salida el ctrica El equipo produce chispas humo o emite llamas La unidad vibra de una manera excesiva El tratamiento inadecuado del generador puede da arlo y acortar su vida...

Page 41: ...ruido del motor y est equipado con una pantalla apagachispas Tanque del Combustible El tanque tiene una capacidad de 7 galones Americanos de gasolina sin contenido de plomo Tomacorriente Dobles de 12...

Page 42: ...de env o 3 Corte de arriba a abajo las esquinas de uno de los lados de la caja y coloque ese lado de la caja sobre el suelo 4 Retire todo el material de empaque relleno etc 5 Saque el generador de la...

Page 43: ...bater a Quite y deseche pl stica cubierta sobre el interruptor de arranque Figura 35 Reemplace la cubierta en el cargador de flotante de la bater a A pesar de que en el manual del motor se indica que...

Page 44: ...io que pueda estar ocupado Aseg rese de que los gases de escape no puedan entrar por ventanas puertas tomas de aire de ventilaci n u otras aberturas en un espacio cerrado en el que puedan acumularse F...

Page 45: ...y retire el fusible en l nea de 10A del generador Figura 38 Compruebe el estado del fusible y si es necesario sustit yalo Vuelva a colocar el fusible en el portafusibles 2 Extraiga el recubrimiento a...

Page 46: ...cos conectados y encendidos 2 Deje que el motor funcione sin cargas por algunos minutos para estabilizar las temperaturas internas del motor y el generador 3 Sit e el interruptor de arranque en la pos...

Page 47: ...la salida de pared cuando arandela de presi n se comienza y mientras est en la operaci n 3 Mantenga este corcel conect cuando arandela de presi n NO est en est acostumbrado a prolonga la vida de bater...

Page 48: ...Arranque el motor y mant ngalo en marcha en exteriores 11 Aseg rese de que los gases de escape no puedan entrar por ventanas puertas tomas de aire de ventilaci n u otras aberturas en un espacio cerra...

Page 49: ...4 kW a corrientes de 20 Amperios Use los juegos de cables que son calificados para cargas de 125Voltios AC a 20 Amperios o mayores Tomacorrientes de 12 Voltios DC Este tomacorriente le permite recarg...

Page 50: ...mente y el aparato conectado al mismo trabaja adecuadamente 4 Conecte y encienda la pr xima carga 5 De nuevo permita que el generador se estabilice 6 Repita los pasos 4 y 5 para cada carga adicional q...

Page 51: ...el tap n de vaciado de aceite Figura 47 2 Inserte la patilla de la bandeja de vaciado de aceite en la ranura de la base del generador como se muestra en la figura 3 Para vaciar el aceite siga las inst...

Page 52: ...al menos durante 30 minutos Si no puede hacer esto y debe almacenar la unidad por m s de 30 d as siga las siguientes instrucciones para preparar su unidad para almacenamiento Almacenando el Generador...

Page 53: ...Circuito del generador en corto 1 Desconecte la carga el ctrica en corto 2 Vea No Sobrerecarque Generador 3 Contacte el distribuidor de servicio autorizado El motor no se enciende o se enciende y fun...

Page 54: ...7000W Generador 54 NOTAS...

Page 55: ...55 7000W Generador NOTAS...

Page 56: ...ON PRODUCTS GUARDE SU RECIBO DE COMPRA SI NO APORTA LA PRUEBA DE LA FECHA DE COMPRA INICIAL SE UTILIZAR LA FECHA DE FABRICACI N DEL PRODUCTO PARA DETERMINAR EL PER ODO DE GARANT A ACERCA DE LA EQUIPO...

Reviews: