background image


We suggest that the installation and operation should be done by the verified technician and 
follow the instruction strictly. 


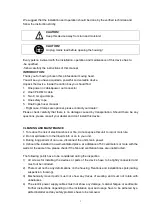
CAUTION!   


Keep this device away from rain and moisture!


CAUTION! 

Unplug mains lead before opening the housing!


Every person involved with the installation, operation and maintenance of this device has to: 
-be qualified 
-follow carefully the instructions of this manual 

INTRODUCTION: 

Thank you for having chosen this professional moving head. 
You will see you have acquired a powerful and versatile device. 
Unpack the device. Inside the carton box you should find: 
1.  One power in cable&power out connector 
2.  One 3Pin DMX cable 
3.  Two C omega clamps 
4.  One safety rope 
5.  One English user manual 

Flight case, Clamps are optional, please contact your dealer


Please check carefully that there is no damage caused by transportation. Should there be any 
questions, please consult your dealer and don’t install this device.           


CLEANING AND MAINTENANCE 

1. To reduce the risk of electrical shock or fire, do not expose this unit to rain or moisture. 
2. Do not spill water or other liquids into or on to your unit. 
3. During long periods of non-use, disconnect the unit’s main power. 
4. It should be installed in a well-ventilated place, at a distance of 50 centimeters or more with the 
walls. At the same time, please check if the fan and ventilation holes are unobstructed. 
 
The following points have to be considered during the inspection 
1)  All screws for installing the devices or parts of the device have to be tightly connected and 

must not be corroded. 

2)  There must not be any deformations on the housing. Fixations and installations spots(ceiling, 

suspension, trussing). 

3)  Mechanically  moved  parts  must  not  show  any  traces  of  wearing  and  must  not  rotate  with 

unbalances. 

4)  The electric power supply cables must not show any damage, material fatigue or sediments. 

Further instructions depending on the installation spot and usage have to be adhered by a 
skilled installer and any safety problems have to be removed. 

Summary of Contents for MINI EYE P40

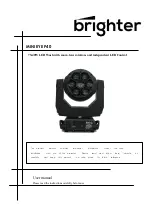
Page 1: ...Please read the instructions carefully before use This product manual contains important information about the safe installation and use of this projector Please read and follow these instructio ns ca...

Page 2: ...ameters 7 8 Menu Function 8 9 Functions of Buttons 9 10 DMX Channels 11 11 Shape Details 12 Thank you for your patronage We are confident that our excellent products and service can satisfy you For yo...

Page 3: ...don t install this device CLEANING AND MAINTENANCE 1 To reduce the risk of electrical shock or fire do not expose this unit to rain or moisture 2 Do not spill water or other liquids into or on to you...

Page 4: ...cohol or solvents Statement When the product is shipped from the factory its performance is intact and the packaging is complete All users should strictly abide by the warnings and operating instructi...

Page 5: ...ux 5m Min angle Wash Beam Graphic Effects function Front lens can rotated infinity With vortex and kaleidoscope effects Variable built in dynamic effects 4 Liner dimming curves 2 color mode RGBW CMY S...

Page 6: ...6 Photometrics Electrical parameters MENU FUNCTION U V I A P W cos PF Hz HZ 240 1 311 299 3 0 952 50 0 220 1 419 300 0 963 50 0 120 2 600 308 0 991 60 0...

Page 7: ...7 FUNCTIONS OF BUTTONS...

Page 8: ...the top level Commute from units tens hundreds in the Address Fixture ID and Calibration menu USING THE MENU 1 Press OK once Main Menu appears on the display 2 Use the UP and DOWN keys to select the...

Page 9: ...onsiderations The X axis rapid lock forward is LOCKED and backward UNLOCKED to open CAUTION Before packing please get the zoom lens back inside Please match the ARROWS with the DOT Without this operat...

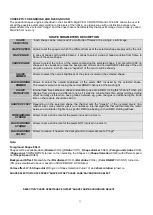
Page 10: ...10 SHAPE MODE DESCRIPTION...

Page 11: ...t allows to select a snap or faded variation from frame to frame of the same shape SHAPE RGBW Allows to select the colour of the pixels composing the selected shape if all are left at 000 no shape wil...

Page 12: ...sh 255 Mirror effet with bkgnd color Note Mirror effect unavailable for macro 31 Macro 67 68 69 the mirror effect is available only for options 1 3 9 9 2 Ring 2 10 3 Reserved 11 4 Reserved 12 5 Pixel...

Page 13: ...t unavailable for macro 31 Macro 67 68 69 the mirror effect is available only for options 1 3 9 31 24 Lefy Right scrolling bar No 32 25 Mirror pixel N0 33 26 34 27 35 28 Fpllowing pixel Yes 36 29 Wing...

Reviews: