background image

3

WARNING

• 

Leak test all connections before fi rst use, even if grill was purchased fully assembled and after 
each tank refi ll. Check the propane tank rubber seal for damage.

• Always 

check 

the grill and propane tank prior to each use as indicated in the “Checking for 

Leaks” & “Pre-Start Check List” sections of this manual.

• 

Never use natural gas in a unit designed for liquid propane gas.

• 

Never use charcoal, lava rocks or wood briquets in a gas grill. Flavoring chips must be 
contained in a metal smoking box to contain ash and prevent fi res.

• Ensure 

fl ames come out of all burner ports at each use. Spiders and insects like to build nests 

in burner tubes. Blocked burner tubes can prevent gas fl ow to the burners and could result in a 
burner tube fi re or fi re beneath the grill.

• 

Never check for leaks using a match or open fl ame.

• 

Never use or store gasoline, lighter fl uid, paint thinner, or other fl ammable vapors and liquids or 
combustible materials in or near your grill.

• 

DO NOT block ventilation areas in sides, back or cart compartment of grill.

• 

DO NOT cover cooking grates or other components with aluminum foil, as this blocks ventilation 
and damage to grill or personal injury may occur. 

• 

Never place more than 15 pounds on the side tables. DO NOT lean on the side tables. DO NOT 
lift grill using side tables.

• 

Keep children and pets away from hot grill. DO NOT allow children to use or play near this grill.

• 

DO NOT leave the grill unattended while ON or in use.

• 

DO NOT allow the gas hose to come in contact with hot surfaces. Redirect the gas hose if 
necessary.

• 

DO NOT allow grease or hot drippings to fall on hose and regulator assembly. If this occurs, turn 
gas supply OFF at once. Empty grease tray/cup and clean the hose and regulator assembly and 
inspect for damage before use.

• 

Never cook on the grill without the grease cup/tray in position.

• 

Keep any electrical supply cords away from water or heated surfaces.

• 

DO NOT use water on a grease fi re. Closing the lid to extinguish a grease fi re is not possible. 
Use type BC dry chemical fi re extinguisher or smother with dirt, sand or baking soda.

• 

DO NOT use while under the infl uence of drugs or alcohol.

• 

FOR OUTDOOR USE ONLY. DO NOT operate indoors or in an enclosed area such as a garage, shed 
or breezeway.

• 

Position your grill outdoors on a non-combustible level surface in a well ventilated location, a 
safe distance 10 ft. (3.1 m) from combustible materials, buildings and overhangs.

• 

Apartment dwellers: Check with management and follow the requirements and fi re codes for using 
an LP gas grill in your apartment complex. Only use outside on the ground (not on a balcony, 
patio, garage, etc) with a 15 foot (4.6 m) minimum clearance on all sides from any wall, structure or 
combustible material.

• 

Maintain a minimum clearance of 36 inches (91 cm) between all sides of grill, deck railings, walls or 
other combustible material. Not adhering to these clearances may prevent proper ventilation and can 
increase the risk of a fi re and/or property damage, which could also result in personal injury. DO NOT 
use grill under overhead unprotected combustible construction.

• 

DO NOT use or install this grill in or on a recreational vehicle and/or boat.

• 

DO NOT build this model grill in any built-in or slide in construction.

• 

If a bristle brush is used to clean any of the cooking surfaces, ensure no loose bristles remain on the 
cooking surfaces prior to grilling as loose bristles may attach to food.

• 

DO NOT store items in cart that can catch fi re or damage your grill (such as swimming pool 
supplies/chemicals, table cloth, wood chips).

GENERAL WARNINGS:

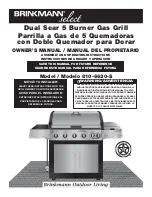
Summary of Contents for 810-6630-S

Page 1: ...HACE CASO OMISO A ESTAS ADVERTENCIAS E INSTRUCCIONES LEA Y SIGA TODAS LAS ADVERTENCIAS E INSTRUCCIONES EN ESTE MANUAL PARA EVITAR LESIONES PERSONALES INCLUSO LA MUERTE O LOS DAÑOS MATERIALES NOTICE TO INSTALLER LEAVE THESE INSTRUCTIONS WITH THE GRILL OWNER FOR FUTURE REFERENCE AVISO PARA EL INSTALADOR ENTREGUE ESTAS INSTRUCCIONES AL PROPIETARIO DE LA PARRILLA PARA REFERENCIA FUTURA SAVE THIS MANUA...

Page 2: ...1 Shut off gas to the appliance 2 Extinguish any open flame 3 Open lid 4 If odor continues keep away from the appliance and immediately call your gas supplier or your fire department 1 Do not store or use gasoline or other flammable liquids or vapors in the vicinity of this or any other appliance 2 An LP cylinder not connected for use shall not be stored in the vicinity of this or any other applia...

Page 3: ... serious injury WARNING Be alert to the possibility of serious bodily injury if the instructions are not followed Be sure to read and carefully follow all of the messages CAUTION Indicates a potentially hazardous situation which if not avoided may result in minor or moderate injury CALIFORNIA PROPOSITION 65 WARNING This product contains chemicals including lead in the brass of certain component pa...

Page 4: ...ase tray cup and clean the hose and regulator assembly and inspect for damage before use Never cook on the grill without the grease cup tray in position Keep any electrical supply cords away from water or heated surfaces DO NOT use water on a grease fire Closing the lid to extinguish a grease fire is not possible Use type BC dry chemical fire extinguisher or smother with dirt sand or baking soda D...

Page 5: ...ur grill is not in use Handle the tank with care Always secure the cylinder in an upright position Never connect an unregulated LP gas cylinder to your grill DO NOT expose LP gas cylinders to excessive heat or ignition sources DO NOT store a spare LP gas cylinder under or near your grill Allow only qualified LP gas dealers to fill or repair your LP gas cylinder DO NOT allow the cylinder to be fill...

Page 6: ...der has similar dimensions of the top and bottom rings The installation of this appliance must be in accordance with All applicable local codes or in the absence of local codes either National Fuel Gas Code ANSI Z223 1 NFPA 54 Natural Gas and Propane Installation Code CAN CGA B149 1 Natural Gas Installation Code CAN CGA B149 1 Canada Propane Installation Code CAN CGA B149 2 Canada To check your lo...

Page 7: ...NOT attempt to connect grill as purchased for LP propane gas to any other fuel supply source such as a natural gas line For dual fuel grills that can be converted to natural gas a Brinkmann conversion kit must be purchased and installed for use with natural gas Please contact Brinkmann Customer Service at 800 527 0717 to see if your grill can be converted DO NOT use any other pressure regulator ho...

Page 8: ...g your grill Only the manufacturer s supplied replacement should be used 6 Remove the protective plastic cap from the cylinder valve 7 Check that the hose does not contain kinks does not contact sharp edges and does not contact surfaces that may become hot during use 8 Hold regulator and insert the brass nipple into the LP cylinder valve outlet Ensure that the device is centered properly 9 Turn th...

Page 9: ...e cylinder valve knob counter clockwise to full open If you hear a rushing sound or smell gas turn the gas off Tighten any leaking connections If leak is detected at connection nut and tightening does not stop leak reinspect propane tank rubber seal 5 Apply the soapy water mixture to the following Supply tank cylinder welds Connection nut to tank valve Back side of connection nut to brass nipple B...

Page 10: ...there is excessive abrasion or wear or the hose is cut it must be replaced prior to the grill being used Replace with hose and regulator Model No 155 6630 0 which can be obtained by contacting customer service at 800 527 0717 Leak check all gas connections hose and propane tank See section on Leak Testing Ensure that all electrical supply cords are properly grounded Keep any electrical supply cord...

Page 11: ...he igniter see Match Lighting the Side Burner section 6 To turn off turn control knob clockwise until it locks in the OFF position This does not turn off the gas flow from the cylinder Note If burner does not light or flame is too low See Trouble Shooting section of the owners manual MATCH LIGHTING THE SIDE BURNER 1 Open the lid to the side burner before lighting 2 Make sure control knob is in the...

Page 12: ...ratures to sear the food sugars when cooking After lighting your grill set the main burner control knobs to the HIGH position for 5 to 10 minutes Close the lid during the preheat period 6 To turn off turn control knob clockwise until it locks in the OFF position This does not turn off the gas flow from the cylinder Note If burner does not light or flame is too low See Trouble Shooting section of t...

Page 13: ...dily harm If grease fire occurs while lid is open leave lid open turn burner knobs to OFF turn off LP cylinder valve If possible relocate food to a different section of cooking grate and allow grease to burn out or smother the flames with baking soda If grease fire occurs while lid is closed leave lid closed as a sudden burst of air may increase flames Turn burner knobs to OFF turn off LP cylinder...

Page 14: ...aner and warm soapy water Stainless steel surfaces To maintain your grill s appearance wash with mild detergent and warm soapy water and wipe dry with a soft cloth after each use Baked on grease deposits may require the use of an abrasive plastic cleaning pad Use only in direction of brushed finish to avoid damage Do not use abrasive pad on areas with graphics Car wax may help protect the exterior...

Page 15: ...clean the Burner Assembly follow these instructions to clean and or replace parts of burner assembly or if you have trouble igniting the grill 1 Turn gas off at control knobs and LP cylinder tank valve 2 Remove cooking grills and heat distribution plates 3 Remove post and cotter pin from each burner foot 4 Remove crossover channels and carefully lift each burner up and away from valve openings 5 U...

Page 16: ...the off position DO NOT store a spare LP gas cylinder filled or empty under or near the grill Never store flammable liquids or spray canisters under or near the grill If the outdoor cooking gas appliance is not in use the gas must be turned off at the LP gas supply cylinder Storage of an outdoor cooking gas appliance indoors is permissible only if the cylinder is disconnected and removed from the ...

Page 17: ...ce electrode wire assembly Wire is shorting sparking between ignitor and electrode Replace ignitor wire electrode assembly Bad ignitor Replace ignitor Grill does not get hot enough Out of gas Replace or refill LP gas tank Flow limiting device may have been activated 1 Mini Reset a Turn control knobs and LP gas tank valve to OFF b Wait one minute and relight grill per Lighting Instructions 2 If fla...

Page 18: ...nd Maintenance instructions GRILL COOKING TIPS CLEANLINESS Always wash hands thoroughly with soap and hot water prior to handling food and after handling raw meat uncooked poultry or seafood When using a platter to carry raw meat uncooked poultry or seafood to the grill make sure to wash the platter thoroughly with soap and hot water before placing cooked foods back on the platter or use different...

Page 19: ...tallation process Your Parts Bag will include M6 X 12 mm Bolts Black Qty 1 M4 Washer 2 M5 X 10 mm Bolts Black 2 M6 Wing Nuts Black 1 Caster Tightening Pin 2 Door Hinge Pins M6 Star Washers M4 Washer M4 X 15 mm Bolts Black M4 Nut Silver Caster Tightening Pin Door Hinge Pins M4 X 10 mm Bolt Silver READ ALL SAFETY WARNINGS ASSEMBLY INSTRUCTIONS CAREFULLY BEFORE ASSEMBLING OR OPERATING YOUR GRILL M5 X...

Page 20: ...er Gas Grill Phillips Head Screwdriver Hex Nut Wrench PARTS LIST 1 Grill Body 1 Left Side Table Assembly 1 Right Side Table Assembly 1 Left Side Table Front 1 Warming Rack 1 Right Side Table Front 5 Control Knobs 1 Dual Sear Knob LED 3 Cooking Grills 1 Sear Burner Cooking Grill 1 Side Burner Grate 1 Left Side Cart Panel 4 Heat Distribution Plates 1 Sear Burner Heat Distribution Plate 1 Upper Cart ...

Page 21: ...ed Inspect contents of the box to ensure all parts are included and undamaged FOR GRILL REPLACEMENT PARTS COVERS ACCESSORIES PLEASE VISIT US ONLINE AT 2 1 9 13 12 16 13 5 4 26 3 6 10 11 17 23 21 22 25 27 30 31 29 32 14 28 7 8 24 18 19 20 ...

Page 22: ...caster can be tightened Step 2 Lock the casters Align key holes in bottom of side cart panels with corresponding pre installed bolts Insert key holes over bolts and slide toward back of base Secure using two M6 X 12 mm bolts black as illustrated Tighten down all bolts Step 3 Use eight pre installed M6 X 12 mm bolts black to attach the cart corner brackets to the cart base and the cart side panels ...

Page 23: ...rt keyholes on right side cart panel Slide hooks toward the side panel Figure 2 Align the holes in each foot of tank block rack with the corresponding holes in the cart base Secure with two M5 X 10 mm bolts black Figure 3 Step 6 Use four M4 X 15 mm bolts black to insert into four door spacers and attach to door handles Left Door Right Door Door Spacer Figure 1 Figure 2 Figure 3 Tank Block Rack Bra...

Page 24: ...door hinge pin through both holes Figure 2 Repeat for other door Note When performing Step 8 lift grill body from front and rear panels to avoid injury to hands and fingers Step 8 With the help of a friend place grill body assembly on grill cart Align bolt holes located on the grill body assembly using four M6 X 12 mm bolts black Door Hinge Pin Left Door Assembly Right Door Assembly Figure 2 Figur...

Page 25: ...ft side table by inserting pre attached bolts on the front panel into the keyholes on side table Slide into smaller part of keyhole Tighten bolts securely Step 11 Attach front panel to side burner by inserting pre attached bolts on the front panel into the keyholes on side burner assembly Slide into smaller part of keyhole Tighten bolts securely Dual Sear Knob ...

Page 26: ...en securely Fasten side table front panel to grill body with one M6 X 12 mm bolt black Step 13 Attach right side burner assembly to right side of cart frame assembly Place table over pre attached bolts and slide toward back of grill then tighten securely Fasten side burner assembly front panel to grill body with one M6 X 12 mm bolt black Bolt Bolt ...

Page 27: ...urner Figure 2 Attach one M4 X 10 mm bolt silver from the top of the side burner to secure in place Figure 3 Attach two M4 washers and one M4 nut and one wing nut to secure the side burner Figure 4 Step 15 Attach side burner igniter lead to electrode on bottom of side burner Side Burner Figure 1 Figure 2 Side Burner Igniter Lead Electrode M4 Washer Bolt Figure 3 Figure 4 M4 Nut Wing Nut M4 Washer ...

Page 28: ...de burner table Step 17 Slide the grease tray onto the tracks located behind and underneath the grill body assembly Step 18 Hang grease cup from the grease tray Make sure to slide cup onto tracks as illustrated Side Burner Grate Grease Cup Grease Tray ...

Page 29: ...ill body assembly directly above burners Step 21 Place cooking grills and sear burner cooking grill on support ribs directly above heat distribution plates Step 22 Insert warming rack onto brackets so it sits above the cooking grills Sear Zone Divider Plate Cooking Grates Heat Distribution Plates Sear Burner Cooking Grill Sear Burner Heat Distribution Plate Warming Rack ...

Page 30: ...29 Brinkmann 6630 Assembled ...

Page 31: ...ce with a new battery pack Reposition the battery tab back to its original position Secure the battery tab using a screwdriver Tighten securely To test if working properly press the switch with fingertip Step 1 Step 2 Step 3 Step 4 Step 5 Step 6 A replacement battery pack may be purchased at Brinkmann Customer Service by calling 800 527 0717 NOTE The battery pack can be replaced by using three 3 A...

Page 32: ... expuesta 3 Abra la tapa 4 Si el olor persiste subsistencia lejos de la aplicación y llame de inmediato a su proveedor de gas o a los bomberos 1 No guarde ni use gasolina ni otros líquidos inflamables con vapores en las cercanías de este o de ningún otro artefacto 2 Un cilindro de propano líquido que no esté conectado para ser utilizado no debe ser mantenido cerca de éste o ningún otro artefacto a...

Page 33: ...a muerte o lesiones graves ADVERTENCIA De no cumplir con estas instrucciones esté alerta a la posibilidad de sufrir lesiones físicas graves Cerciórese de leer y de seguir cuidadosamente todos los mensajes PRECAUCIÓN Indica una situación potencialmente peligrosa que de no evitarse puede causar lesiones menores o moderadas ADVERTENCIA DE LA PROPUESTA 65 DE CALIFORNIA Este producto contiene sustancia...

Page 34: ...O permita que caiga grasa o que gotee material caliente sobre el conjunto del regulador y la manguera Si ocurre esto cierre el suministro de gas de inmediato Antes de usar vacíe el depósito la batea para la grasa limpie el conjunto del regulador y la manguera e inspeccione si hay daños Nunca cocine en la parrilla sin el depósito o la batea para la grasa en su lugar Mantenga los cables de suministr...

Page 35: ...graves Cuando no use la parrilla cierre la válvula del cilindro Manipule el tanque con cuidado Siempre asegure el cilindro en posición vertical Nunca conecte a la parrilla un cilindro de gas LP que no cumpla con las reglamentaciones NO exponga los cilindros de gas LP a fuentes de ignición o calor excesivo NO almacene un cilindro de gas LP de repuesto debajo de la parrilla o cerca de esta Permita q...

Page 36: ...de DOT pueden adaptarse a esta parrilla si el anillo superior y el anillo inferior del cilindro tienen dimensiones similares La instalación de este electrodoméstico debe realizarse de acuerdo con Todos los códigos locales correspondientes o ante la ausencia de códigos locales ya sea Código Nacional de Gas Combustible ANSI Z223 1 NFPA 54 Código de Instalación de Gas Natural y Propano CAN CGA B149 1...

Page 37: ...onectar el asador a ninguna otra fuente de suministro de combustible como una línea de gas natural ya que se compró para gas LP propano Para parrillas de doble combustible que pueden ser convertidas a gas natural un juego de conversión Brinkmann debe ser adquirido e instalado para uso con gas natural Por favor llame al servicio al cliente de Brinkmann al 800 527 0717 para averiguar si su parrilla ...

Page 38: ...por el fabricante 6 Quite la tapa protectora de plástico de la válvula del cilindro 7 Verifique que la manguera no tenga dobleces y que no esté en contacto con bordes filosos y con superficies que puedan calentarse durante el uso 8 Sostenga el regulador e introduzca la boquilla de bronce en la salida de la válvula del cilindro de gas LP Cerciórese de que el dispositivo esté centrado adecuadamente ...

Page 39: ...e latón Conexión del niple de latón al regulador Conexiones del regulador a las mangueras de suministro de gas Conexión de la manguera al múltiple de gas El largo completo de la manguera de suministro de gas Válvula del tanque al cilindro 6 Verifique cada lugar enumerado A H para detectar la formación de burbujas que indiquen una fuga de gas Es posible que las fugas grandes no se detecten por medi...

Page 40: ...stá cortada debe reemplazarla antes de usar la parrilla Reemplácela por el modelo de regulador y manguera n º 155 6630 0 que puede obtener a través del servicio de atención al cliente llamando al 800 527 0717 Inspeccione todas las conexiones de gas la manguera y el tanque de propano en busca de fugas Consulte la sección Pruebas de Detección de Fugas Asegúrese de que todos los cables de suministro ...

Page 41: ...encendido 5 Si no se enciende el quemador al usar el encendedor consulte la sección de Encendido de las quemadores lateral con un cerillo 6 Para apagar gire la perilla de control en sentido horario hasta que se trabe en la posición APAGADO Esto no apaga el flujo de gas del cilindro Nota Si el quemador no se enciende o la llama es muy baja consulte la sección Solución de Problemas del manual del pr...

Page 42: ...ye al sabor único de cocinar en una parrilla a gas Tenga cuidado al abrir la tapa dado que pueden generarse llamaradas repentinas Un exceso de llamaradas puede recocer la comida y causar una situación peligrosa para usted y para la parrilla Las llamaradas excesivas ocurren como consecuencia de la acumulación de grasa en la parrilla De ocurrir esto NO vierta agua sobre las llamas Esto puede causar ...

Page 43: ...erdo con una llama baja o indirectamente Asegúrese de que la parrilla esté sobre una superficie nivelada y de que la grasa pueda escurrirse por la parrilla a través del orificio de drenaje en la parte inferior hasta el depósito o la batea para la grasa Limpie la parrilla con frecuencia para minimizar la acumulación de grasa COCCIÓN INDIRECTA La cocción indirecta es el proceso que le permite cocina...

Page 44: ... suave o un limpiador no abrasivo y agua tibia jabonosa Superficies de acero inoxidable Para mantener la apariencia de la parrilla lávelas con un detergente suave y agua tibia jabonosa y séquelas con un paño suave después de cada uso Es posible que para los depósitos de grasa pegada se necesite una esponja abrasiva de plástico Úsela solo en la dirección del acabado pulido para evitar daños No use ...

Page 45: ...cada quemador y de cada canal de interconexión Nota Siga las instrucciones de la sección Pruebas de Detección de Fugas incluidas en este manual Vuelva a encender los quemadores para verificar que funcionen correctamente 10 Vuelva a colocar las placas de distribución de calor y los rejillas ÓXIDO Como resultado de las altas temperaturas de cocción los adobos ácidos los incendios de grasa y la expos...

Page 46: ...ión apagado NO almacene un cilindro de gas LP de repuesto lleno o vacío debajo de la parrilla o cerca de esta Nunca almacene líquidos inflamables o aerosoles debajo de la parrilla o cerca de esta Si el artefacto de cocina a gas para exteriores no se usa el suministro de gas debe estar cerrado en el cilindro de gas LP Un artefacto de cocina a gas para exteriores solo se puede almacenar en interiore...

Page 47: ...do o el electrodo con alcohol rectificado El electrodo y los quemadores están húmedos Séquelos con un paño El electrodo está rajado o está roto chispas en la rajadura Reemplace el electrodo Hay un cable flojo o desconectado Vuelva a conectar el cable o reemplace el conjunto del cable electrodo Hay un cable en cortocircuito chisporroteo entre el dispositivo de encendido y el electrodo Reemplace el ...

Page 48: ...nto de Restablecimiento del Regulador Se forman llamaradas Acumulación de grasa Limpie todas las piezas de la parrilla según las instrucciones incluidas en la sección Cuidado y Mantenimiento Adecuados Exceso de grasa en la carne Quítele la grasa a la carne antes de cocinarla Temperatura de cocción excesiva Ajuste baje la temperatura de cocción Se generan incendios de grasa Hay grasa atascada por a...

Page 49: ...pollo cruda en alimentos que han sido cocidos y están listos para ser servidos ASAR A LA TEMPERATURA ADECUADA Use un termómetro para carne para asegurarse de que la comida haya alcanzado una temperatura interna segura El Departamento de Agricultura de los Estados Unidos recomienda que se alcance las siguientes temperaturas mínimas para los siguientes alimentos SUGERENCIAS ÚTILES Si precoce la carn...

Page 50: ...las siguientes herramientas para armar esta Parrilla a Gas con Doble Quemador para Abrasar Destornillador de Cabeza Phillips Llave de Tuercas Hexagonales LISTA DE PARTES 1 Montaje del Cuerpo de la Parrilla 1 Meza Lateral Izquierda 1 Meza Lateral Derecha 1 Panel Frontal de la Meza Lateral Izquierda 1 Rejilla para Calentar 1 Panel Frontal de la Meza Lateral Derecha 5 Perillas de Control 1 Perilla de...

Page 51: ...IERTAS Y ACCESORIOS FAVOR DE VISITARNOS AL La prueba de compra se requiere Inspeccione el contenido de la caja para verificar que todas las partes estén incluidas e intactas 2 1 9 13 12 16 13 5 4 26 3 6 10 11 17 23 21 22 25 27 30 31 29 32 14 28 7 8 24 18 19 20 ...

Page 52: ...delas de Estrella M6 1 Tuerca M4 Plateados 2 Pernos M4 X 10 mm Plateados 4 Pernos M4 X 15 mm Negros 1 Arandela M4 2 Pernos M5 X 10 mm Negros 2 Tuercas de Ala M6 Negros 1 Llave de Apriete de Rueda 2 Pasador de Resorte Pernos M6 X 12 mm Negros Arandelas de Estrella M6 Arandela M4 Pernos M4 X 15 mm Negros Tuerca M4 Plateado Llave de Apriete de Rueda Pasador de Resorte Pernos M4 X 10 mm Plateados Pern...

Page 53: ...Alinee lo agujeros en la parte inferior de los paneles laterales del carro con los pernos previamente instalados correspondientes Inserte los agujeros en los pernos y deslice hacia la parte trasera de la base Asegúrelos usando dos pernos M6 x 12 mm negros tal como se ilustra Apriete todos los pernos Paso 3 Use ocho pernos M6 x 12 mm negros previamente instalados para unir los soportes de esquina a...

Page 54: ...panel del carro Deslice los ganchos hacia el panel lateral Figura 2 Alinee los agujeros en cada pata de las rejillas de bloqueo con sus agujeros correspondientes en la base del carro Asegurelos con dos pernos M5 x 10 mm Negros Figura 3 Paso 6 Use cuatro pernos M4 X 15 mm negros para insertarlos en los cuatro espaciadores de las puertas y fijarlos a las manijas de las puertas Puerta Izquierda Puert...

Page 55: ...para la otra puerta Nota Cuando lleve a cabo el Paso 8 eleve el cuerpo de la parrilla desde los paneles delantero y trasero para evitar lastimarse manos y dedos Paso 8 Con la ayuda de un amigo coloque el montaje del cuerpo de la parrilla sobre el carro de la parrilla Alinee los orificios para perno que se encuentran en el montaje del cuerpo de la parrilla utilizando cuatro pernos M6 X 12 mm negros...

Page 56: ...rtando los pernos preanexados del panel frontal dentro de los orificios de la mesa lateral Deslice en la parte pequeña del agujero Luego ajuste los pernos de manera segura Paso 11 Anexe el panel frontal del quemador lateral insertando los pernos preanexados del panel frontal dentro de los orificios del montaje del quemador lateral Deslice en la parte pequeña del agujero Luego ajuste los pernos de ...

Page 57: ...l frontal de la mesa lateral al cuerpo de la parrilla con un perno M6 X 12 mm negro Paso 13 Fije el montaje del quemador lateral derecho al lateral derecho del montaje del armazón del carro Coloque la mesa sobre los pernos previamente fijados y deslícela hacia la parte trasera de la parrilla luego ajuste los pernos firmemente Ajuste el panel frontal del montaje del quemador lateral al cuerpo de la...

Page 58: ...a parte superior del quemador lateral para asegurar en su lugar Figura 3 Coloque las dos arandelas M4 una tuerca M4 y una tuerca de ala para asegurar el quemador lateral Figura 4 Paso 15 Ajuste el conductor del encendedor del quemador lateral al electrodo que se encuentra en la parte inferior del quemador lateral Conductor del Encendedor del Quemador Lateral Electrodo Quemador Lateral Figura 1 Ara...

Page 59: ...re los rieles que se encuentran detrás y debajo del montaje del cuerpo de la parrilla Paso 18 Coloque la taza para grasa de modo que quede colgando de la bandeja para grasa Asegúrese de deslizar la taza sobre los rieles como se muestra en la ilustración Rejilla de la Quemador Lateral Taza para la Grasa Bandeja para la Grasa ...

Page 60: ...so 21 Coloque las parrillas de cocción y la parrilla de cocción del quemador para abrasar en las barras de soporte directamente sobre las placas de distribución de calor Paso 22 Inserte el rejilla para calentar sobre los soportes para que se asiente sobre las rejillas para cocinar Rejilla para Calentar Rejilla para Cocinar Placas de Distribución de Calor Rejilla para Cocinar del Quemador para Abra...

Page 61: ...60 Brinkmann 6630 Armada ...

Page 62: ...mplace con el paquete de la batería nueva Vuelva a colocar la lengüeta de la batería a su posición original Asegurar la lengüeta de la batería con un destornillador Ajuste con firmeza Para probar si funciona correctamente presione el interruptor con el dedo Paso 1 Paso 2 Paso 3 Paso 4 Paso 5 Paso 6 Un paquete de baterías de reemplazo pueden ser comprados en Servicio al Cliente llamando al 800 527 ...

Page 63: ...e 5 Quemadoras con Doble Quemador para Dorar está libre de defectos de materiales o mano de obra De por vida los quemadores de acero inoxidable de tubo Cinco años en todas las piezas de acero inoxidable restantes Tres años en válvulas armazón envoltura carro encendedor rejillas de cocinar y piezas relacionadas Las obligaciones de El Brinkmann Corporation con respecto a esta garantía se limitan a l...

Reviews: