


SpeedTrace Self-Regulating
Heating Cable
© BriskHeat® Corporation. All rights reserved.
9
2. Position and Attach Heating Cable to Pipe
•
Be sure all piping to be traced is dry.
•
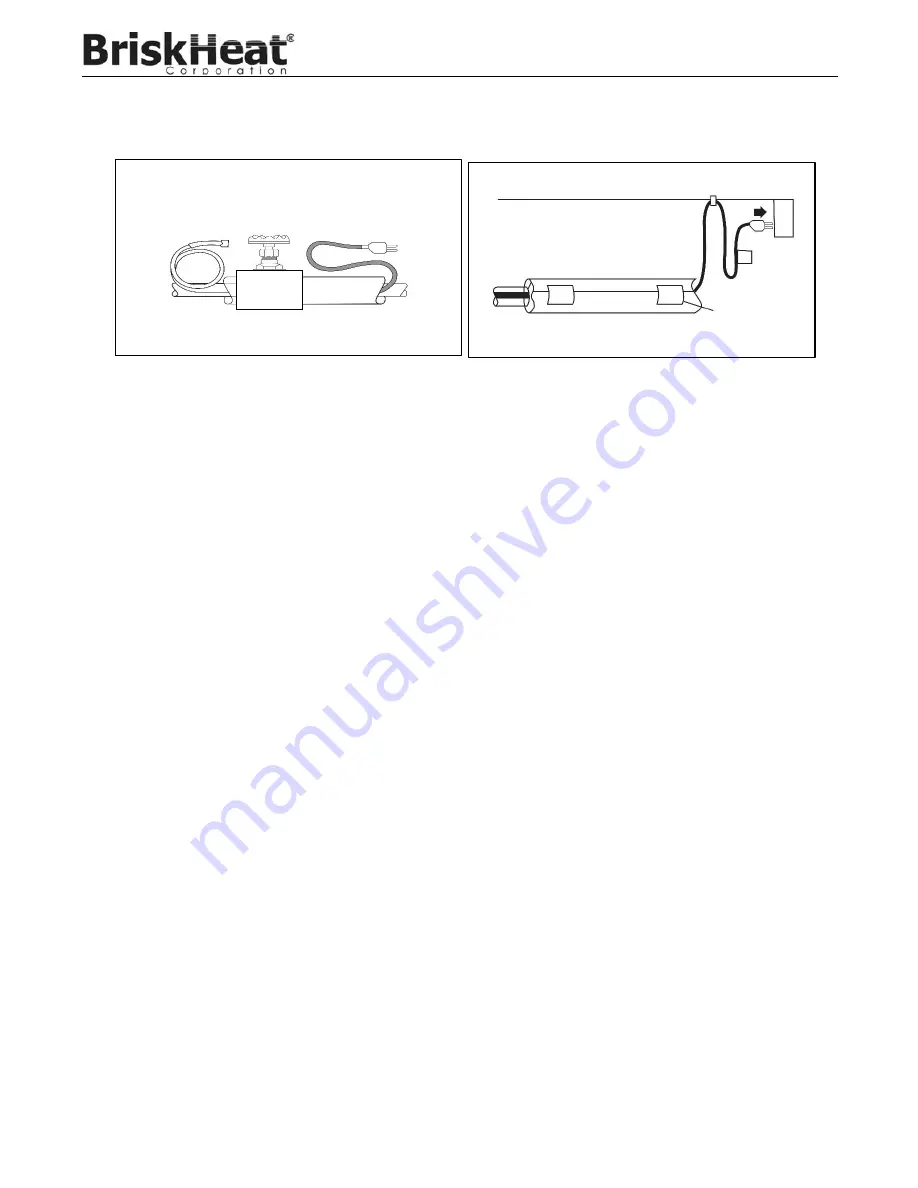
Install heating cable, using straight tracing Figure 1, or spiraling Figure 2.
•
For straight tracing, install the heating cable on a lower half of
the pipe; for example, in the 4 o’clock
or 8 o’clock position.
•
Be sure to install the additional heating cable required for valves, flanges, etc. as shown in Figures
1 and 2.
•
When the design calls for spiraling, begin by suspending a loop every 3 m as shown in Figure 2. To
determine the loop length, divide the SpeedTrace heating cable length by your pipe length and
multiply by 3. For example, if you are using a 15 m SpeedTrace heating cable on a 12 m pipe, leave
a 3.7 m loop of heating cable at every 3 m section of pipe. Grasp the loop in its center and wrap it
around the pipe. Even out the distance between spirals by sliding the wraps along the pipe. Use
recommended fiberglass or aluminum adhesive tape to secure the center of the loop to the pipe.
•
Fasten SpeedTrace heating cable to the pipe at 30 cm intervals using PSAT36A fiberglass tape or
AAT260 aluminum tape. Do not use vinyl electrical tape, duct tape, metal bands, or wire.
•
If excess cable remains at the end of the pipe, double it back along the pipe.
3. Check the Installation
•
Prior to installing thermal insulation make sure the heating cable is free of mechanical damage
(from cuts, clamps, etc.) and thermal damage (from solder, overheating etc.).
4. Install Thermal Insulation
•
A reliable SpeedTrace heating cable system depends on properly installed and dry, weatherproofed
thermal insulation like the INSUL-LOCK DS Flexible Closed Cell Pipe Insulation.
•
Ensure that at least 13 mm of preformed foam or equivalent thermal insulation is used and that all
piping, including valves, joints, and wall penetrations, has been fully insulated as shown in Figure 3.
•
For protection to -29 °C, use 25 mm thick insulation.
•
Install the insulation on the piping as soon as possible to minimize the potential for mechanical
damage after installation.
•
Be sure the SpeedTrace heating cable label is visible on the outside of the thermal insulation.
Pipe label
Figure 4 Strain relief
Strain relief
Cord label
Note:
Pipes must be fully insulated
Figure 3 Insulation


