background image

6

Need help?

 Give us a call on

 0330 026 6273

 and speak to one of our trained advisors.  

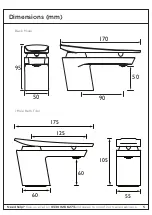
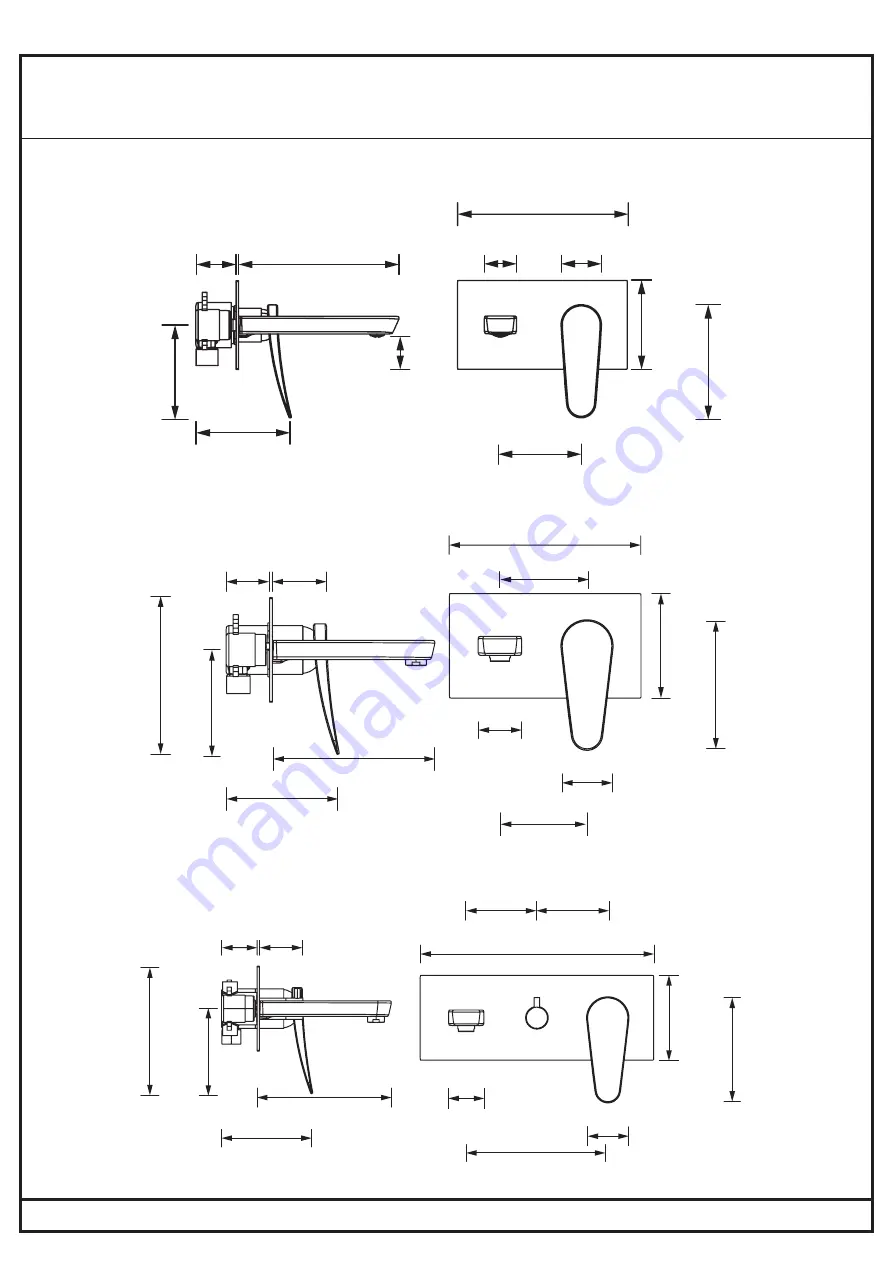
Dimensions (mm)

50 60

190

127

122

180

330

120

50

58

197

145

100 100

220

58

147

50

185

50 62

182

100

128

122

120

100

210

110

100

50

40

201

50

140

118

115

40

Wall Mounted Basin Mixer

Wall Mounted Bath Filler

Wall Mounted Bath Shower Mixer

Summary of Contents for Claret CLR 1HBF C/WHT

Page 1: ...Claret Tap Range Models Covered CLR BASNW C WHT CLR 1HBF C WHT CLR WMBAS C CLR WMBF C WHT CLR WMBSM C Please keep this booklet for future reference Installer when you have read these instructions ple...

Page 2: ...r enjoyment in mind To ensure that it works to its full potential it needs to be fitted correctly These fitting instructions have been created to give you all of the information you need and if you ne...

Page 3: ...cked with the aid of an electronic detector If power tools are used do not forget to Wear eye protection Unplug equipment after use Important Remember to turn off the mains water supply before connect...

Page 4: ...bar NOTE Nominally equal balanced inlet supply pressures are recommended for optimum Performance of mixer taps Designed to comply with BS EN 200 for single taps combination taps for water systems of...

Page 5: ...5 Need help Give us a call on 0330 026 6273 and speak to one of our trained advisors Dimensions mm 50 95 170 50 90 105 60 175 125 60 55 Basin Mixer 1 Hole Bath Filler...

Page 6: ...of our trained advisors Dimensions mm 50 60 190 127 122 180 330 120 50 58 197 145 100 100 220 58 147 50 185 50 62 182 100 128 122 120 100 210 110 100 50 40 201 50 140 118 115 40 Wall Mounted Basin Mi...

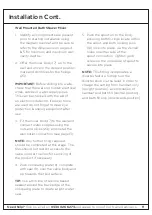
Page 7: ...the inlet connection pipes 13 by hand only DO NOT OVERTIGHTEN to the fitting and connect the hot and cold supplies 4 Connect the hot and cold water supplies to the connecting pipes 5 Turn on the wate...

Page 8: ...2 Cartridge Retaining Nut x1 3 Shroud x1 4 Cartridge x1 5 Mixer Body Sleeve x1 6 O Ring x1 7 Mixer Body x1 8 Concealing Plate x1 9 Concealing Plate x1 10 O Ring x1 11 O Ring x1 12 Screw Wall Plug Pac...

Page 9: ...d connect water supplies using the nut and olive 13 Any further tiling required should be completed at this stage NOTE The tiles should not restrict access to the valve in order to allow for servicing...

Page 10: ...Nut x1 4 Cartridge x1 5 Sleeve x1 6 0 Ring x1 7 Mixer Body x1 8 Concealing Plate x1 9 Plate Seal x1 10 0 Ring x1 11 O Ring x1 12 Handset Holder x1 13 Hose x1 14 Handset x1 15 Spout Connections x1 16 S...

Page 11: ...ll the wall outlet connection see page 13 NOTE Any further tiling required should be completed at this stage The tiles should not restrict access to the valve in order to allow for servicing of the pr...

Page 12: ...ge of the concealing plate to create a tight water seal Connect the wall outlet assembly to the shower valve outlet connection not supplied B Without rear access once wall is finished Fit a wall plate...

Page 13: ...ead CLR WMBSM C Your Bristan showerhead has rub clean nozzles for easy cleaning Simply rub your fingers across the rubber spray jets regularly and before you turn the shower on to remove any scale or...

Page 14: ...ted at the rear of the handle using a hexagonal key 2 Remove the handle by pulling upwards from the spacer proceed to remove spacer and shroud 3 Using a suitable spanner remove retaining nut to gain a...

Page 15: ...r a few seconds after the tap has turned off This is caused by capillary action and residual water in the spout being siphoned out This should only last for a couple seconds Constant dripping for a fe...

Page 16: ...why we offer solid guarantees on all our products effective from the date of purchase to give you peace of mind To start your free guarantee simply scan the QR code and register your product Alternati...

Reviews: