1
2
3
4
5
6
7
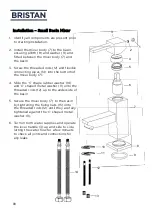
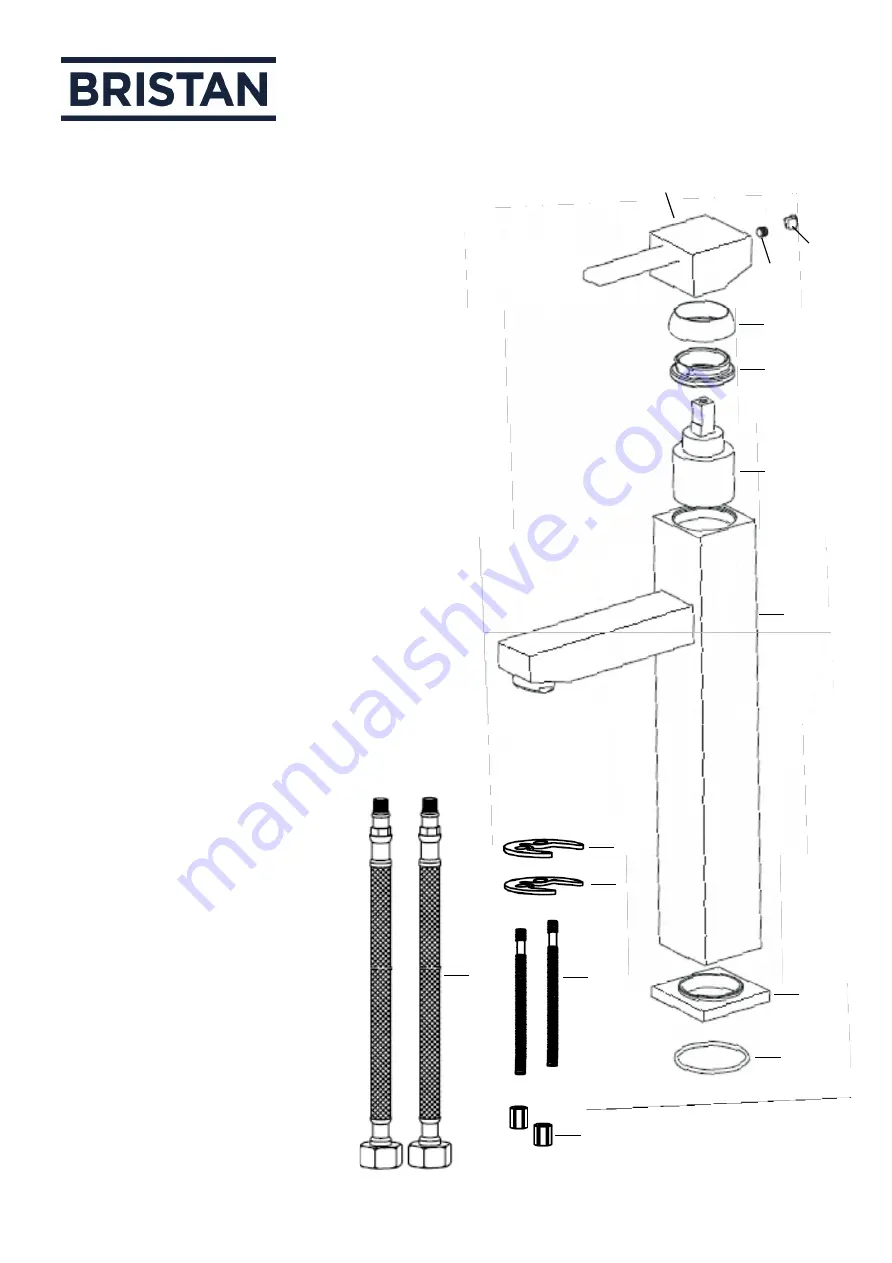
Installation – Tall Basin Mixer
1.
Identify all components are present prior to
starting installation.
2.
Install the mixer body (7) to the basin, ensuring
the plinth (8) and washer (9) are fitted between
the mixer body (7) and the basin.
3.
Screw the threaded rods (12) into the bottom of the
mixer body (7).
Note: The copper connecting pipes are pre-installed into the
mixer body (7). DO NOT attempt to remove them as this
could cause a leak from the connection.
4.
Slide the ‘C’ shaped rubber washer (10) and ‘C’ shaped
metal washer (11) onto the threaded rods (12) up to the
underside of the basin.
5.
Secure the mixer body (7) by tightening
the fixing nuts (13) onto the threaded
rods (12) until they are fully tightened
against the ‘C’ shaped metal washer (11).
10
8
9
10
11
12
13
14
6.
Turn on both water sup[plies
and operate the lever handle
(3) up and side to side,
letting the water flow for a
few minutes to check all
joints and connections for
and leaks.
Summary of Contents for QD 1/2 C
Page 15: ...15...


