23
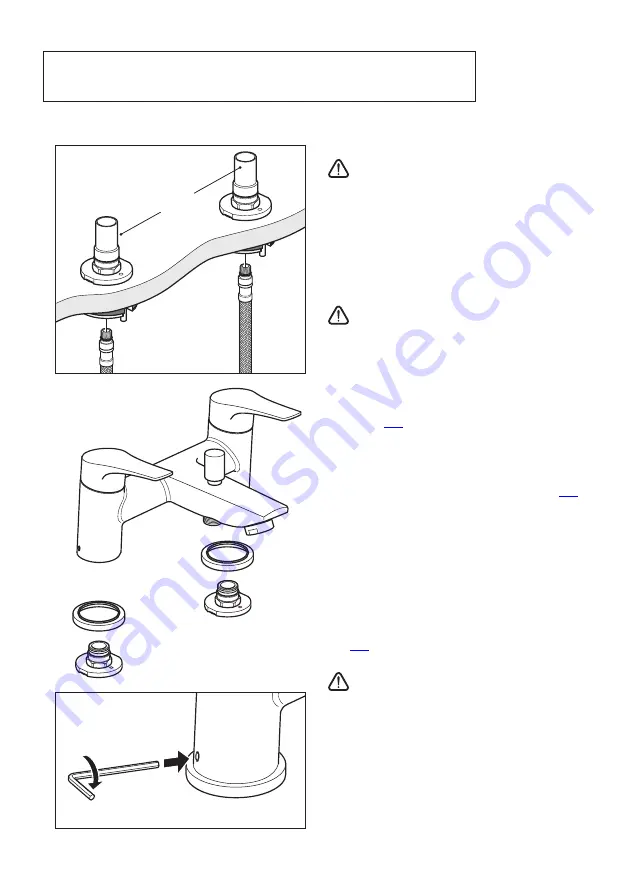
X 2 Grubscrews 1 one on the outside of each pillar
3. Attach flexible connecting pipes
Important:
Before connecting the
flexible connecting pipes, please refer to
the specific installation requirements on
page 6.
Carefully screw the ‘flexible connecting
pipes’ into the ‘push-fit connectors’ and
turn the integral isolation valves to the
'closed' position as shown on page 6.
Important:
Only tighten the flexible
connecting pipes by hand.
Do not
overtighten.
Connect the flexible connecting pipes to
the household water supply pipes.
Remove the spacer cover caps and place
the plinths over the push-fit connectors.
Grease the push-fit connectors using the
sachet of grease provided. Push-fit the tap
body onto the connectors.
Align the body and tighten both grub
screws at the rear of the body using the
long end of the 2.5mm hexagonal key as
shown opposite until finger tight. Remove
the hexagonal key and insert the short
end into the grub screw and tighten an
extra ¾ to 1 complete turn more to ensure
the tap body is securely tightened to the
push-fit connector.
Important:
The fitting must be
securely attached to the base.
Push-fit the grey rubber plugs into the
grub screw holes.
Plinths
2.5mm
hexagonal key
Bath Shower Mixer - Installation
Flexible
connecting
pipes
Spacer cover caps
Push-fit
connectors


