bomborasupplies.com.au
sales@bomborasupplies.com.au
1300 724 249
BRITA C150 FINEST
INSTALLATION INSTRUCTIONS
PART #
C150KIT-FINEST
5. Plumbing in Your System
1.
Drill a 12mm (1/2”) hole in the desired loca�on in the sink bench top. We suggest placing masking tape over drill spot to prevent drill
movement. Drill a 3mm pilot hole first, followed by a 12mm (1/2”) hole for faucet sha�. Good quality, sharp drill bits and coolant are
recommended. Seek professional advice before attemp�ng to drill marble or similar surfaces.
2.
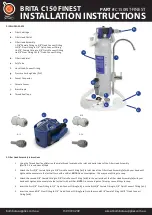
Mount the dedicated Chrome Faucet
(i)
into the bench top and place the chrome escutcheon and large rubber washer on the brass
stem of faucet.
3.
Place the faucet stem through moun�ng the hole, and attach the small rubber washer then the metal/plas�c washer, followed by the
metal locking washer and nut. Tighten the nut ensuring that the faucet lever is located in the direc�on required.
4.
Screw Quick-Connect Faucet Connector
(h)
onto the sha� of the faucet. This fitting does not require thread tape and should be �ght-
ened (but not over-�ghtened) to prevent water leaks.
NOTE:
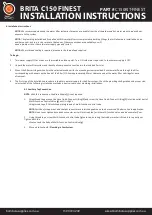
All fittings provided for water tubing are quick connect push-in fittings. No tools or sealing materials are required. It is important
that tube is cut to length (if required) with straight square cuts and pushed firmly into fi�ings to seal. To install tubing, immerse the end
of the tubing in cold water to lubricate prior to pushing into the fitting.
5.
Measure a length of Poly Tube
(e)
to run from the bottom of the Faucet Connect Fitting
(h)
on the faucet, to the outlet connec�on
(b)
on the water filter system. Ensure you measure length accurately and allow for tubing to be run neatly through the cupboard. Push
tubing firmly into the faucet fitting, ensuring it is fully sealed. Push the other end into the outlet connec�on on filter system
(b)
.
6.
Take the rest of the tubing
(e)
and connect from inlet connec�on of filter system
(b)
to the Hose-Quick Connector
(f)
on PLV
(g)
, previously
installed on water supply. Again, ensure that the tubing is pushed firmly into these fittings.
7.
Connect the 3/8” braided hose line to the coffee line outlet located on the tee sec�on of the filter outlet
(d)
.
8.
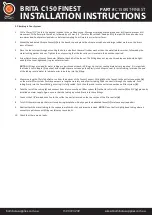
Turn ON the water supply that was closed during installa�on. Slowly open the dedicated faucet
(i)
to release any trapped air.
9.
Neatly attach the water tubing to the cupboard walls with clips and screws provided.
NOTE:
Do not pull or �ghtly bend tubing where it
connects to quick connect fittings as this may cause leaks.
10. Check that there are no leaks.


