G730-Install-IG100 Installation Guide
Brocade
®
G730 Switch Hardware Installation Guide
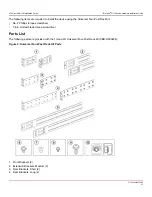
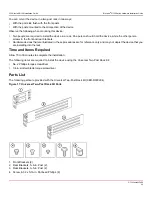
5. Screw, 8-32 x 5/16-in. Flathead Phillips (16)
6. Screw, 6-32 x 1/4-in. Panhead Phillips (8)
7. Screw, 10-32 x 5/8-in. Panhead Phillips (8)
8. Retainer Nut, 10-32 (8)
Ensure that the items listed and illustrated in the preceding figure are included in the kit.
NOTE
Not all parts may be used with certain installations depending on the device type.
Flush-Front Mounting
Observe the following notes when performing this procedure:
•
The device must be turned off and disconnected from the fabric during this procedure.
•
The figures in this document show a 1U device, but the instructions are the same for a 2U device.
•
The figures for this procedure show a two-post rack with narrow posts (3-in. to 5-in.) as an example.
•
The figures in the rack installation procedures are for reference only and may not show the actual device.
CAUTION
Use the screws specified in the procedure. Using longer screws can damage the device.
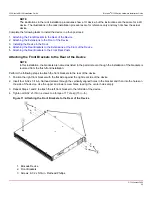
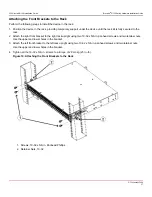
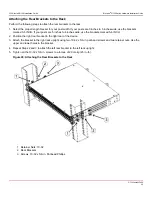
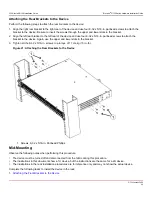
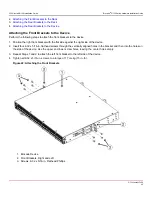
Complete the following tasks to install the device in the rack:
1.
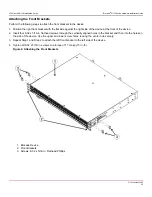
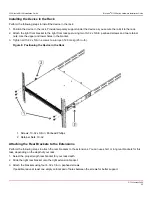
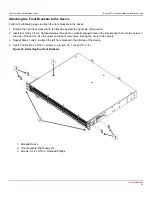
Attaching the Front Brackets to the Device
2.
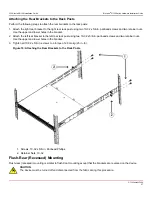
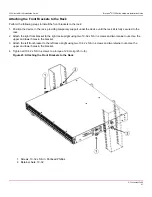
Attaching the Front Brackets to the Rack
3.
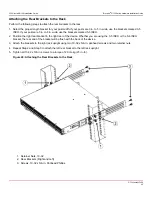
Attaching the Rear Brackets to the Rack
4.
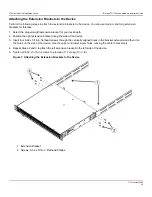
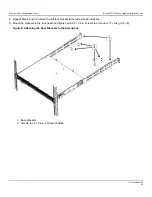
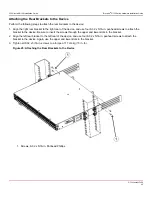
Attaching the Rear Brackets to the Device
G730-Install-IG100
35
Summary of Contents for Brocade G730
Page 94: ......

