NetXtreme-UG100
51
NetXtreme-C/NetXtreme-E
User Guide
15.2 DCBX Mode – Enable (IEEE only)
This option allows a user to enable/disable DCBX with the indicated specification. IEEE only indicates that IEEE 802.1Qaz
DCBX is selected.
Windows Driver setting:
After enabling the indicated options in the UEFI HII menu to set firmware level settings, perform the follow selection in the
Windows driver advanced properties.
Open
Windows Manager
→
Broadcom NetXtreme E Series adapter
→
Advanced Properties
→
Advanced tab
Quality of Service = Enabled
Priority & VLAN = Priority& VLAN enabled
VLAN = <ID>
Set desired VLAN id
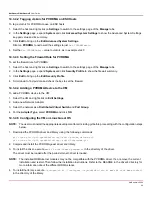
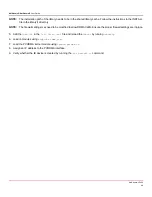
To exercise the DCB related command in Windows PowerShell, install the appropriate DCB Windows feature.
1. In the
Task Bar
, right-click the Windows PowerShell icon and then click
Run as Administrator
. Windows PowerShell
opens in elevated mode.
2. In the Windows PowerShell console, type:
Install-WindowsFeature "data-center-bridging"
15.3 DCBX Willing Bit
The DCBX willing bit is specified in the DCB specification. If the Willing bit on a device is true, the device is willing to accept
configurations from a remote device through DCBX. If the Willing bit on a device is false, the device rejects any configuration
from a remote device and enforces only the local configurations.
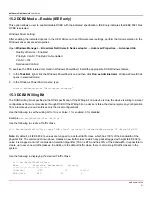
Use the following to set the willing bit to True or False. 1 for enabled, 0 for disabled.
Example
set-netQoSdcbxSetting -Willing 1
Use the following to create a Traffic Class.
C:\> New-NetQosTrafficClass -name "SMB class" -priority 4 -bandwidthPercentage 30 -Algorithm ETS
Note:
By default, all IEEE 802.1p values are mapped to a default traffic class, which has 100% of the bandwidth of the
physical link. The command shown above creates a new traffic class to which any packet tagged with eight IEEE 802.1p
value 4 is mapped, and its Transmission Selection Algorithm (TSA) is ETS and has 30% of the bandwidth. It is possible to
create up to seven new traffic classes. In addition to the default traffic class, there is at most eight traffic classes in the
system.
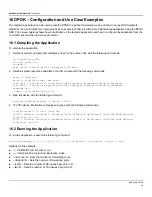
Use the following in displaying the created Traffic Class:
C:\> Get-NetQoSTrafficClass
Name Algorithm Bandwidth(%) Priority
---------------------------
[Default] ETS 70 0-3,5-7
SMB class ETS 30 4

