background image

Page 3

MODELS   QTXE050 • QTXE080 • QTXE110

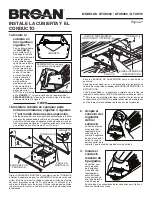
2. Attach 

damper/duct 

connector.


Snap damper / 

duct connector 

onto housing. 

Make sure con-

nector is flush with 

top of housing and 

damper flap falls 

closed.

3. Install 

6-inch 

round duct-

work.


Connect 6-inch 

round ductwork 

to damper / duct 

connector. Run 

ductwork to a 

roof cap or wall 

cap. Tape all 

ductwork con-

nections to make 

them secure and air tight.

INSTALL HOUSING & DUCT


1a. Mount 

housing to 

joist or 

I

-joist.


Use a pliers to bend 

housing 

TABS

 out 

to 90

0

. Hold housing 

in place so that 

the housing tabs 

contact the bottom 

of the joist. The 

housing mounts 

with four (4) screws 

or nails. Screw or 

nail housing to joist 

through lowest 

holes in each 

mounting flange,  

then through 

highest holes. 

NOTE: Mounting to 

I

-JOIST

 (shown) 

requires use 

of 

SPACERS


(included) between 

the highest hole 

of each mounting 

flange and the 

I

-joist.

SPACER

(use for mounting to I-Joist)

I

-JOIST

TABS

1b. Mount housing anywhere between 

trusses, joists, or 

I

-joists using hanger 

bars.


Sliding hanger bars are provided to allow for accurate posi-

tioning of housing anywhere between framing. They can be 

used on all types of framing (

I

-joist, standard joist, and truss 

construction) and span up to 24”.

Attach the MOUNTING CHANNELS to the housing using the 

SCREWS supplied. Make sure TABS face “up” as shown. Use 

the set of channel mounting holes (marked “STD”) to mount the 

housing flush with the bottom of the drywall. Use the other set 

of holes (not marked) to mount the housing flush with the top of 

the drywall.

OR

HANGER

BAR (4)

SCREWS (4)

TAB


Extend HANGER BARS to the width of the framing.

  Hold ventilator in place with the hanger bar tabs wrapping 

around the BOTTOM EDGE OF THE FRAMING.


NAIL ventilator to framing or fasten with screws (not provided) 

through HOLES near nails.


*

 To ensure a noise-free mount: Secure hanger bars together 

with  SCREWS or use a pliers to crimp mounting channels 

tightly around hanger bars.

HOLE FOR OPTIONAL 

SCREW MOUNTING (4)

STD

MOUNTING

CHANNEL (2)

NAIL (4)

BOTTOM EDGE 

OF FRAMING

*


SCREW (2)

Summary of Contents for ULTRA SILENT QTXE080

Page 1: ...sh attachment The motor is permanently lubricated and never needs oiling If the motor bearings are making excessive or unusual noises replace the blower assembly includes motor and impeller OPERATION Use an on off switch or speed control to operate this ventilator See Connect Wiring for details Use of speed controls other than the Broan Models 78V and 78W may cause a motor humming noise To registe...

Page 2: ... best performance and avoid installing the fan with smaller ducts than recommended Insulation around the ducts can reduce energy loss and inhibit mold growth Fans installed with existing ducts may not achieve their rated airflow Use a roof cap or wall cap that has a built in damper to reduce backdrafts Plan to supply the unit with proper line voltage and appropriate power cable Cooking Equipment F...

Page 3: ...BS 1b Mount housing anywhere between trusses joists or I joists using hanger bars Sliding hanger bars are provided to allow for accurate posi tioning of housing anywhere between framing They can be used on all types of framing I joist standard joist and truss construction and span up to 24 Attach the MOUNTING CHANNELS to the housing using the SCREWS supplied Make sure TABS face up as shown Use the...

Page 4: ... into slots on each side of hous ing 7 Push grille against ceiling 5 Finish ceiling Install ceiling material Cut out around housing 4 Connect electrical wiring Run 120 VAC house wiring to installation location Use proper UL approved connector to secure house wiring to wiring plate Connect wires as shown in wiring diagrams CONNECT WIRING SERVICE PARTS Key No Part No Description 1 97016466 Housing 2...

Page 5: ...am bién larga vida y una apariencia atractiva baje o retire la rejilla y aspire el interior de la unidad con el accesorio del cepillo para sacudir polvo El motor está permanentemente lubricado y nunca necesitará aceite Si los cojinetes del motor están haciendo ruido excesivo o inusual reemplace el conjunto del ventilador incluye el motor y el rodete del ventilador OPERACIÓN Opere este ventilador m...

Page 6: ...ventilador con conductos menores que los recomendados El aislamiento alrededor de los conductos puede reducir la pérdida de energía e inhibir el de sarrollo de moho Los ventiladores instalados en conductos existentes podrían no obtener el flujo de aire nominal Instale una tapa de techo o de pared que tenga un regulador de tiro incorporado a fin de reducir los contratiros Alimente la unidad con el ...

Page 7: ...ios de montaje del canal marcados como STD para montar la cubierta al ras con la parte inferior de la tablarroca Utilice el otro juego de orificios sin marca para montar la cubierta al ras con la parte superior de la tablarroca VIGUETA I SEPARADOR se usa para el montaje a la vigueta I LENGÜETA BARRA DE SUS PENSIÓN 4 TORNILLOS 4 LENGÜETA STD CANAL DE MONTAJE 2 Abra las BARRAS DE SUSPENSIÓN hasta el...

Page 8: ... en las ranuras que se encuentran a cada lado de la cubierta 7 Empuje la rejilla contra el cielo raso 5 Termine el cielo raso Instale el material del cielo raso Recorte alrededor de la cubierta 4 Conecte los cables eléctricos Extienda el cableado de la casa de 120 V CA al lugar de la instalación Utilice una conexión aprobada por UL para afianzar el cableado de la casa a la placa de cableado Conect...

Reviews: