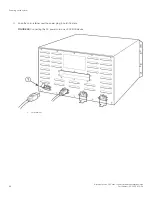
1.
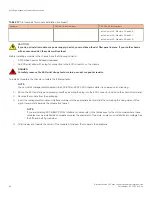
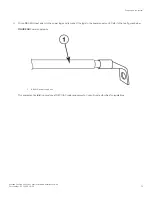
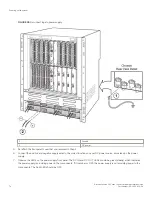
Cord retainer
DANGER
If the installation requires a different power cord than the one supplied with the device, make sure you use a
power cord displaying the mark of the safety agency that defines the regulations for power cords in your country.
The mark is your assurance that the power cord can be used safely with the device.
4. Connect the power cord to the wall outlet.
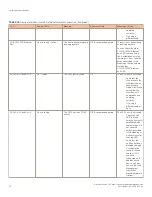
5. Observe the LEDs on the power supply front panel. The AC OK and DC OK LEDs should be green (steady), which indicates the
power supply is providing power to the components. If it is amber or OFF, the power supply is not providing power to the
components. The ALM LED should be OFF.
Connecting DC power to the chassis
You can use a DC power source for the Brocade chassis using a DC-to-DC power supply. DC power must be supplied at 48 V and 30
A.
To perform this task, you need the following items:
•
Flathead screwdriver
•
Phillips-head screwdriver
•
#6 AWG wire (grounding wire)
•
#8 AWG wire (input wire)
•
Crimping tool
Powering on the system
Brocade FastIron SX Series Chassis Hardware Installation Guide
70
Part Number: 53-1003613-04
Summary of Contents for FastIron SX
Page 10: ...Brocade FastIron SX Series Chassis Hardware Installation Guide 10 Part Number 53 1003613 04 ...
Page 12: ...Brocade FastIron SX Series Chassis Hardware Installation Guide 12 Part Number 53 1003613 04 ...
Page 46: ...Brocade FastIron SX Series Chassis Hardware Installation Guide 46 Part Number 53 1003613 04 ...
Page 80: ...Brocade FastIron SX Series Chassis Hardware Installation Guide 80 Part Number 53 1003613 04 ...
Page 118: ...Brocade FastIron SX Series Chassis Hardware Installation Guide 118 Part Number 53 1003613 04 ...
Page 158: ...Brocade FastIron SX Series Chassis Hardware Installation Guide 158 Part Number 53 1003613 04 ...
Page 164: ...Brocade FastIron SX Series Chassis Hardware Installation Guide 164 Part Number 53 1003613 04 ...
Page 172: ...Brocade FastIron SX Series Chassis Hardware Installation Guide 172 Part Number 53 1003613 04 ...

