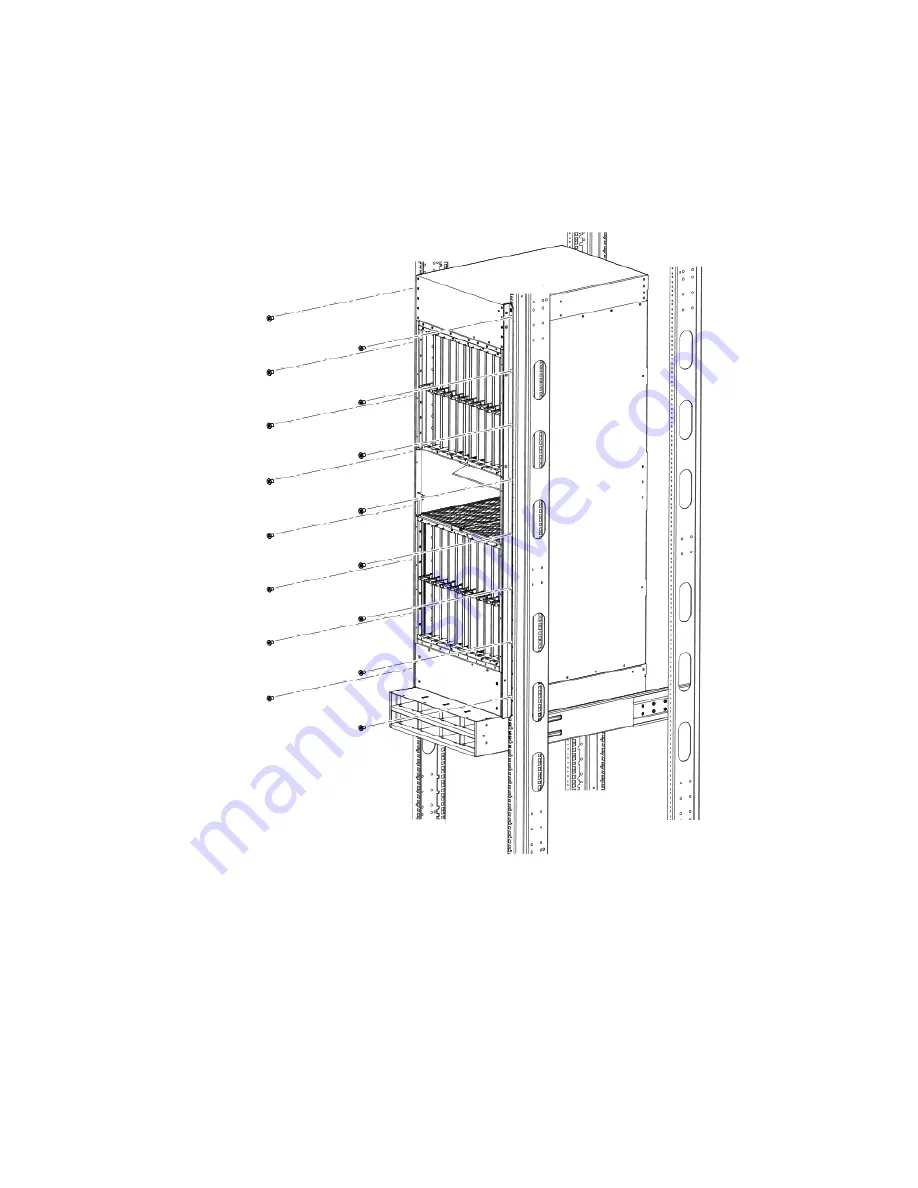
12. Once the chassis is securely inserted in the rack, fasten the mounting brackets to the front rails of the rack using 10-32 screws
(eight screws per side) and either clip nuts or floating nuts, whichever is appropriate for your rack type (see the following figure).
FIGURE 73
Securing the chassis in rack
Your rack installation is complete.
Installing modules in the Brocade MLXe Series-32 router
The Brocade MLXe Series-32 router ships with empty module slots and upper and lower shipping panels installed.
For instructions about installing 2x100GbE interface modules, refer to
Installing 2x100GbE CFP2 interface modules in Brocade MLXe
Installing a Brocade MLXe Series-32 router
Brocade NetIron MLXe Series Hardware Installation Guide
152
53-1004203-04
Summary of Contents for NetIron MLXe Series
Page 8: ...Brocade NetIron MLXe Series Hardware Installation Guide 8 53 1004203 04...
Page 12: ...Brocade NetIron MLXe Series Hardware Installation Guide 12 53 1004203 04...
Page 20: ...Brocade NetIron MLXe Series Hardware Installation Guide 20 53 1004203 04...
Page 192: ...Brocade NetIron MLXe Series Hardware Installation Guide 192 53 1004203 04...
Page 270: ...Brocade NetIron MLXe Series Hardware Installation Guide 270 53 1004203 04...
Page 286: ...Brocade NetIron MLXe Series Hardware Installation Guide 286 53 1004203 04...
Page 292: ...Brocade NetIron MLXe Series Hardware Installation Guide 292 53 1004203 04...


