Initial Setup and Verification
•
•
•
•
•
•
•
•
•
•
•
•
•
Configuration and verification task guide
Before connecting device to the fabric, use the following tasks to initially configure and setup the device, verify correct operation, and
back up the configuration.
The configuration information is mirrored to the standby CP blade, which allows the current configuration to remain available even if the
active CP blade fails. The configuration information for the device is stored in the WWN cards and the flash memory of the CP blades.
The configuration can be backed up to a workstation (uploaded) and then downloaded to the active CP blade if necessary.
NOTE
The device WWN is set by the factory to match the license ID (which is based on the chassis serial number).
TABLE 12
Configuration and verification tasks
Task
Task details or additional information
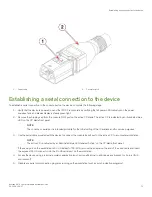
Establish a serial connection to the director.
Connect a serial cable to the console port on active CP blade and use a terminal
emulator program (such as HyperTerminal on a PC, or TERM, TIP, or Kermit in a
UNIX environment) to log in to the console port and device. The blue "Active" LED
illuminates on the active CP blade.
Configure IP addresses for the device.
Configure an IP address and subnet mask for a chassis management connection.
Configure IP addresses, host names, subnet masks, and gateway addresses for both
control processor (CP) blades.
Establishing an Ethernet connection to the device.
Connect Ethernet cable to active CP blade Ethernet port labeled "Management" and
establish a connection.
Set a unique domain ID for the device.
Disable the device using the
switchDisable
command, and then use the
configure
command to step through prompts to configure a domain ID. Use
switchEnable
to
re-enable the device.
Set the date and time for the device.
Use the
date
,
tsTimeZone
, and
tsClockServer
commands to set date, time zone, and
synchronize local time of device with NTP server.
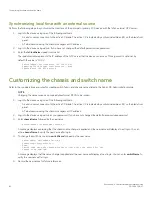
Customize a switch and chassis name for the device.
Use the
switchName
command, followed by new name in quote marks (
switchname
"bigswitch".)
Use the
chassisName
command followed by the new name in quote marks
(
chassisname
"chassis_002").
Brocade X6-4 Director Hardware Installation Guide
53-1004106-07
65
Summary of Contents for X6-4
Page 12: ...Brocade X6 4 Director Hardware Installation Guide 12 53 1004106 07...
Page 20: ...Brocade X6 4 Director Hardware Installation Guide 20 53 1004106 07...
Page 28: ...Brocade X6 4 Director Hardware Installation Guide 28 53 1004106 07...
Page 64: ...Brocade X6 4 Director Hardware Installation Guide 64 53 1004106 07...
Page 86: ...Brocade X6 4 Director Hardware Installation Guide 86 53 1004106 07...
Page 102: ...Brocade X6 4 Director Hardware Installation Guide 102 53 1004106 07...
Page 130: ...Brocade X6 4 Director Hardware Installation Guide 130 53 1004106 07...
Page 140: ...Brocade X6 4 Director Hardware Installation Guide 140 53 1004106 07...
Page 166: ...Brocade X6 4 Director Hardware Installation Guide 166 53 1004106 07...
Page 196: ...Brocade X6 4 Director Hardware Installation Guide 196 53 1004106 07...
Page 200: ...Brocade X6 4 Director Hardware Installation Guide 200 53 1004106 07...
Page 204: ...Brocade X6 4 Director Hardware Installation Guide 204 53 1004106 07...
Page 210: ...Brocade X6 4 Director Hardware Installation Guide 210 53 1004106 07...
Page 224: ...Brocade X6 4 Director Hardware Installation Guide 224 53 1004106 07...
Page 238: ...Brocade X6 4 Director Hardware Installation Guide 238 53 1004106 07...

