10
bromic.com/heat
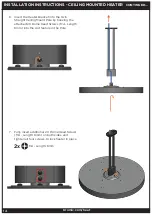
4. Slide the Round Cap over the Ceiling Mount
Pole and attach the it to the Roof Bracket
using 2 X Dome Head Screws (M4 - Length:
10mm).
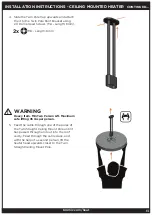
3. Attach the chosen Ceiling Mount Pole to the
Pendant Mount Roof Bracket using the
4 X Dome Head Screws (M4 - Length: 6mm).
Shown on right are the four options for
the Single Ceiling Mount Poles.
2. Fasten the Pendant Mount Roof Bracket
on the ceiling in the desired location, using
appropriately sized and type bolts (not
included) for the mounting surface.
Ensure the bracket is firmly secured to
appropriate supports (not only to
ceiling panels) with fasteners in 4
opposing holes before proceeding.
1. Unpack all items from shipping cartons and
place items on a non-abrasive surface.
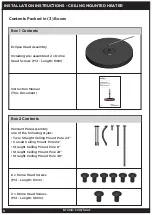
Instructions for Single Pole options, including:
•
Curved Ceiling Mount Pole 24”
•
Straight Ceiling Mount Pole 8”
•
Straight Ceiling Mount Pole 24”
•
Straight Ceiling Mount Pole 48”
INSTALLATION INSTRUCTIONS - CEILING MOUNTED HEATER
CONTINUED...
4x
2x
M4 - Length: 6mm
M4 - Length: 10mm
IMPORTANT
Fasteners must be chosen by installer to suit
mounting structure. Installer is responsible for
chosing fasteners appropriate to the loading of
the product.
!


