bromic.com
7
DEVICE SETUP
Section 2 - Create the Layout in the App
Follow the steps below to create all the Rooms and Heaters in each Room:
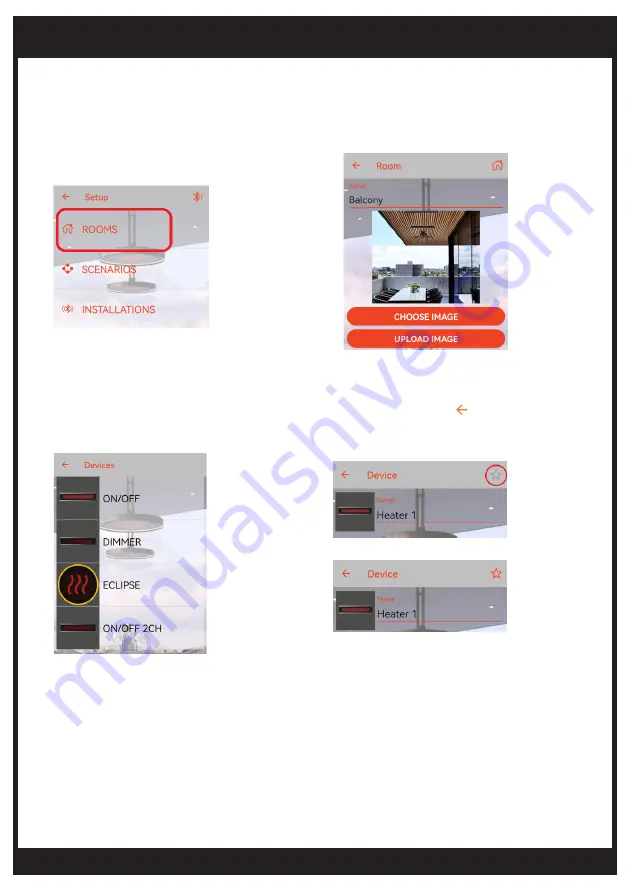
5. Name the Heater, and click “ ” to save the
Heater (Optional: Click on the Star icon to add a
Heater to the “Favorites” list for easy access).
1. Choose the new Installation created
in section 1. Tap the Setup icon then
choose “ROOMS“.
2. Click ON “ + ” to add a new Room. Enter a name.
3. Click on the “ + ” on the bottom of the Room setup page to add the Heater(s).
4. Choose the Heater type according to the
Heater and Controller installed. (i.e. ON/OFF,
Dimmer, Eclipse, ON/OFF 2CH).
Note: For a split-element Heater, choose Device “ON/OFF 2CH”.
Note: Multiple Heaters connected to a single Controller output must be setup as a single Heater in the App.
6. Add all remaining Heaters installed in this Room by repeating steps 3-5.
7. Repeat the above steps to add all remaining Rooms and Heaters.
Note: Hold and swipe left to delete a listed Room or Heater.
Note: Each Smart-Heat Connect can control up to 50 Heaters provided all Controllers are within 30m. Follow
steps in section 1 to add additional Smart-Heat Connect if required.
Note: Customer can upload an image or choose an image from the App library.


