background image

17

OPERATION

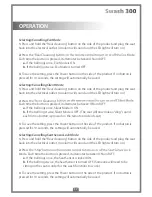
Selecting/Cancelling Eco Mode

1.

 Press and hold the “Rear cleansing” button on the side of the product and plug the seat 

back into the electrical outlet. (An alarm will sound and the LED light will turn on.)

2. 

Press the “Rear Cleansing”

Each time the button is pressed, it alternates between ON and OFF.

a. 

If the bell rings once, Eco Mode is ON.

b. 

If the bell rings twice, Eco Mode is turned OFF.

3

. To save the setting, press the Power button on the side of the product. If no button is 

pressed for 10 seconds, the setting will automatically be saved.

Selecting/Cancelling Silent Mode

1.

 Press and hold the “Rear cleansing” button on the side of the product and plug the seat 

back into the electrical outlet. (An alarm will sound and the LED light will turn on.)

2. 

Press the “Front Cleansing”

Each time the button is pressed, it alternates between ON and OFF.

a. 

If the bell rings once, Silent Mode in ON.

b. 

If the bell rings twice, Silent Mode is OFF. (The seat will now make a “ding” sound 

each time a button is pressed on the remote or side of seat.)

3

. To save the setting, press the Power button on the side of the product. If no button is 

pressed for 10 seconds, the setting will automatically be saved.

Selecting/Cancelling Seat Sensor Lock Mode

1.

 Press and hold the “Rear cleansing” button on the side of the product and plug the seat 

back into the electrical outlet. (An alarm will sound and the LED light will turn on.)

2. 

Press the “Stop”

ock 

Mode. Each time the button is pressed, it alternates between ON and OFF.

a. 

If the bell rings once, the Seat Sensor is locked ON.

b. 

If the bell rings twice, the Seat Sensor is turned OFF. (Someone will need to be 

sitting on the seat in order for the wash functions to work.)

3

. To save the setting, press the Power button on the side of the product. If no button is 

pressed for 10 seconds, the setting will automatically be saved.

Summary of Contents for S300-EW

Page 1: ...OWNER S MANUAL S300 EW S300 RW ...

Page 2: ...ce TABLE OF CONTENTS Section 1 Product Features page 1 Section2 Safety Precautions page 2 5 Section 3 Parts C page 6 7 Section 4 Installation page 8 11 Section 5 Operation page 12 17 Section6 page 18 Section7 Maintenance page 19 20 Section 8 Troubleshooting page 21 22 Section9 Warranty Information page 23 24 Section10 Contact Information page 25 ...

Page 3: ...cro bubbles introduced into the wash spray create a gentler softer cleansing action designed for sensitive skin In addition the aerated spray r ective in cleansing the skin Automatic Eco Mode when engaged the power saving Eco Mode function automatically lowers the seat temperature settings to conserve energy Gentle closing seat and lid slam free gentle closing seat and lid are user friendly Quick ...

Page 4: ... risk of electrocution If not observed serious injury or even death may occur as a result of electrocution READ ALL INSTRUCTIONS BEFORE USING Save these instructions for future reference When using electrical products especially when children are present basic safety precautions should always be taken ...

Page 5: ...3 SAFETY PRECAUTIONS ...

Page 6: ...4 property damage or product damage used WARNING SAFETY PRECAUTIONS ...

Page 7: ...ug is necessary do not connect the grounding wire to either flat blade terminal The insulation wire with an outer green surface with or without yellow stripes is the grounding wire Check with a qualified electrician or service technician if you do not understand the grounding instructions completely or if you are in doubt whether the product is properly grounded This product is for use on a nomina...

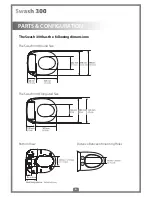
Page 8: ...6 PARTS CONFIGURATION The Swash 300 has the following dimensions The Swash 300 Round Size The Swash 300 Elongated Size BottomView Distance Between Mounting Holes 70mm 2 76inch ...

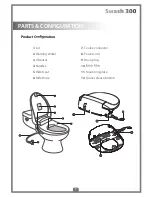
Page 9: ...7 PARTS CONFIGURATION Product C ation 1 Lid 2 Warning sticker 3 IR sensor 4 Nozzles 5 Bidet seat 6 Bidet hose 7 T valve connector 8 Power cord 9 Drain plug 10 11 Mounting plate 12 Quick release button ...

Page 10: ...t 2 2 ea Rubber ConeWasher 3 2 ea FlatWasher 4 2 ea Barrel Nut 5 Mounting Plate 6 2 ea Adjustable Bracket 7 RubberT ValveWasher 8 T Valve Connector 9 Bidet Hose 10 Remote Control Wall Mount 11 2 ea Remote Screw 12 2 ea Remote Anchor 13 3 ea AAA Batteries ...

Page 11: ...9 INSTALLATION ...

Page 12: ...10 INSTALLATION ...

Page 13: ...11 INSTALLATION ...

Page 14: ...12 OPERATION Display Controls A A ...

Page 15: ...13 OPERATION Quick Reference Guide Remote Control Controls Display A B C ...

Page 16: ...14 OPERATION Quick Reference Guide Remote Control continued ...

Page 17: ...15 OPERATION ...

Page 18: ...16 OPERATION 1 cleansing is operating the cleansing function will stop ...

Page 19: ...alternates between ON and OFF a If the bell rings once Silent Mode in ON b If the bell rings twice Silent Mode is OFF The seat will now make a ding sound each time a button is pressed on the remote or side of seat 3 To save the setting press the Power button on the side of the product If no button is pressed for 10 seconds the setting will automatically be saved Selecting CancellingSeatSensorLockM...

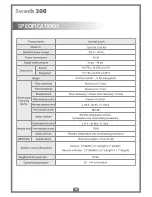
Page 20: ...18 SPECIFICATIONS 800W ...

Page 21: ...19 MAINTENANCE ...

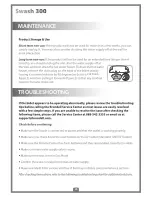
Page 22: ...20 MAINTENANCE TROUBLESHOOTING vertical 1 2 ...

Page 23: ... wash button during cycle to extend the time see operation section for more information about wash functions 2 Check and reset GFI outlet Nozzles do not function properly 1 Body sensor does not detect that you are sitting on Swash Bidet wash feature does not work or fails to spray 1 Adjust sitting position to fully cover the body sensor Overide the body sensor refer to special mode operation secti...

Page 24: ...22 TROUBLESHOOTING 1b Residual water may drip into the bowl for several seconds after a wash cycle or self clean cycle and is not a malfunction ...

Page 25: ...ded only to the ORIGINAL PURCHASER 2 BRONDELL s obligations under this warranty are limited to repairs or replacement at BRONDELL s option of products or parts found to be defective provided that such products were properly installed and used in accordance with instructions BRONDELL reserves the right to make such inspections as may be necessary in order to determine the cause of the defect BRONDE...

Page 26: ...24 ...

Page 27: ...N WARRANTY Brondell Inc PO Box 470085 San Francisco CA 94147 0085 Phone 1 888 542 3355 Email support brondell com Web www brondell com For detailed warranty information and product registration please go on line at www brondell com Please retain receipt records for any warranty claims ...

Page 28: ...1218189 002 ...
Reviews: