10.2
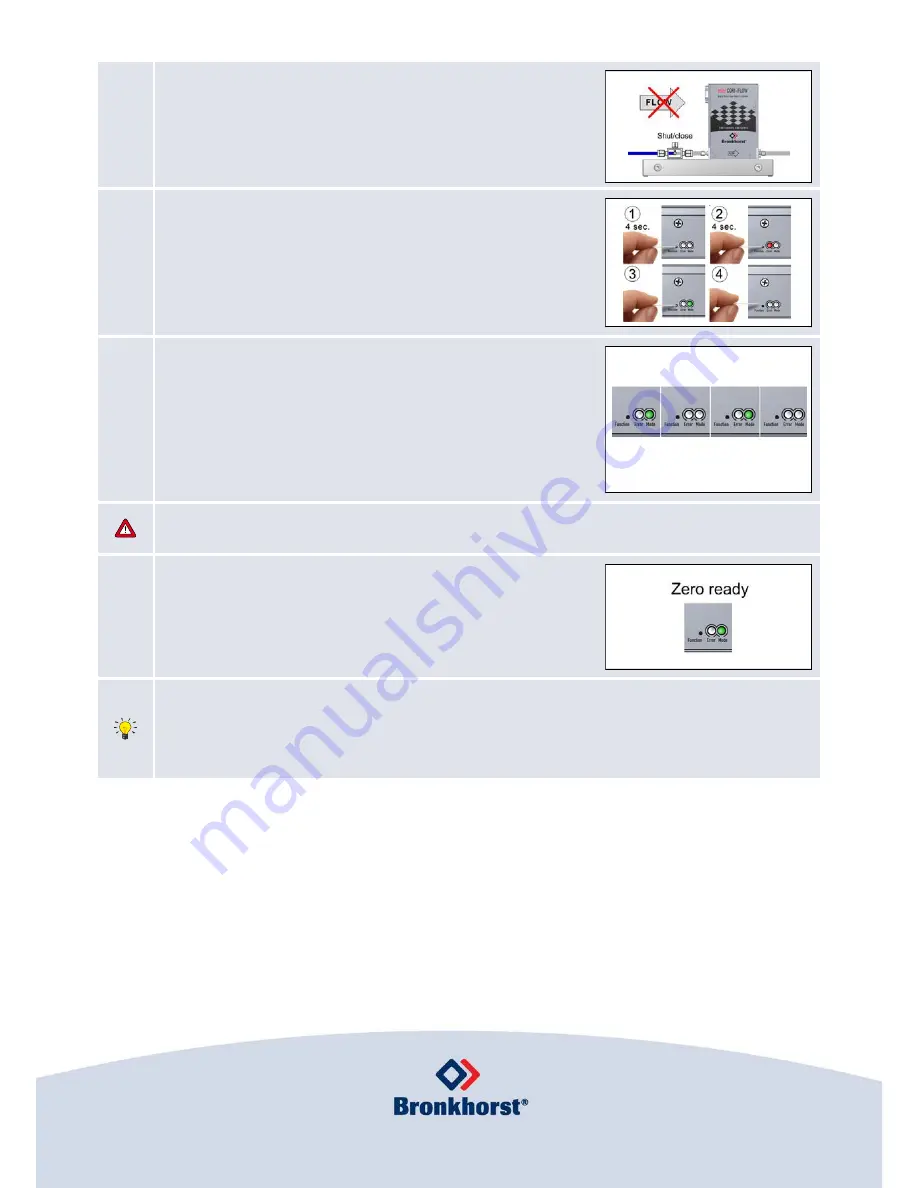
Stop flow
Make sure there is no flow through the
mini CORI-FLOW™ ML120
by
closing a shut-off valve in front of the instrument. At least one (shut-off) valve
in front of the
mini CORI-FLOW™ ML120
is required. High quality shut-off
valves are recommended for proper zero point calibration.
10.3
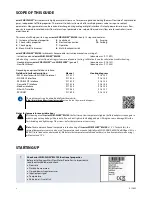
Start Auto-Zero
Press micro switch and hold it. After a short time the
•
red LED will go ON
and OFF, then the
•
green LED will go ON. At that moment (which is 8...12
seconds after pressing) release the switch.
10.4
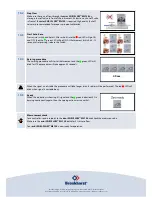
Zeroing procedure
The zeroing procedure will start at that moment and the
•
green LED will
blink fast. The procedure will take approx. 45 seconds.
45 sec.
When the signal is not stable the procedure will take longer (max. 6 retries will be performed). The red
•
LED will
blink when signal is unstable/noisy.
10.5
Ready
When the indication is showing 0% signal and the
•
green indication LED is
burning continuously again, then the zeroing action was successful.
Measurement check
For a controller: send a setpoint to the
mini CORI-FLOW™ ML120
and check the measured value.
Make sure the
mini CORI-FLOW™ ML120
indicates 0% at zero flow.
Your
mini CORI-FLOW™ ML120
is now ready for operation.
Bronkhorst High-Tech B.V., Nijverheidsstraat 1a, NL-7261AK Ruurlo The Netherlands
T
+31(0)573 45 88 00
F
+31(0)573 45 88 08
I
www.bronkhorst.com
E
info@bronkhorst.com


