Installation
Polycold Cryochiller
Inspect and Unpack the Polycold Cryochiller
Installation and Operation Manual
Brooks Automation
4-6
214072 Revision B
5.
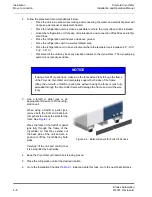
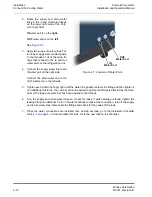
Remove the front and rear bottom
panels from the Cryochiller.
6.
Locate and remove the bolts that
hold the cryochiller to the palette.
7.
Save the bolts, palette, shipping
materials, and the shipping con-
tainers that are in re-usable condi-
tion to ship the Polycold
Cryochiller to another location, as
required.
8.
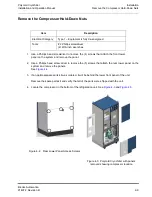
If a spare parts kit was shipped
with the unit, remove the front
panel of the refrigeration unit to
retrieve the spare parts kit and the
manual. Verify that all of the parts
were shipped with the unit.
9.
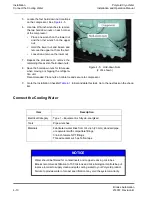
Record the balance pressure by performing the following steps:
a.
Locate the pressure gauge on the rear of the refrigeration unit. When the compressor is
turned off and at room temperature, the pressure gauge reading is the balance pressure.
b.
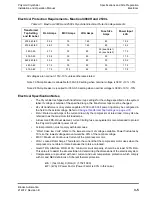
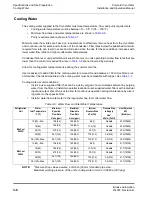
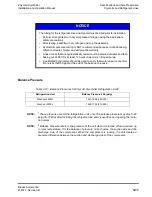
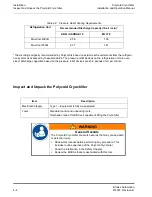
Read the balance pressure on the pressure gauge. The pressure should be within the
ranges shown on the Balance Pressure Table,
.
c.
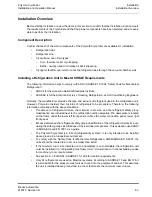
Record the balance pressure in the space in Task 1 on
.
d.
If the equipment has recently been moved from an area where the temperature differs
greatly from the installation area, allow the components 24 hours to stabilize to the new
room temperature before reading the balance pressure and verifying correct charge pres-
sure.
e.
If the pressure is not within the listed range, contact the nearest Brooks Automation Poly-
cold Service Center.
NOTE:
If the system is exposed to extreme cold during shipping, the balance pressure is reduced
due to the increased condensation of the refrigerant mixture. Refrigerant may take up to 48
hours at room temperature to achieve normal balance pressure and for the pressure gauge
to display the proper reading.
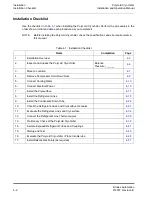
10. Go to the Installation Checklist
.
Initial and date this task. Go to the next task on the check-
list.
Figure 4-1: Bottom Panels


