Installation
Polycold Cryochiller
Install the Cryosurface
Installation and Operation Manual
Brooks Automation
4-18
214072 Revision B
3.
Inspect and clean the O-ring groove and O-ring in the inner flange of the feed-through.
4.
Insert the O-ring into the groove in the inner flange.
5.
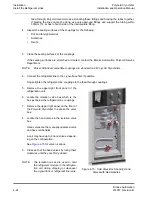
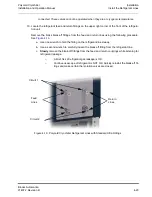
From the inside of the vacuum chamber, insert the feed-through into the feed-through port.
6.
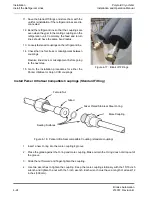
Tighten the feed-through nut finger-tight and position the cryosurface. If the cryosurface has fasten-
ers, secure them at this time. See
.
7.
Verify that no moving parts will hit the cryosurface. Make sure the cryosurface does not touch the
vacuum chamber wall or anything in the vacuum chamber. The cryosurface must be at least 16mm
(5/8-inch) from the vacuum chamber wall to prevent ice bridging. Greater distances are better.
8.
Hold the feed-through in place and tighten the nut with the spanner wrench included with the cryo-
surface assembly. Make certain the nut is tight. If the nut is loose, the O-ring will tend to lift from the
vacuum chamber wall when under vacuum.
9.
Install a heat radiation shield if the cryocoil is in direct view of a source of heat greater than 50°C.
Position the shield between the cryocoil and the heat source. The shield should be as close as pos-
sible to the heat source and as far away as possible from the cryocoil. The cryocoil traps molecules
best when it has maximum view of the vacuum chamber.
10. Check the vacuum chamber for leaks. If any leaks are found, correct them before proceeding.
11. Go to the Installation Checklist
.
Initial and date this task. Go to the next task on the check-
list.
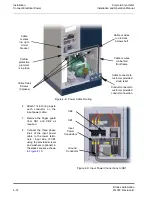
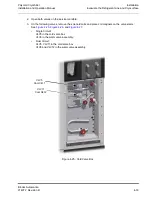
Figure 4-13: Typical Feedthrough

